I spent a bit of time today tidying parts stripped off 05 KD 28 and parts bought for the rebuild – mainly so I could make sure I had what I needed for the engine rebuild.
Only progress today was honing the cylinder bores. I haven’t finished yet but the wear ridge has gone although it doesn’t quite look flat under light.
Honing in.
They need a little more work to cross hatch completely but I needed to charge drill batteries.
The somewhat dull job of painting the chassis continues! I flattened it and put another coat on. I think it is almost there bar some edges and corners. No pictures as it is just even more yellow!
Final coats on block, sump and timing case tomorrow after finishing honing bores and maybe even the final bits of the chassis. The springs need doing too!
My new exhaust valve guide and it’s spare had arrived so I knocked that job off quickly this evening. Of course having a spare meant the first slipped in easily. Still it is done now.
Come in No 1.
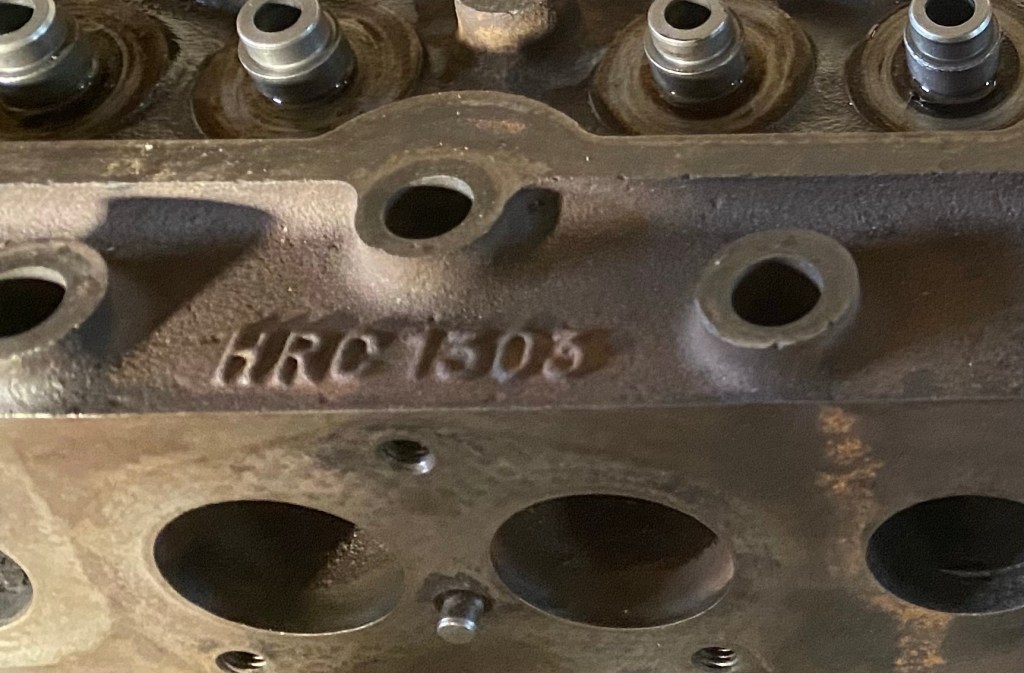
Now whilst looking at the head in detail I started to consider if it was a 7:1 or 8:1 compression ratio. There is a flat on which an 8 should be stamped if it is the latter. Now I guess the guy in charge of stamping mine was having a bad day.
Definitely not a 7
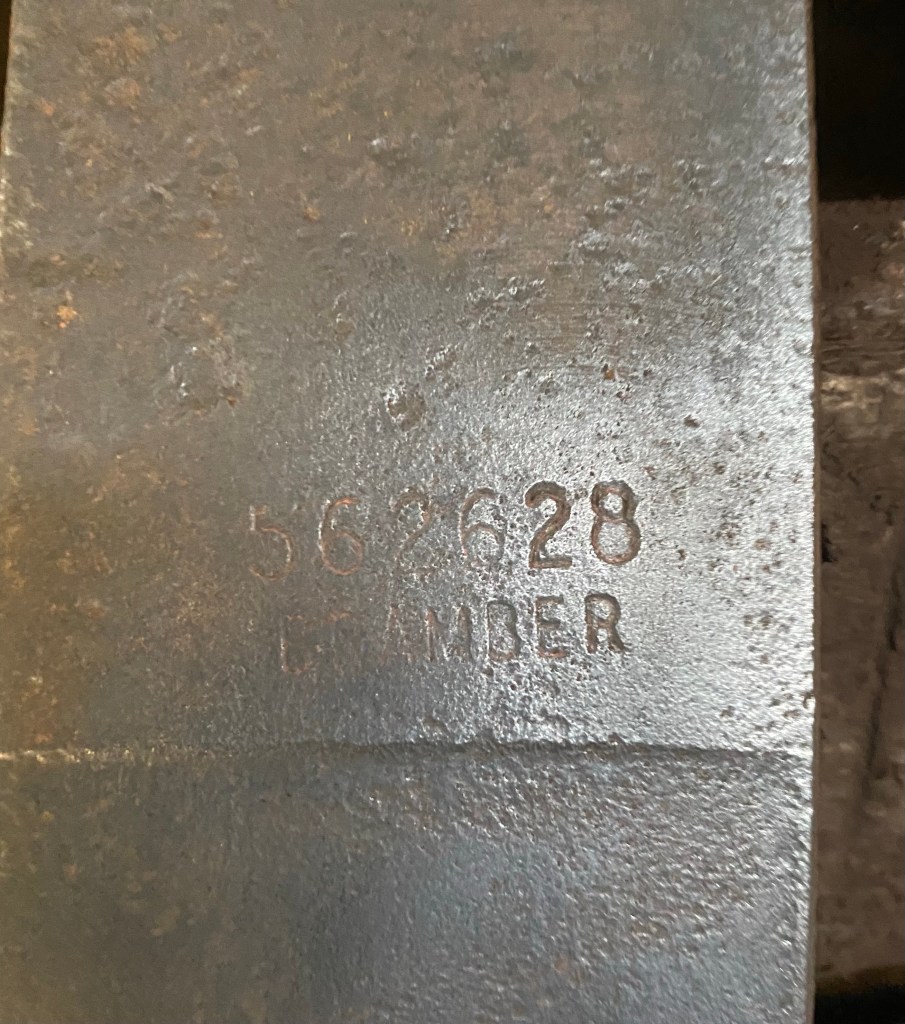
However a quick check tells me that all castings HRC1303 are 8:1.
A little clearer.
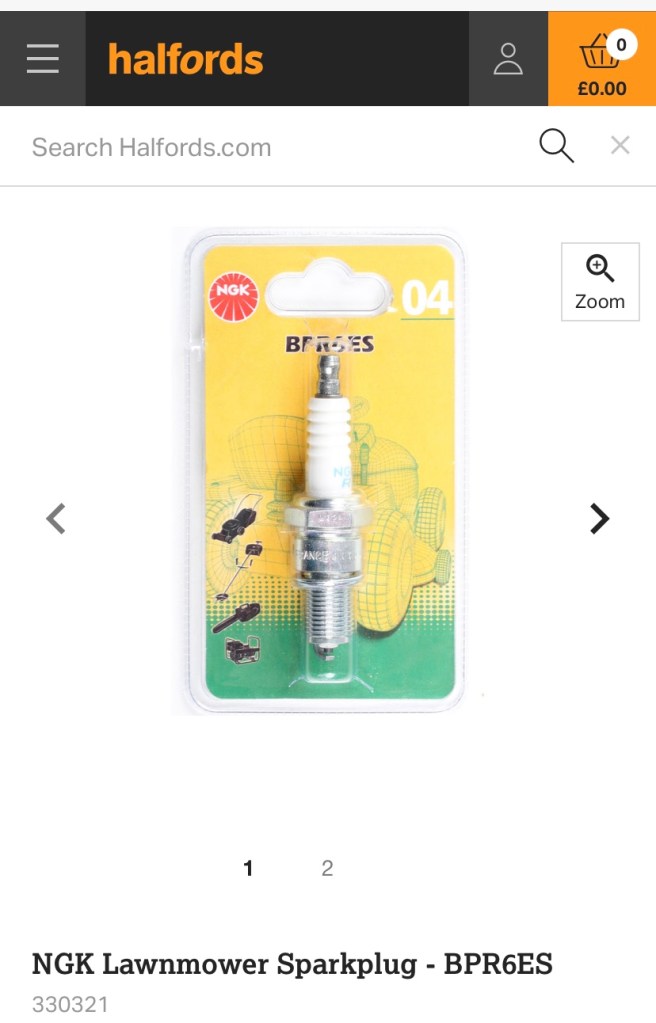
Now whilst pondering this I had a spark of inspiration – check the plugs! Now I have looked at this before and understand the following to be the plugs needed:
7:1 Champion N5C
8:1 Champion RN12YC
7:1 NGK B6ES
8:1 NGK BPR5EIX
Now this is based on what manufacturers’ websites say and check on forum. Of course this is somewhat metered by the fact that these engines will run (maybe not well) on anything.
I checked mine. BPR6ES. So basically the same as that for a 7:1 save for a projecting insulator. Halfords (Half ords as I was taught to say) list this plug thus:
It would be 4 lawnmower power!
I am now somewhat confused. After descending this particular rabbit hole I have concluded that RN12YC are the order of the day. Champion!
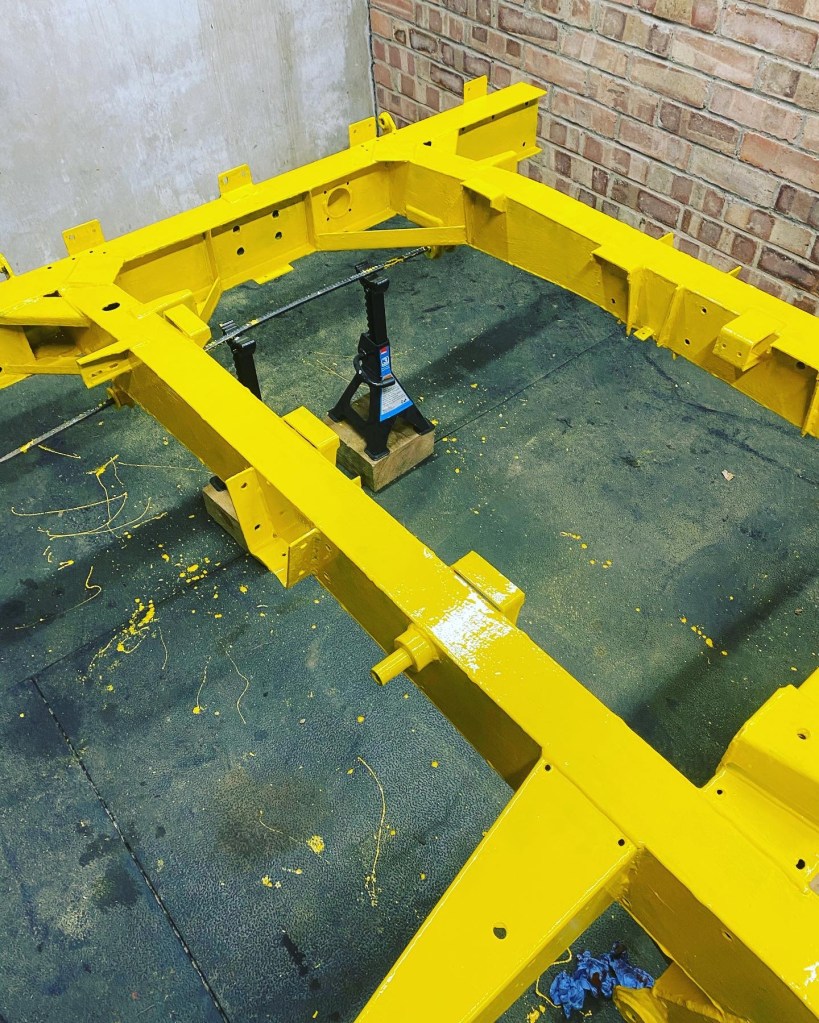
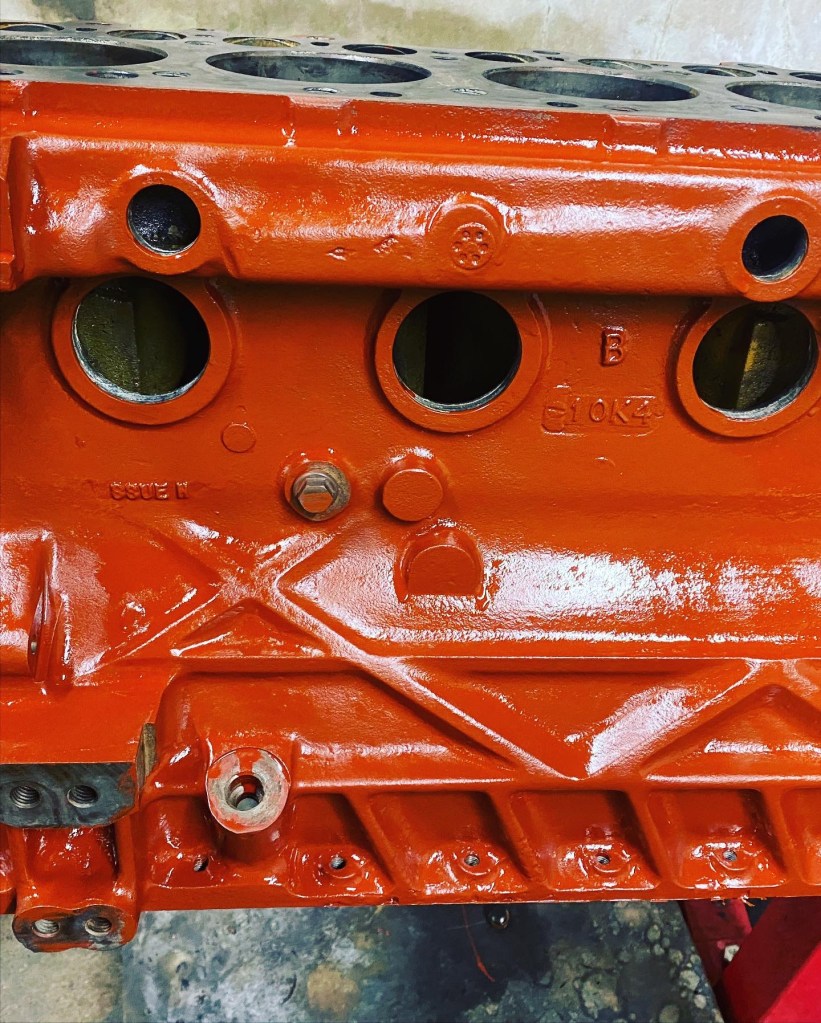
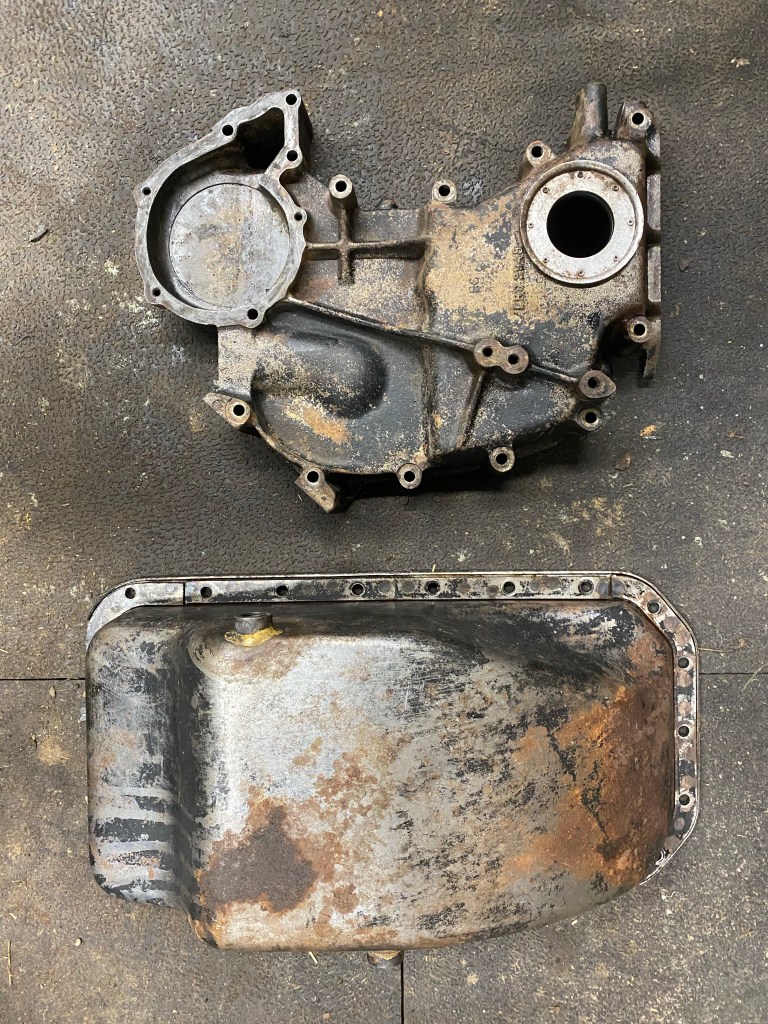
With the core plugs out I decided that the block could do with a coat of paint, and whilst at it the sump and timing case too. The main item to paint was the chassis ready to take bits as I finish them.
I had rubbed the chassis down with 120 grit and then cleaned with pre prep. Yellow is a weak colour and so it will need a few coats.
If is very yellow!
The block had already been cleaned but I gave it a further wipe down with pre prep before painting in the original red. I even painted the inside of the crankcase!
It looks brighter than it is.
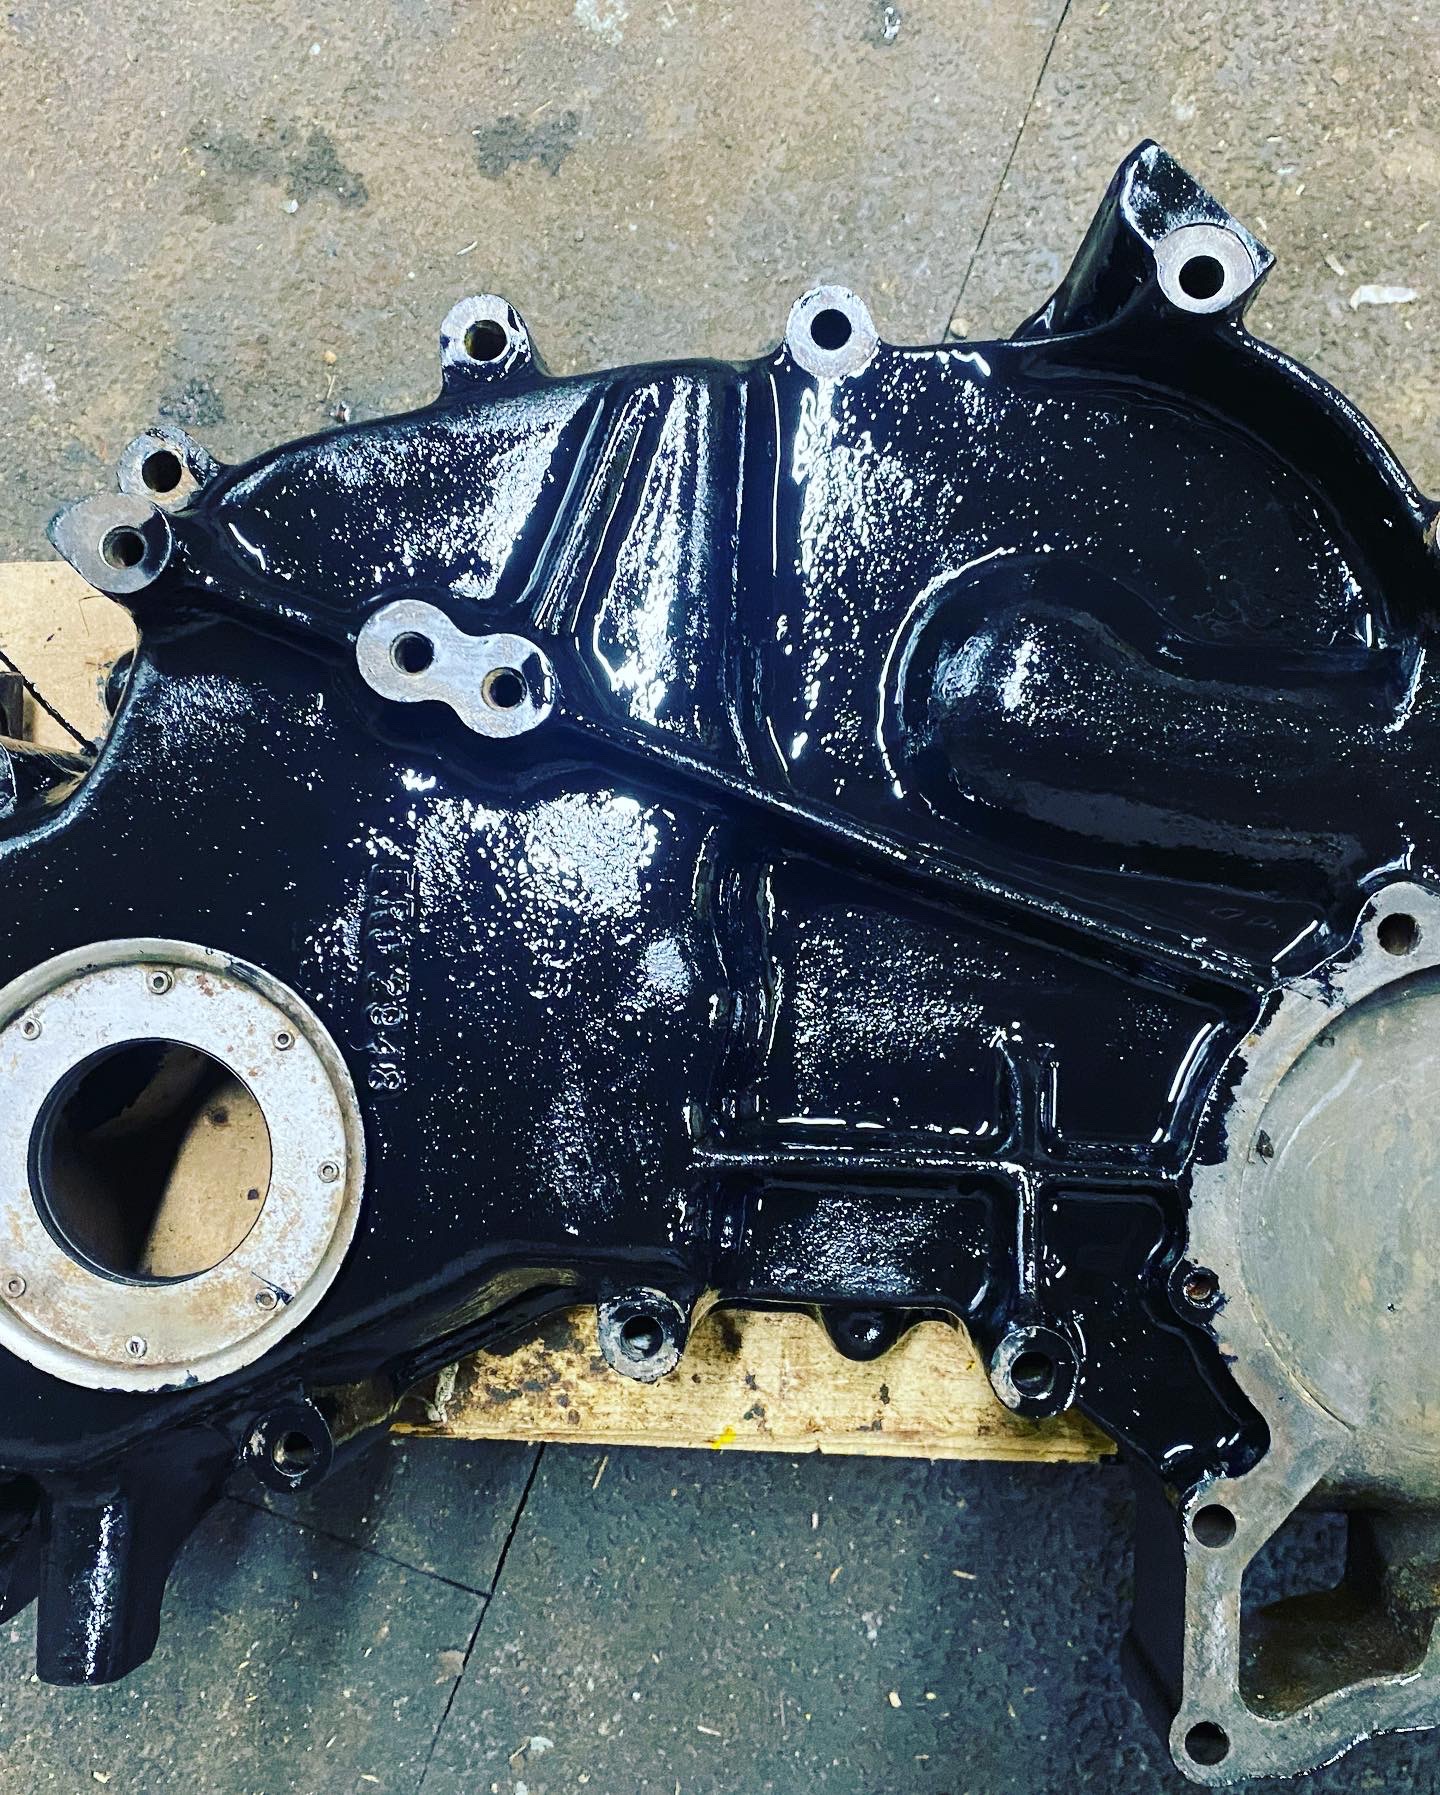
Final painting of the day was the sump and the timing case. Both had been cleaned but the sump needed a little treatment on the rust.
Black paint not oil!
I think the block will be ok with a single coat (I may change mind, but the timing case and sump should have two.
Slight delay on this post but yesterday I set about drifting out the old valve guides and drifting in there replacements. I had bought the drifts from Dingocroft for this.
It took a significant amount of effort with a dead blow hammer to remove the exhaust guides, especially No 1. The inlet guides were significantly easier. The replacements went in reasonably easily until No 1 (I had worked left to right).
Never take your eye off the guide.
A wayward blow took the end off the guide so I have had to order a new one (actually two).
Whist on the head I also knocked out the core plugs and those from the block. The new ones seem deeper and I realised I took the cam end cover out too so will need another plug to well plug that.
I used a small cold chisel and mole grips to remove them and it worked perfectly well. Only one needed long nose pliers to recover it from the gallery behind.
There was little time to do much today, but what I did do took longer than it should.
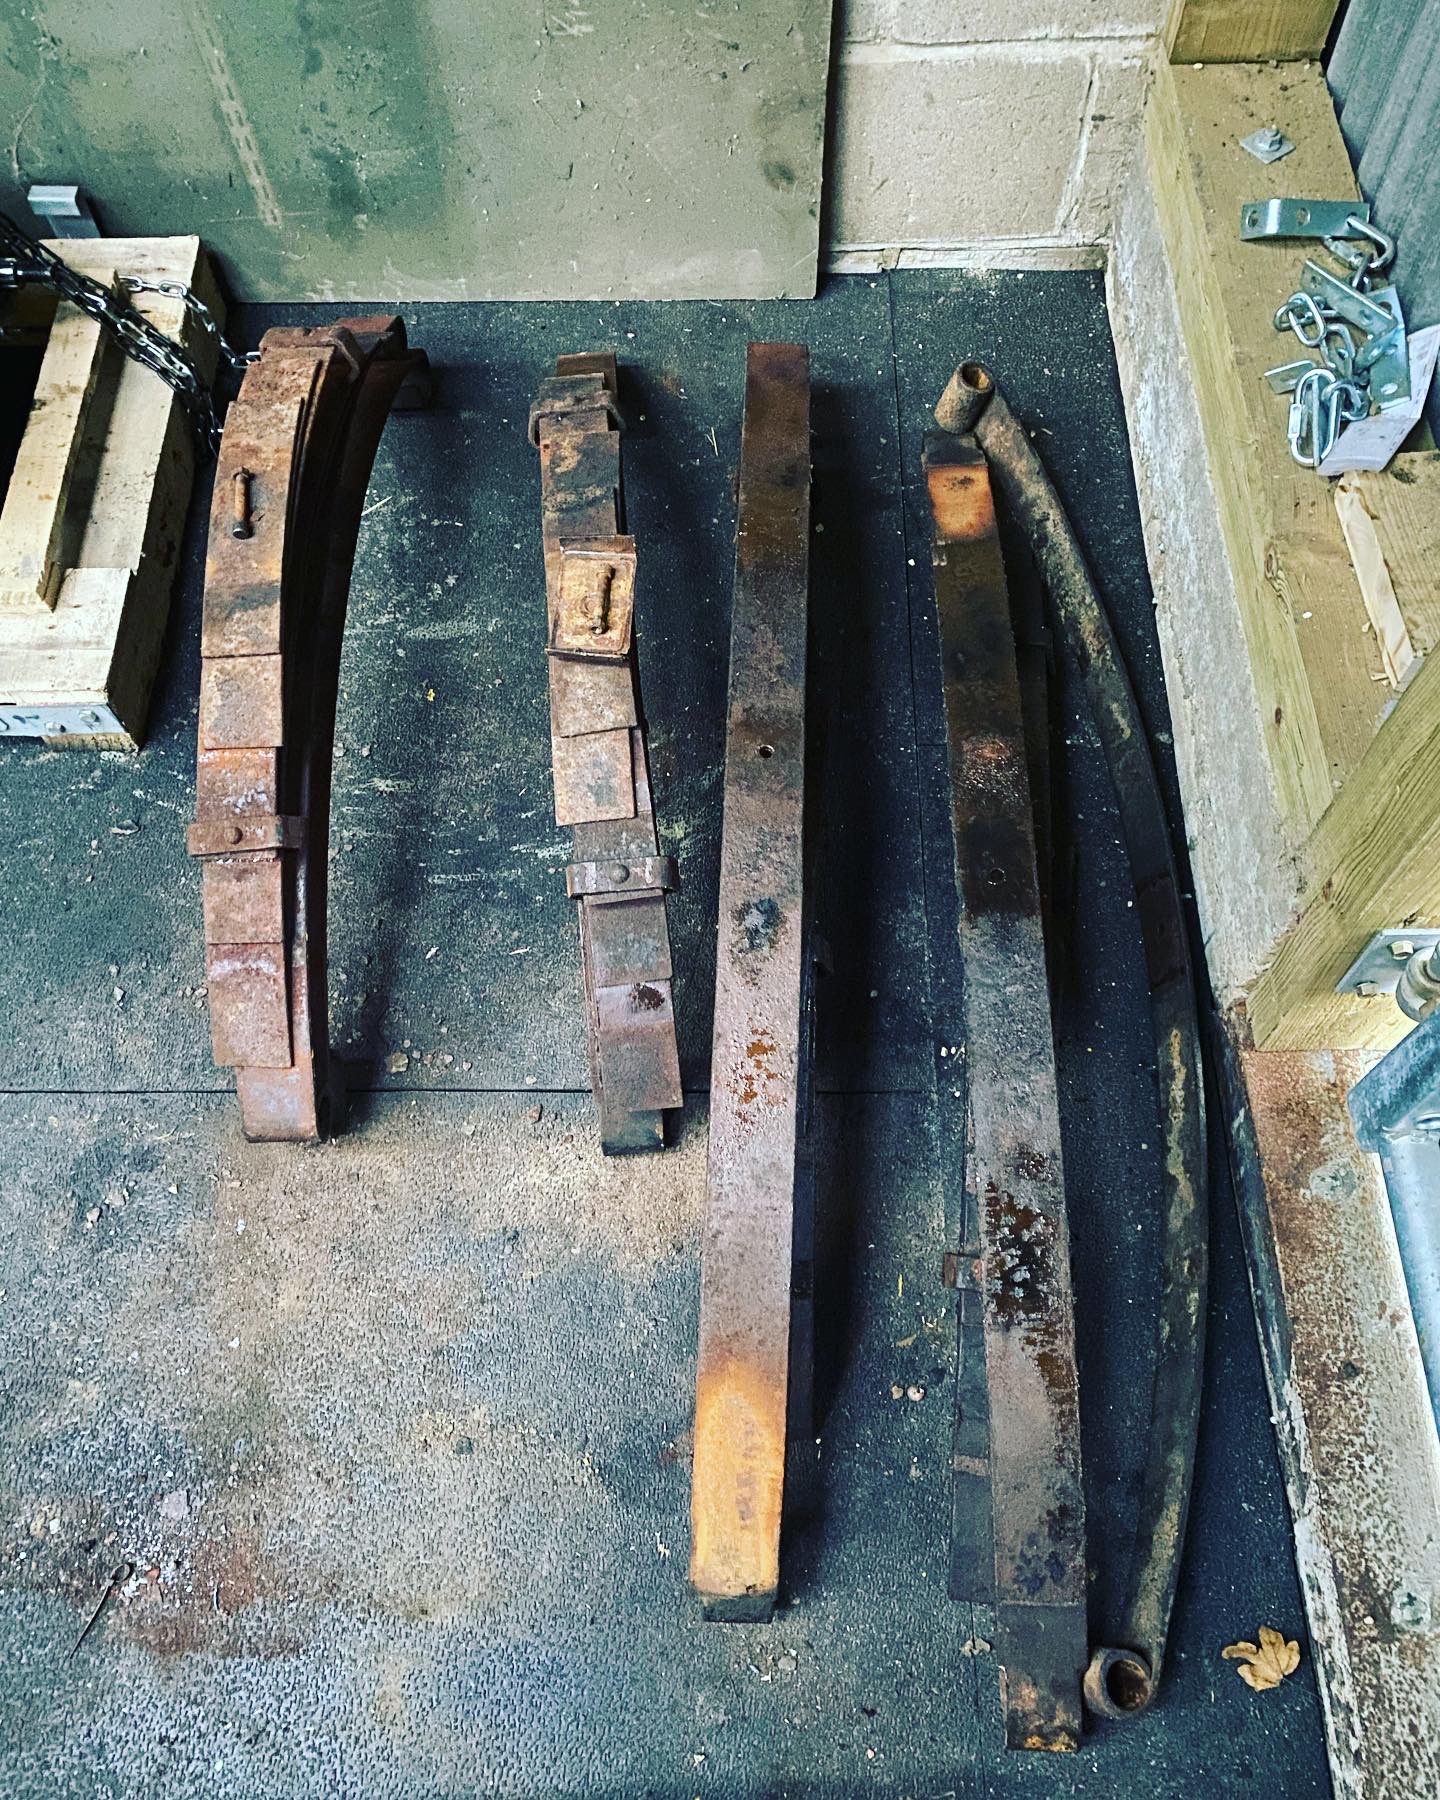
I had planned to reassemble the springs complete with new dowels. The first hurdle was reached when I found I had four RTC1921 rather than two of these and two RTC1920. The second challenge was that these dowels were too long in the shank, so the nut bottomed out too soon. I thought I could thread them further but typically I didn’t have the correct pitch die. I therefore cleaned up the old dowels and installed these in the rear springs as I pasted them with graphite grease before bashing the clips back over.
Considerably more spring like.
I need to see grease the outside to paint, and will replace the dowels when I find the correct ones. Seven leaf dowels are a bit tricky now that I am ignoring the rabbit hole of part numbers that led to the RTC1920/1921 problem.
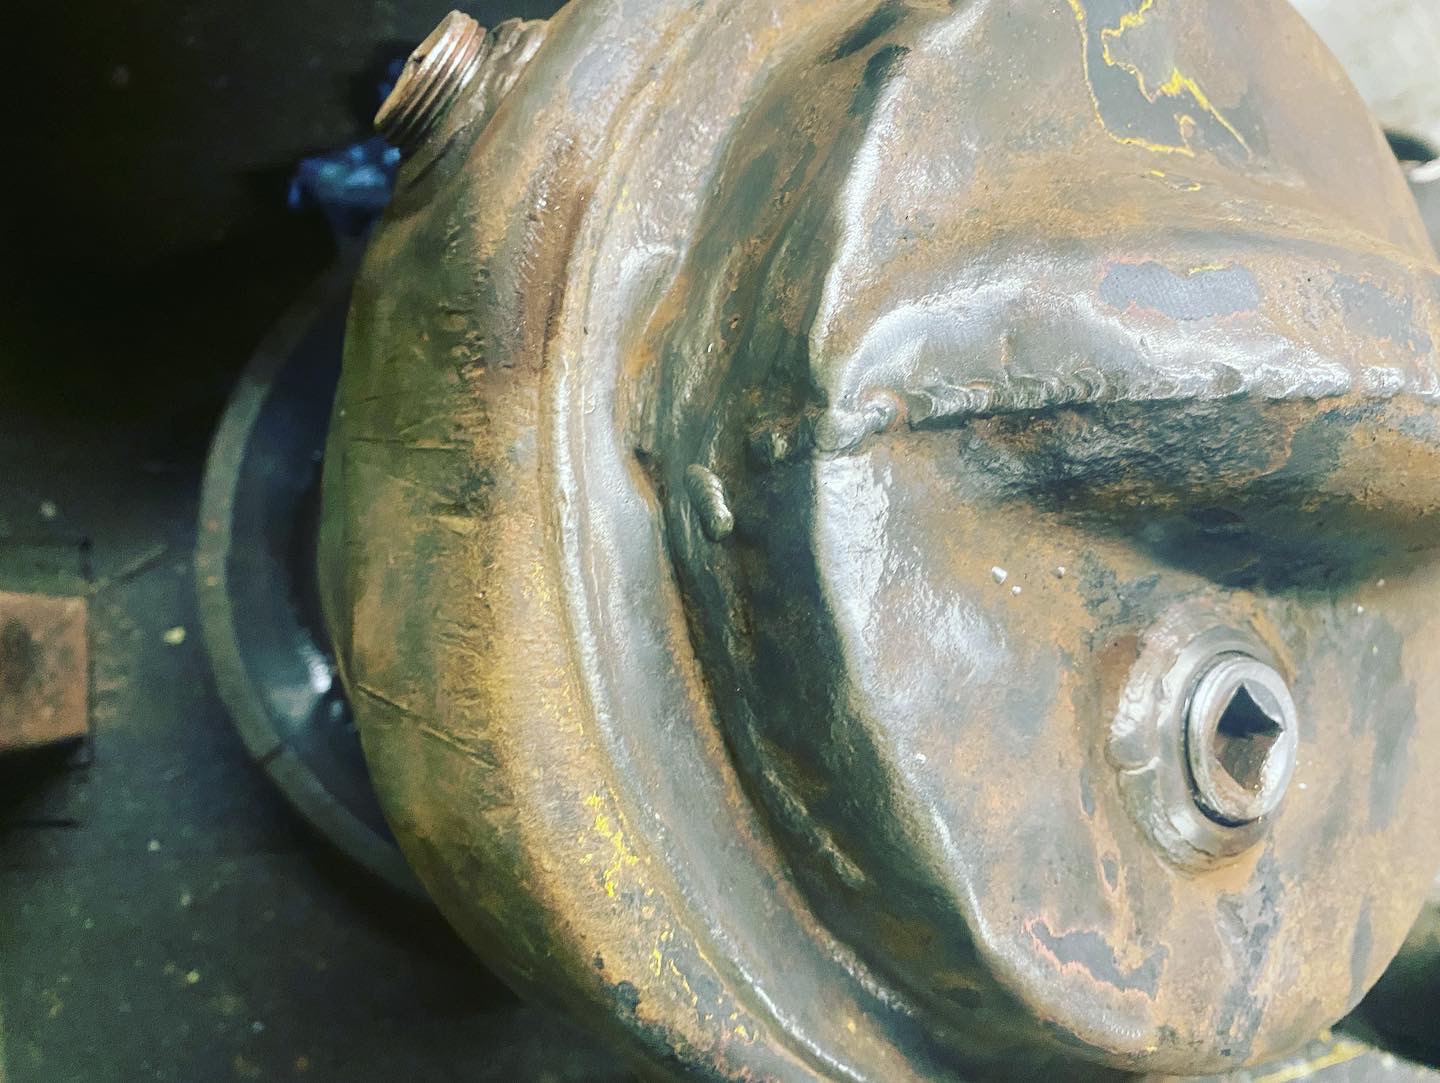
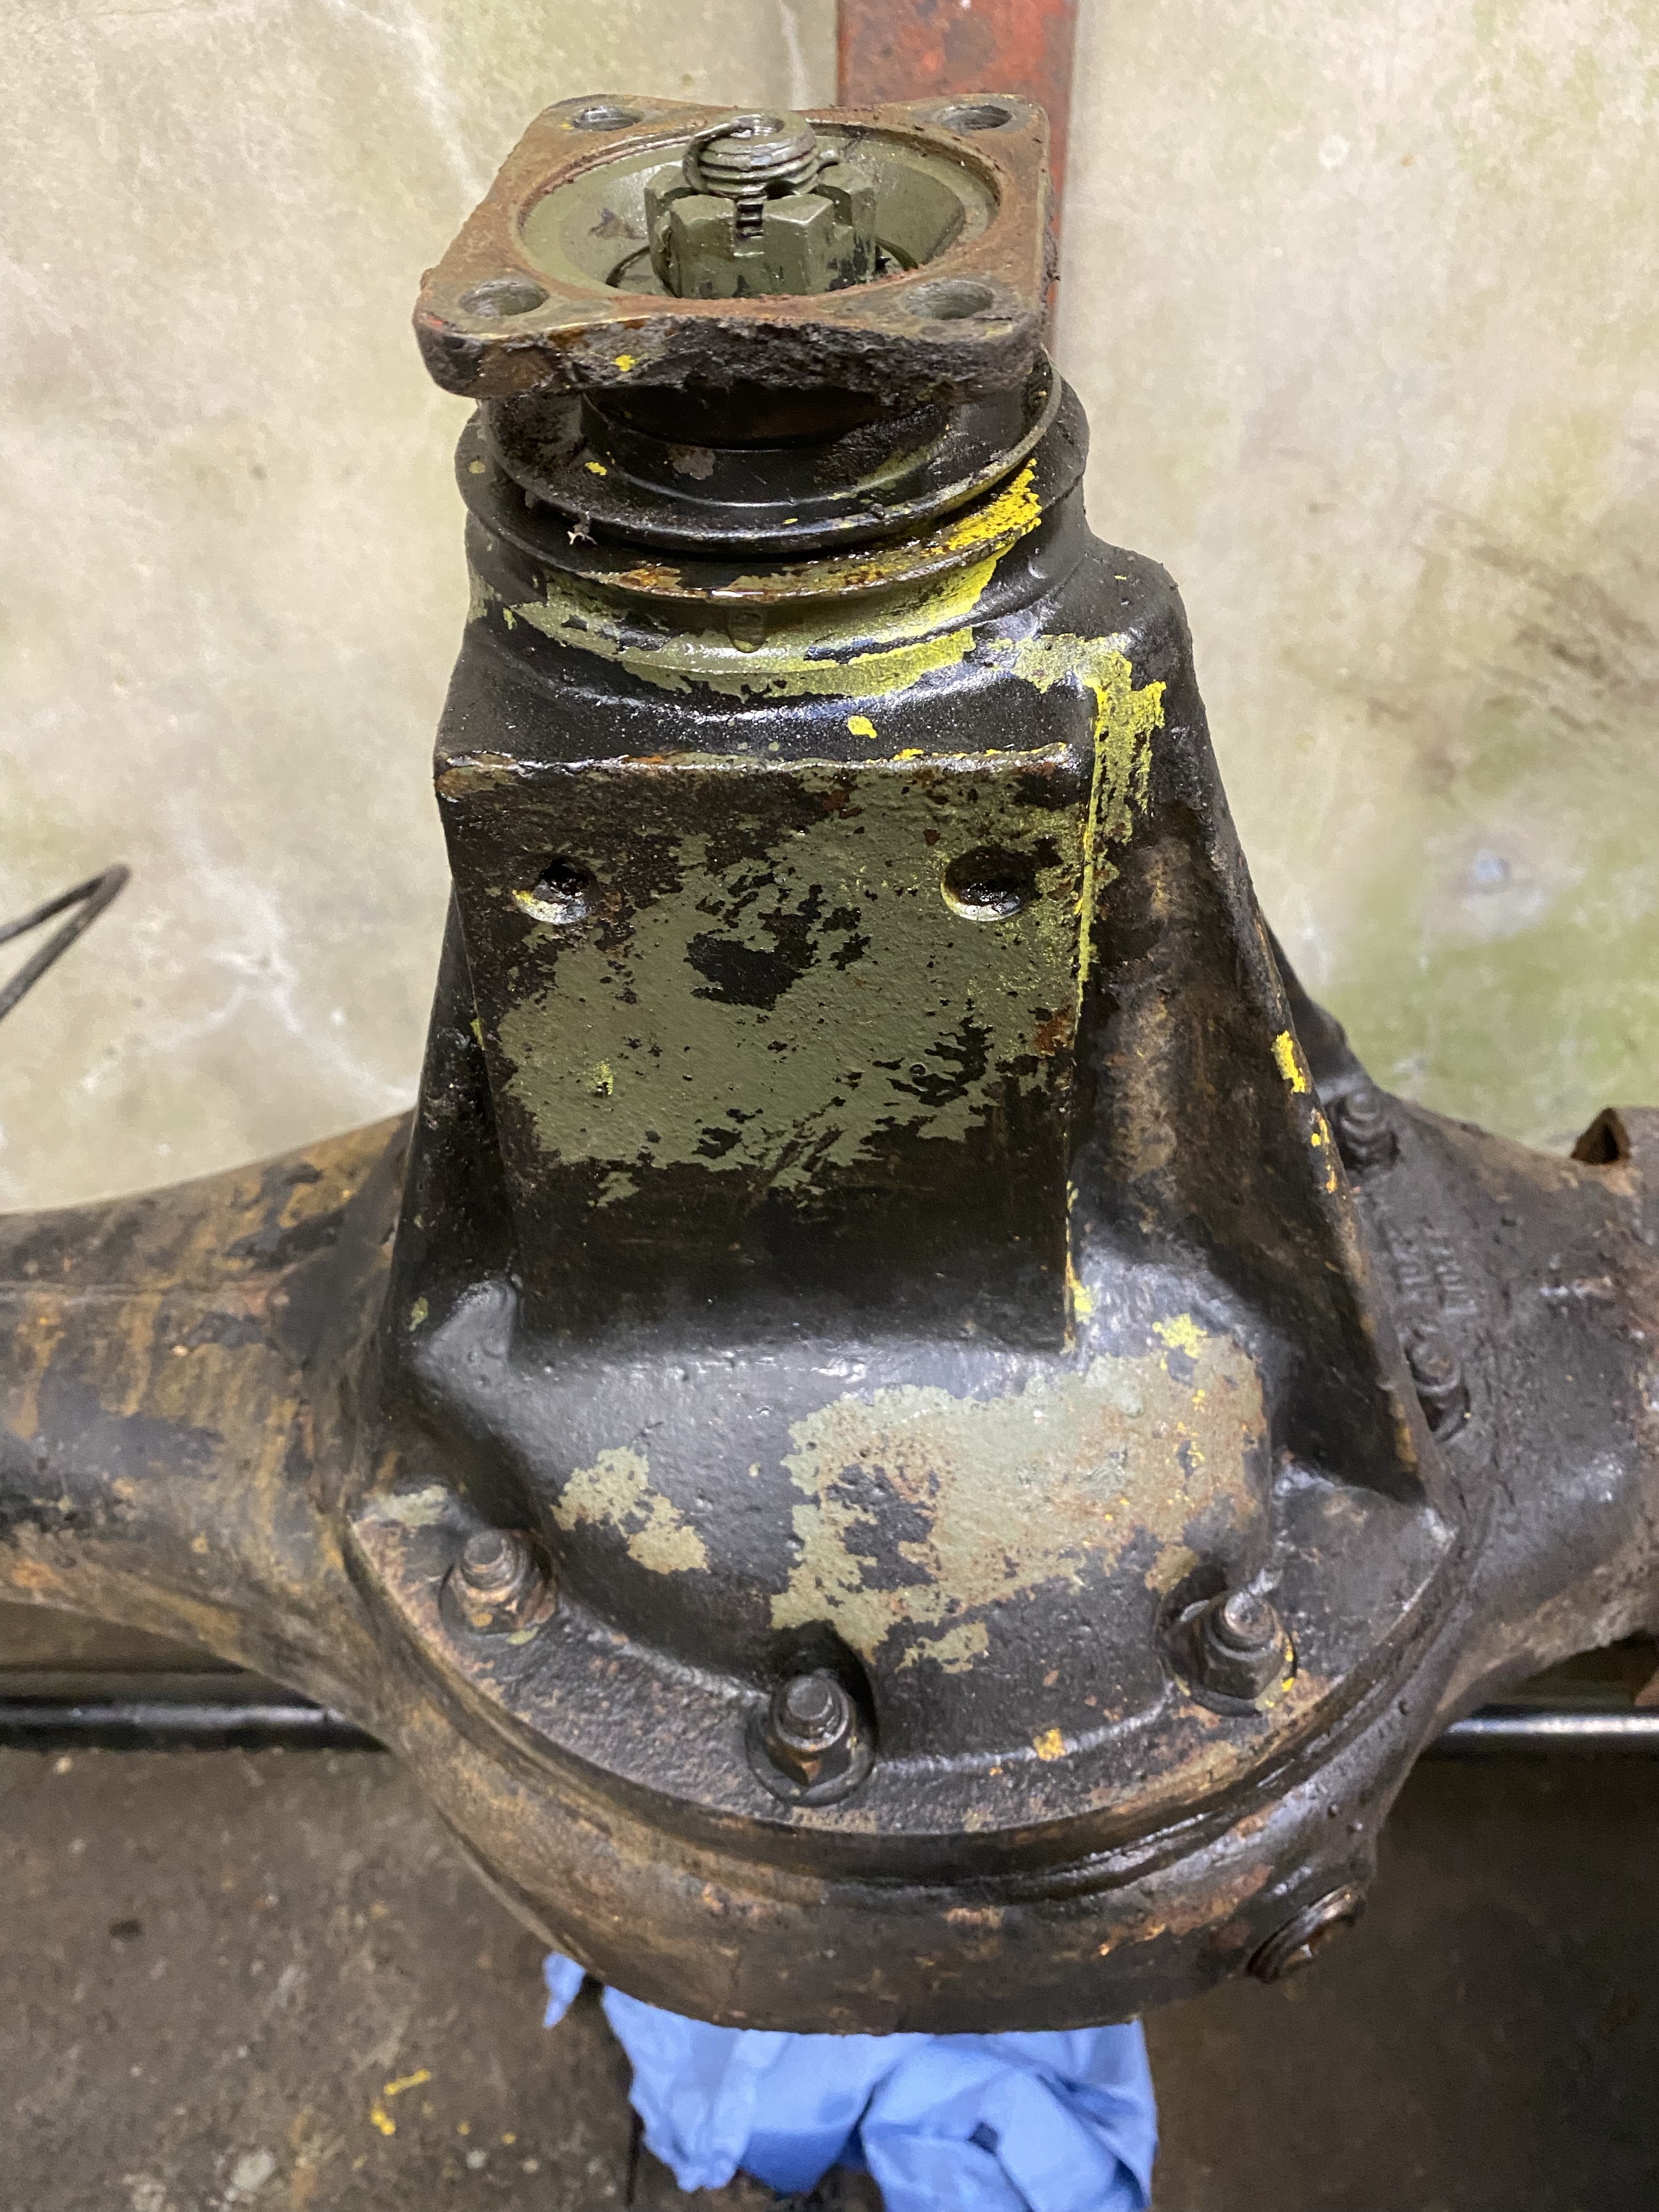
After giving up on springs for the day I attacked the sump and the front axle with a grinder mounted wire brush. No great revelations to report on this apart from the fact that someone seems to have buried the front diff into something immovable.
Welding in all the wrong places.
It must have been sometime early in the life of 05 KD 28 as there is yellow paint over the top of the welding. I think I will let this particular sleeping dog lie. A new diff pan can wait until it is leaking.
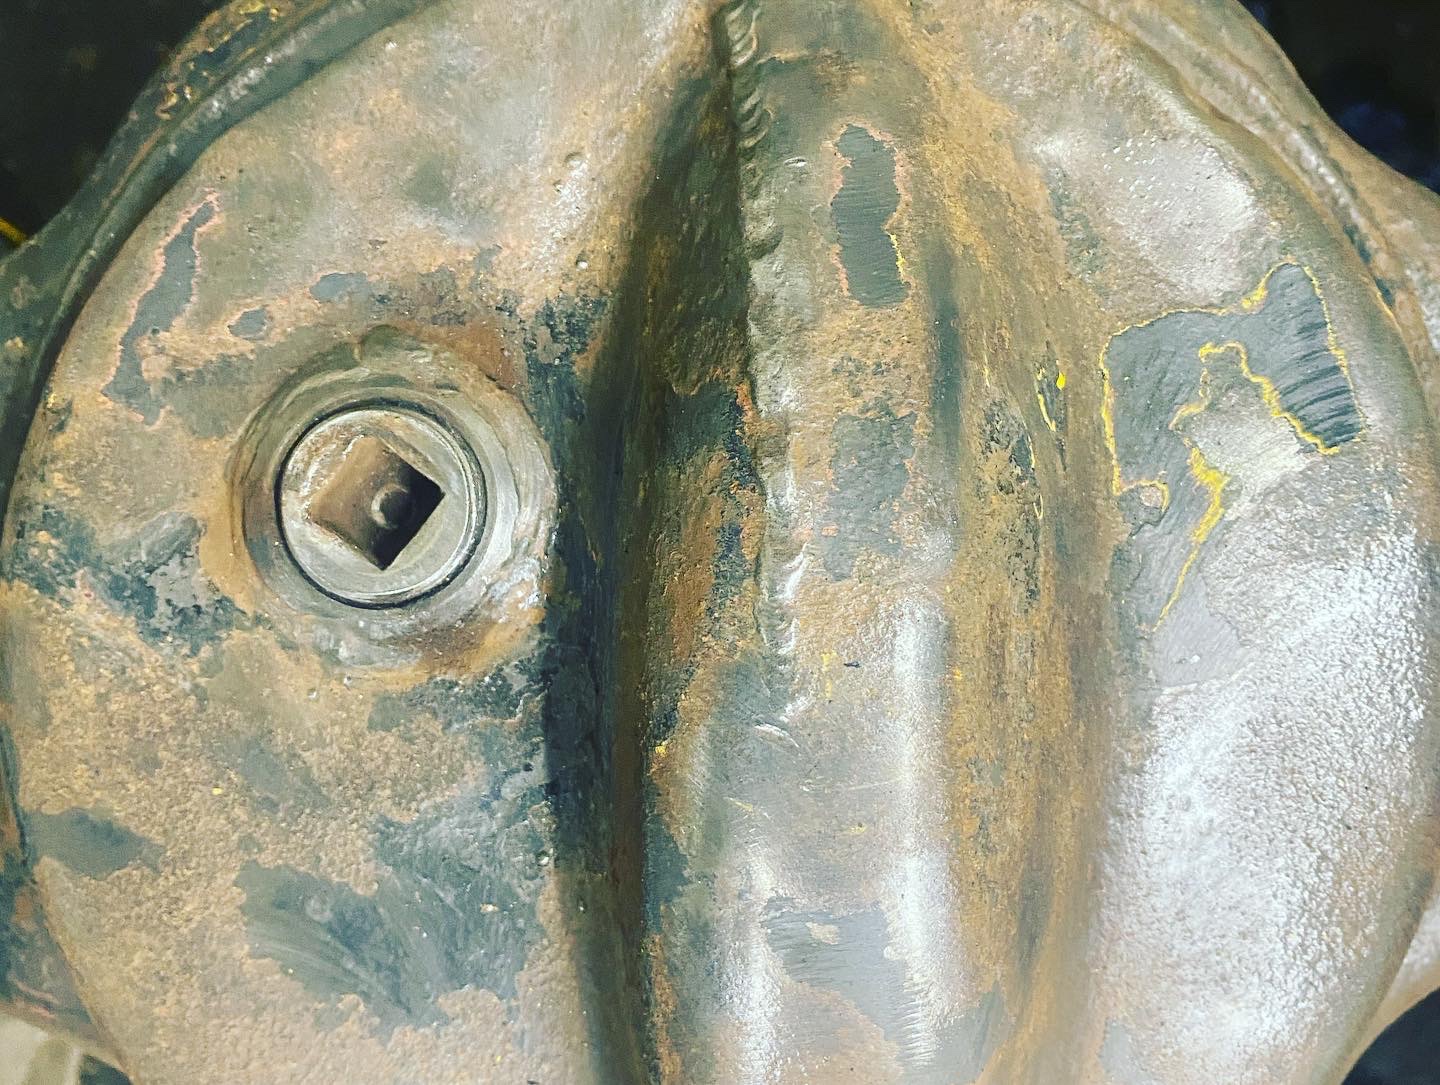
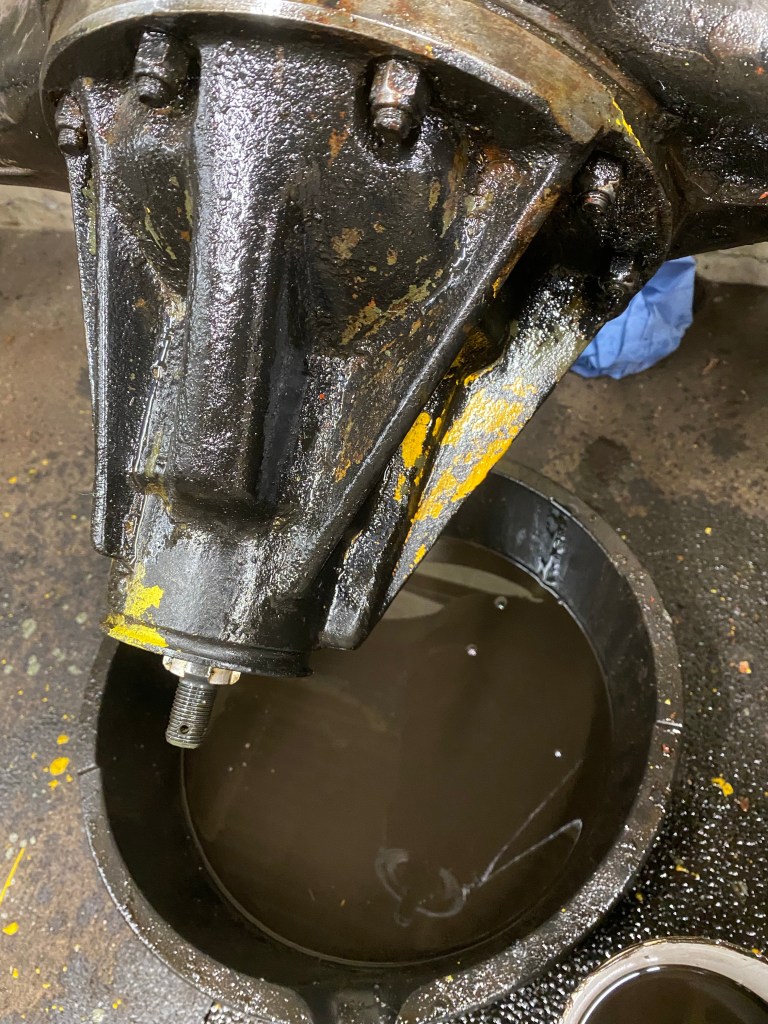
I had left the front axle with the nose of the diff down and, thinking ahead, with an oil pan beneath. I hadn’t paid this much attention until today when I noticed quite how much had leaked out.
Mucky puppy.
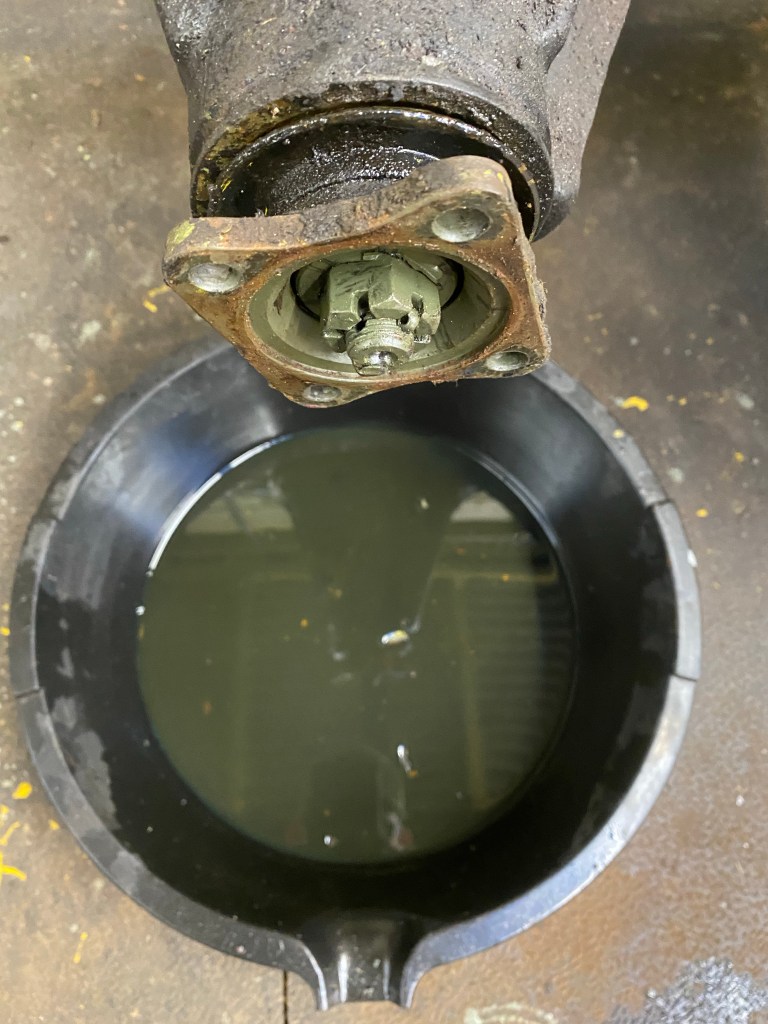
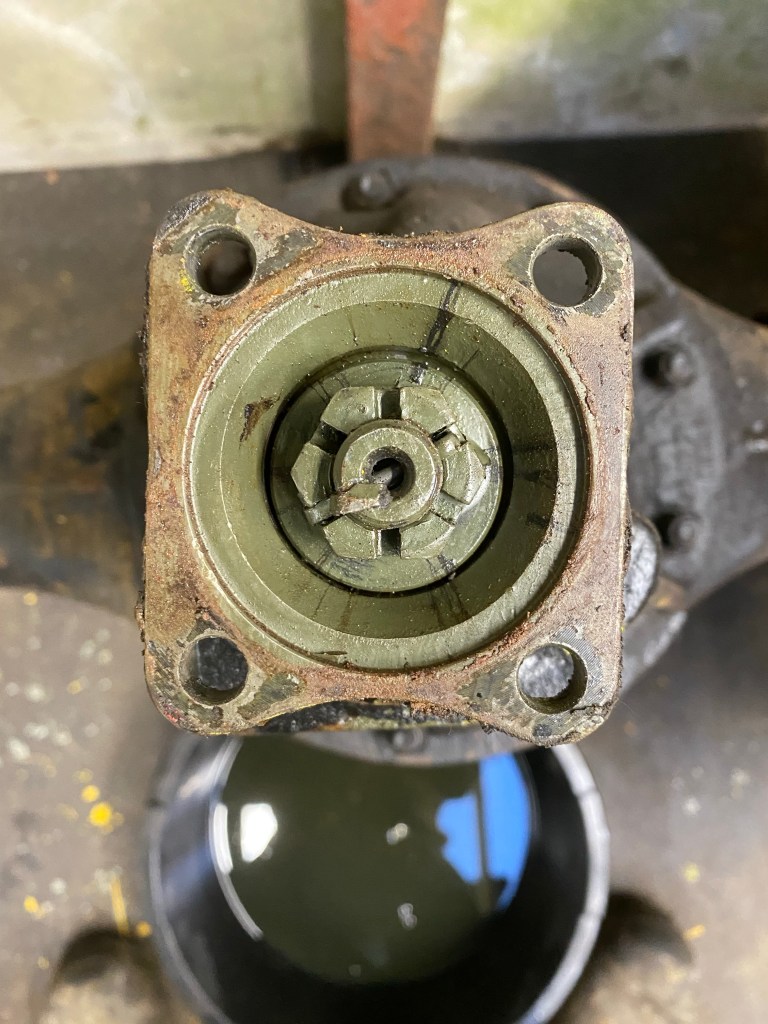
I was also quite impressed by the paint within the drive flange. If I had to guess this has not been apart since new, which may explain its incontinence.
It is greener on this side of the flange.
I removed the drive flange and tapped the mud shield free, before starting in a little bit of cleaning of the diff and axle casings.
Green, yellow and then black.
Whilst I had the degreaser out I also cleaned up the sump and timing case ready to get ready for painting. I knocked a couple of dents out of the sump whilst at it. The gasket on the sump was a pig, despite it leaking.
Less oily but still need a lot of work.
I am still yet to decide if I drill out the front seal mud shield rivets and tap the holes for bolts such that a front crank seal replacement can be down without taking the front off the engine. It makes sense to do it, but it isn’t original.
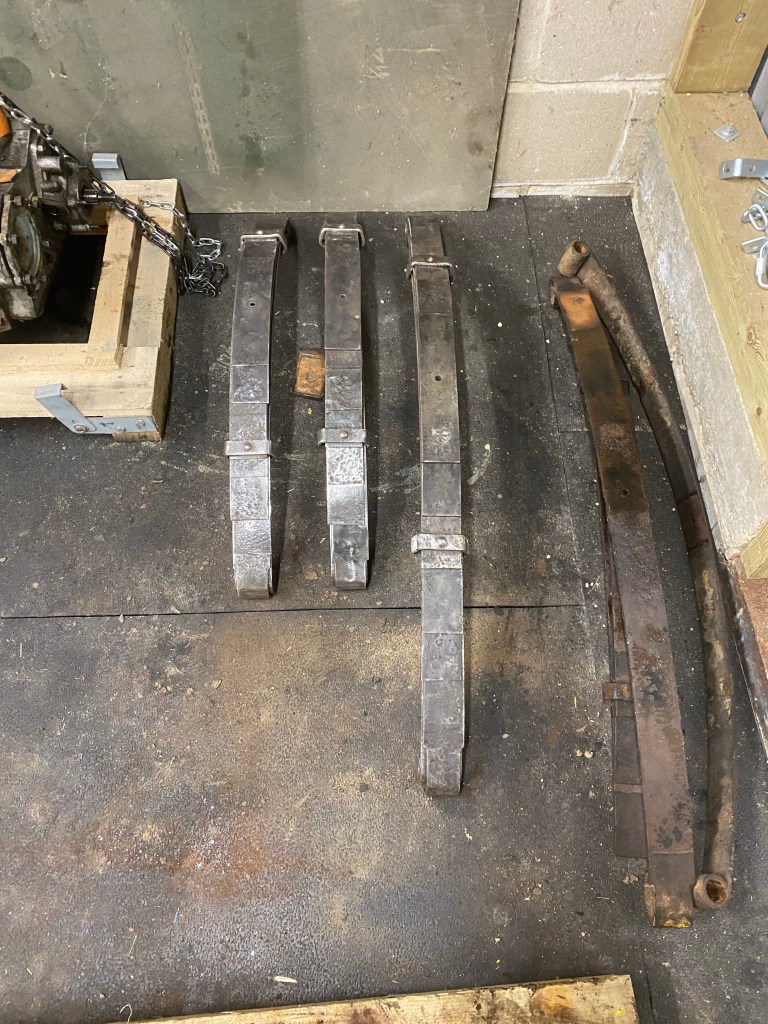
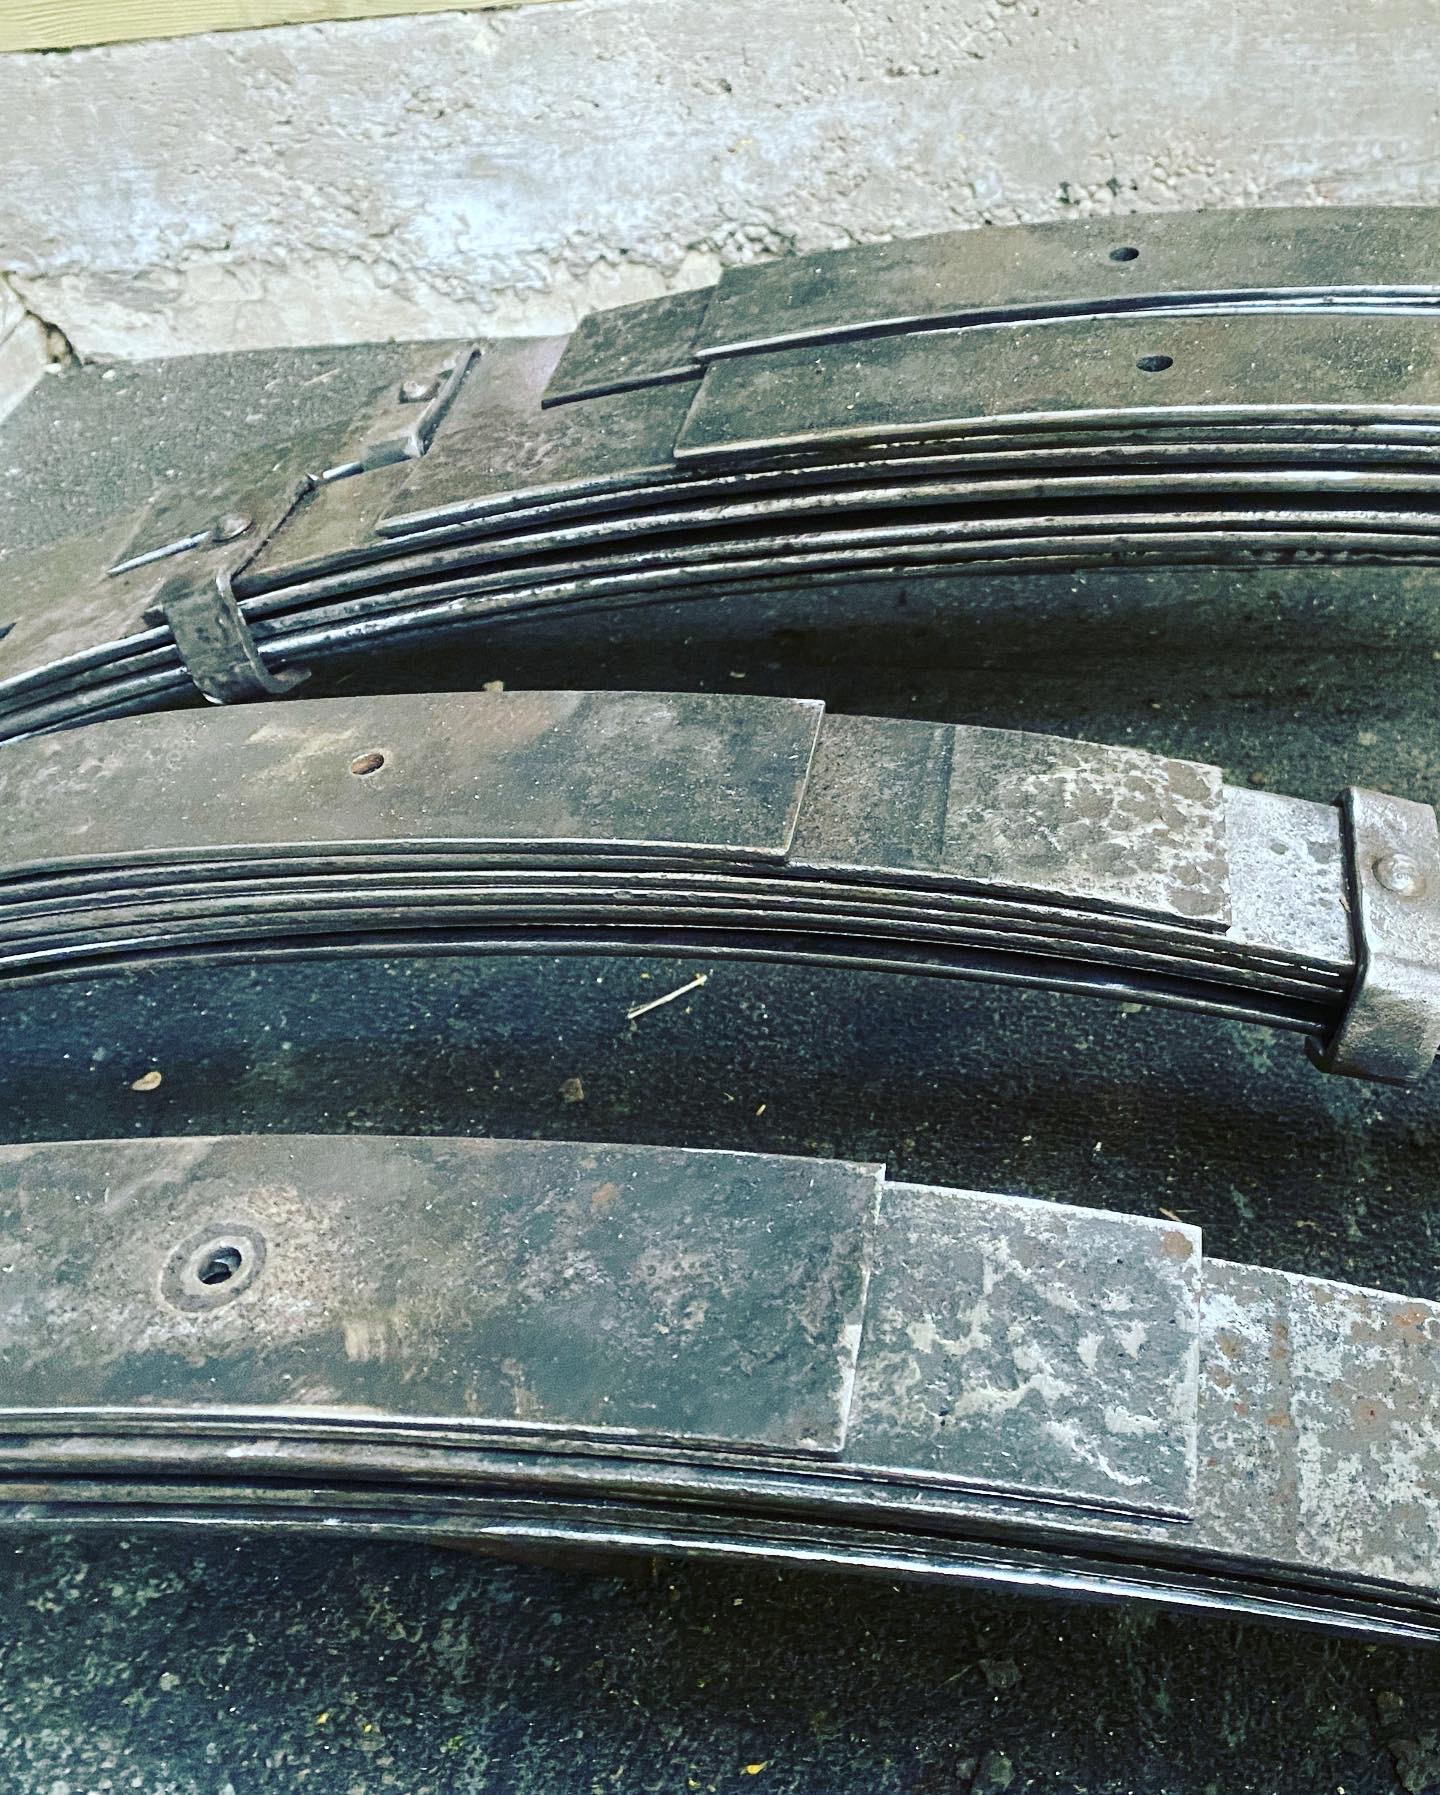
This is actually a post covering yesterday and a bit of today, during which time I tackled the leaf springs. A filthy, repetitive job that is quite rewarding when finished.
I had already taken the springs apart and the front pair were dry. I pulled out my mains powered angle grinder and set to with a knot wire cup brush, followed by a 40 grit flap disc. The bushing started to reveal some of the original features. As I went though black, yellow and black paint.
That wear ridge might need some work.
It took about two flap discs per spring to get them smooth to the touch. They are not perfect but will certainly slip better when reassembled with graphite grease.
The rear springs had been stripped and greased in 2018 for the sum of £215. They were therefore wet, sticky and generally unpleasant to deal with. I scraped the worst of and then gave a brush down with degreaser before start on the wore brushing.
The rear are quite a bit longer than the fronts and so I ran out of time to finish all four. I left three done and one to knock off quickly the next day.
Last but not least.
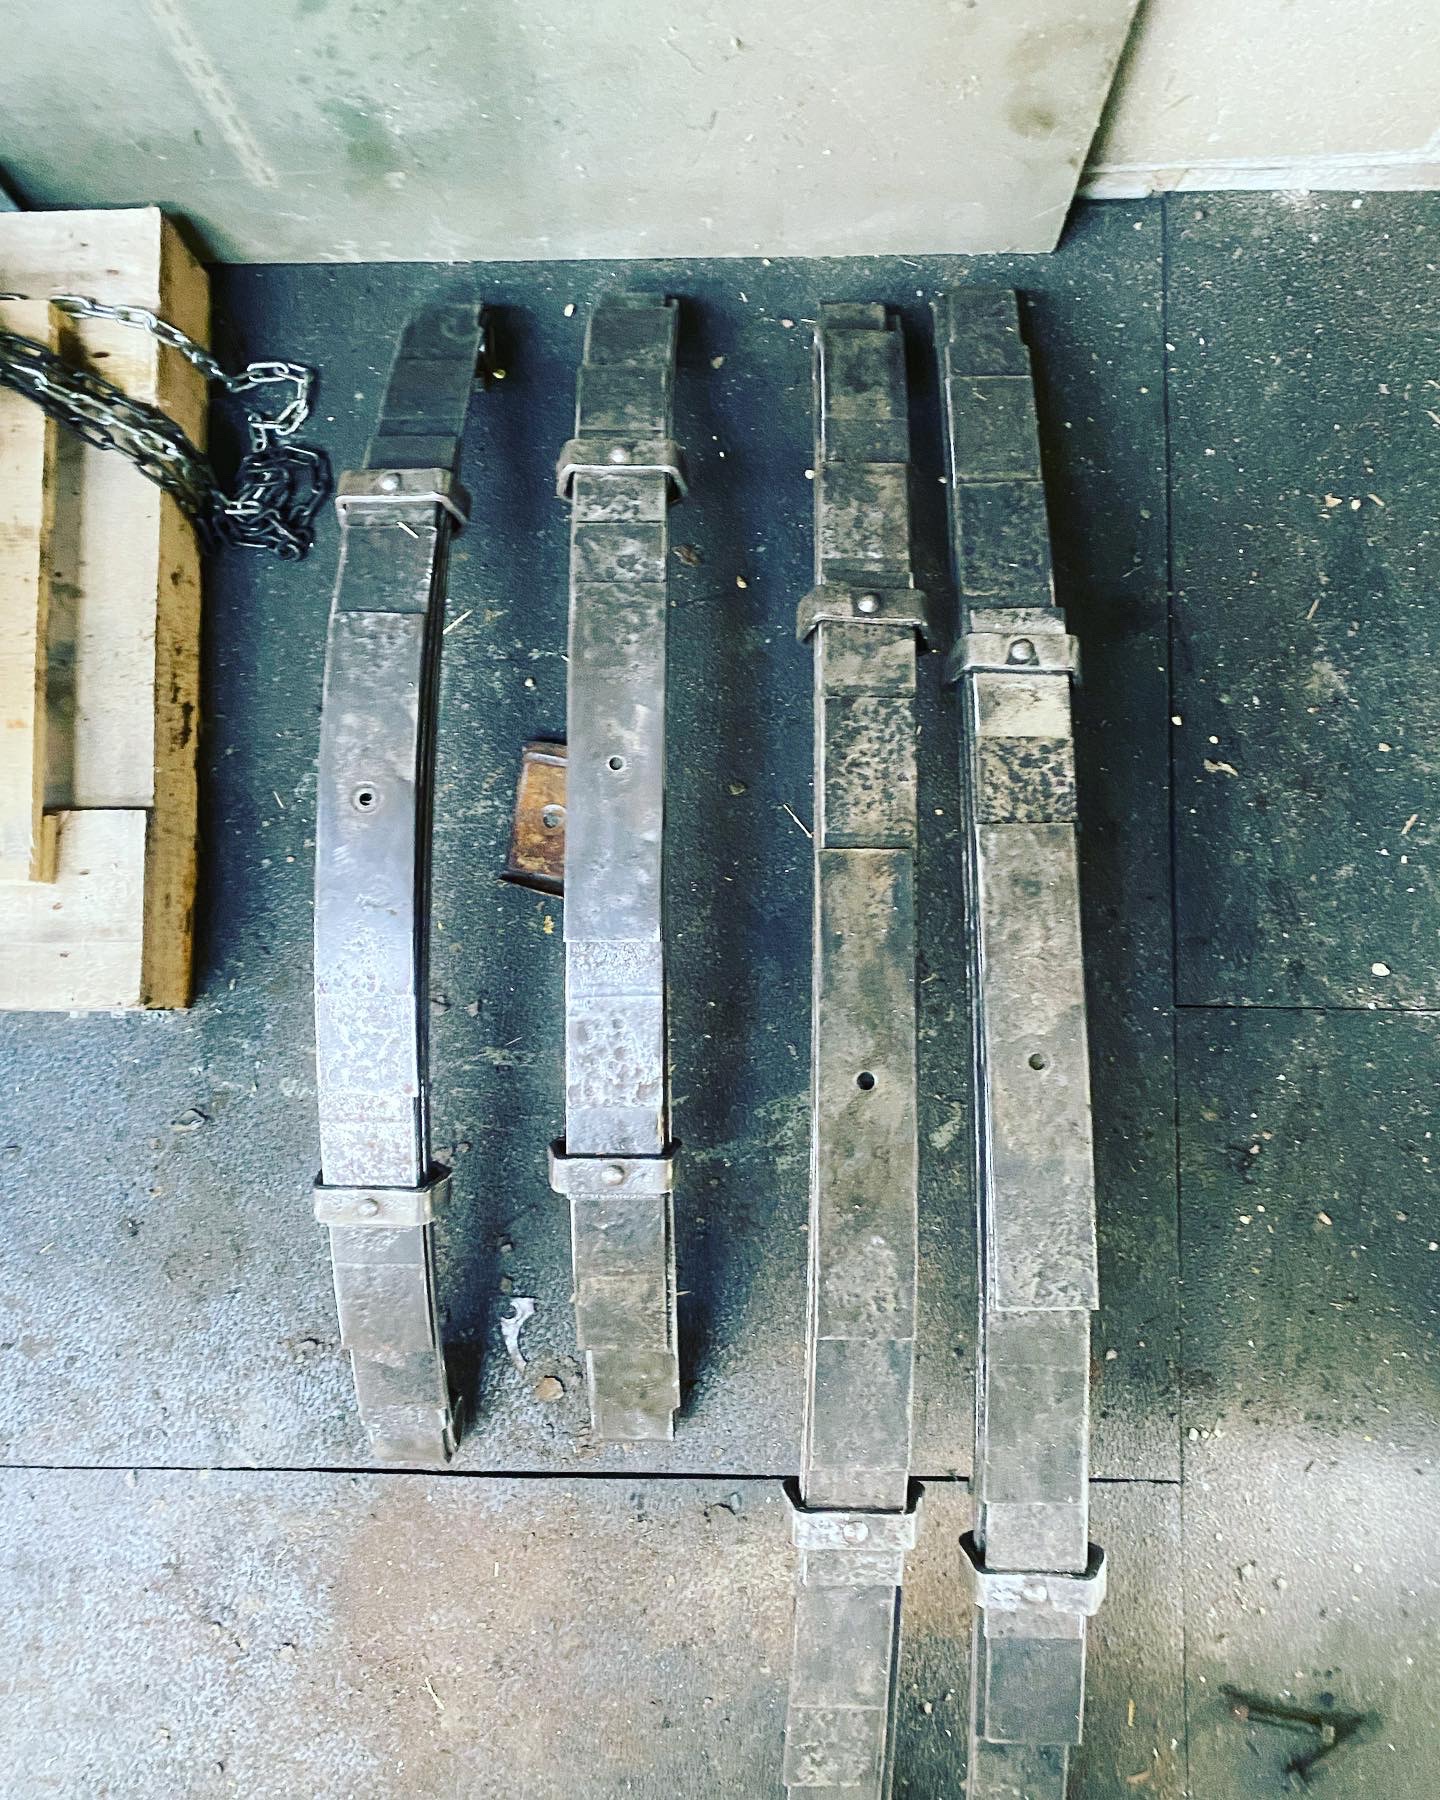
Today I cracked on with the last spring, thinking it would be done fairly quickly and I could get on with some other bits. It wasn’t quite so easy.
I think I can blame it.
My mains grinder decided it was time to go mid way through wire brushing the last spring. It stopped suddenly and then after sitting for a few moments started smoking. I decided it was beyond repair – it was a cheap Bosch green number that has done in a fair few years of hard graft. I trip to my local Screwfix got me back to work (I was not going to use my battery powered grinder for this).
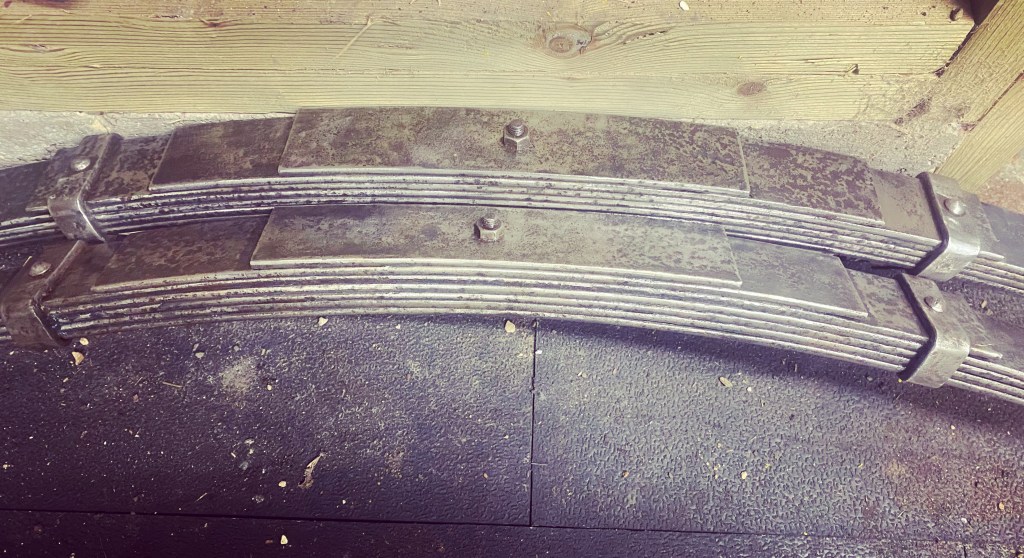
Eventually I was done and all four springs sat resplendent together ready to be regressed and then painted.
Considerably more appealing now.
They will need bushes and new dowels to complete them but this is a good job done.
Today was more about getting ready to complete the engine rebuild more than doing anything practical. In doing this I did look into the liners that remained in seven of the eight valve guides. In doing so I stumbled across a page from Lindsay Porter’s book on rebuilding a Series 3. This told me all I needed to know given the photos were in Turner Engineering’s workshops and my head was a Turner unleaded head from 1995.
Well that explains that.
Now I am not second guessing the wisdom of Turner nor that of Mr Porter, but there is something that doesn’t sit right about thinning the wall of an interference fit component to fit a liner that has a longitudinal split. I will be replacing the guides as LR intended. Only time will tell, but new head was at 29k miles and we have seen the state of the replacements 33k miles later.
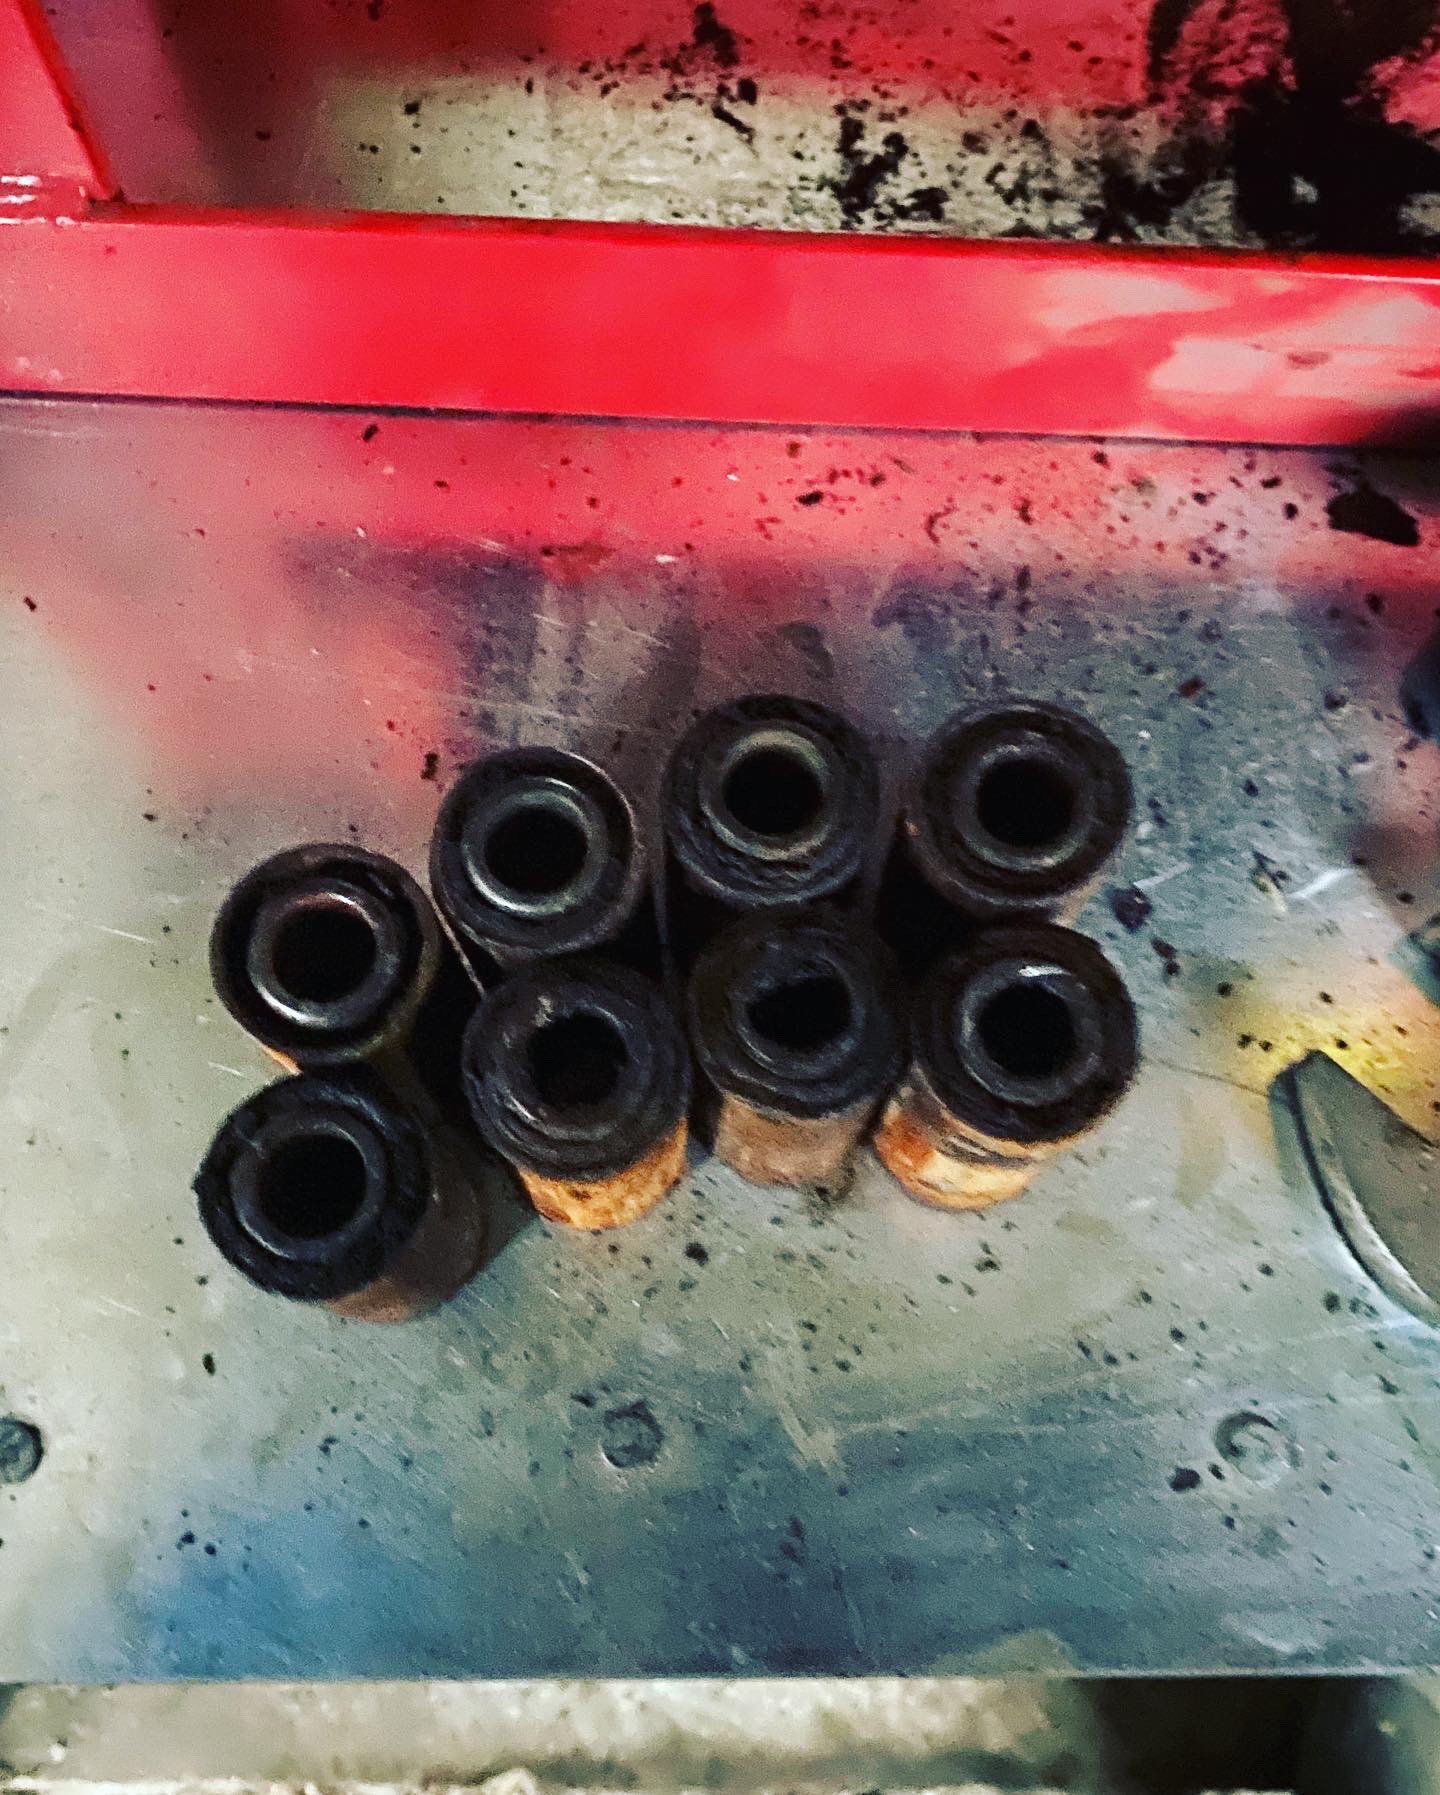
I did find some time to start on the springs. Only enough to remove the centre dowels, pry opened the clips and press out the bushes. I have heard stories of drilling out rubber, hacksawing through the bush outer….. but fortunately I have an hydraulic press!
A 19 mm impact socket worked nicely as a drift in conjunction with a narrow head on the press, and all eight came out with relative ease after the first crack of it releasing.
A bush in the hand is worth two in the spring.
Tomorrow, whilst waiting for various engine parts, I shall clean the springs ready for reassembly, with graphite grease.
In other news the engine / axle paint has now arrived so I am starting to plot a course to rolling chassis.
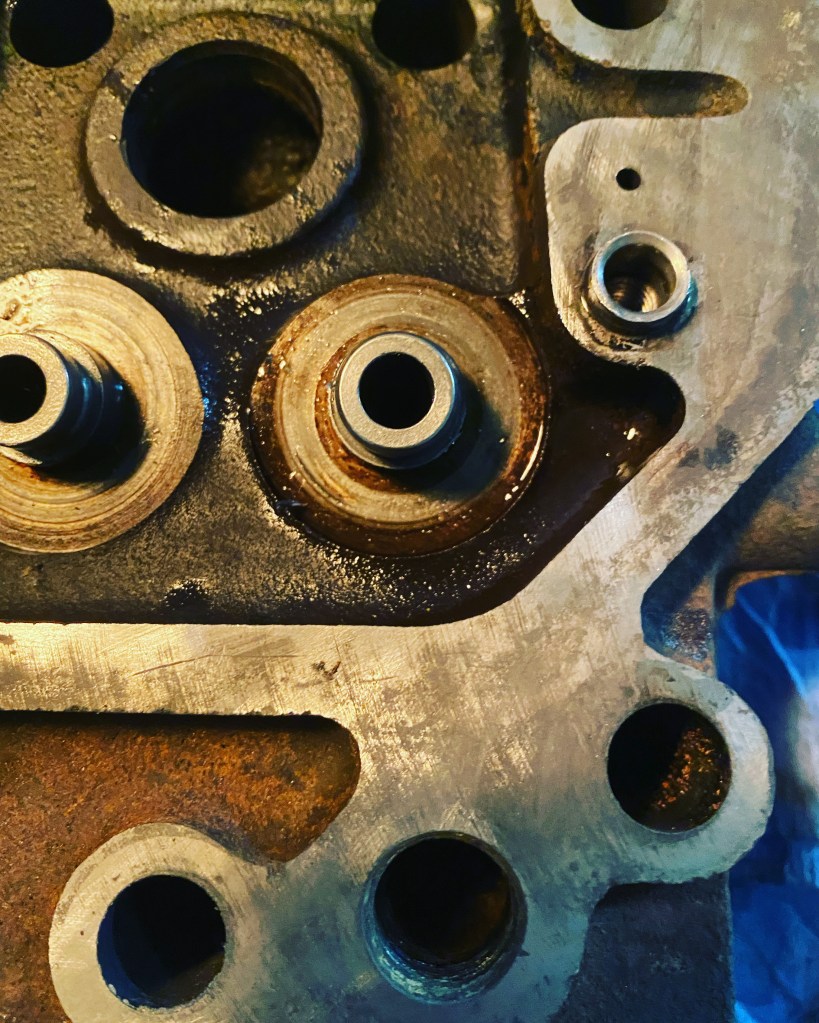
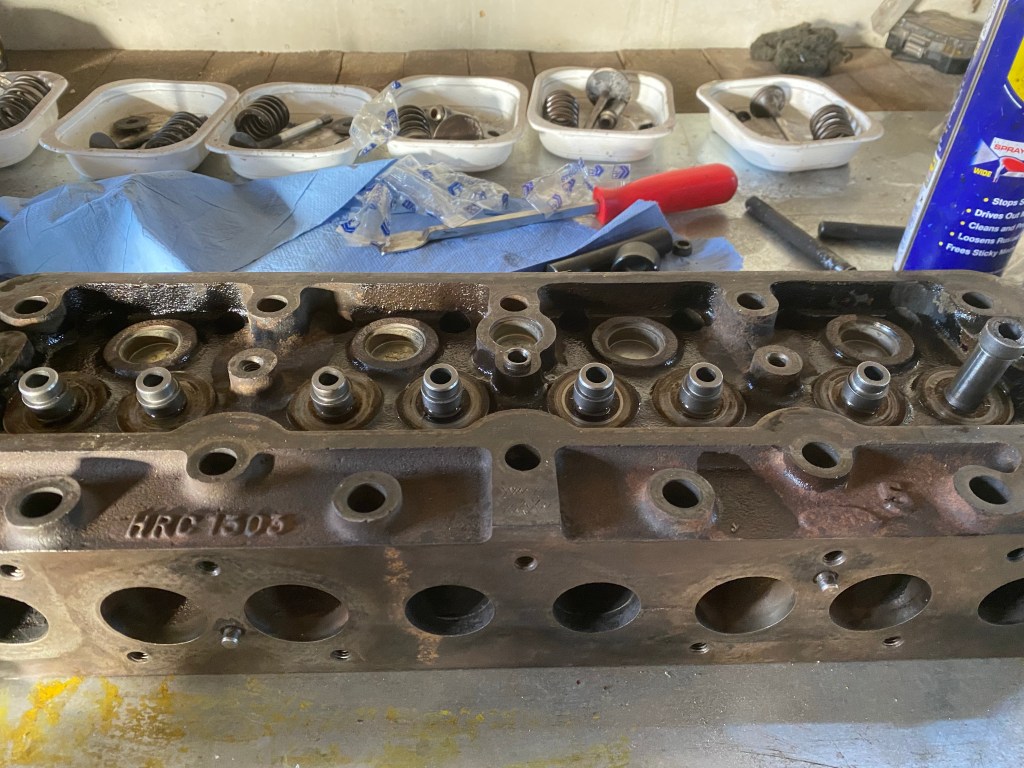
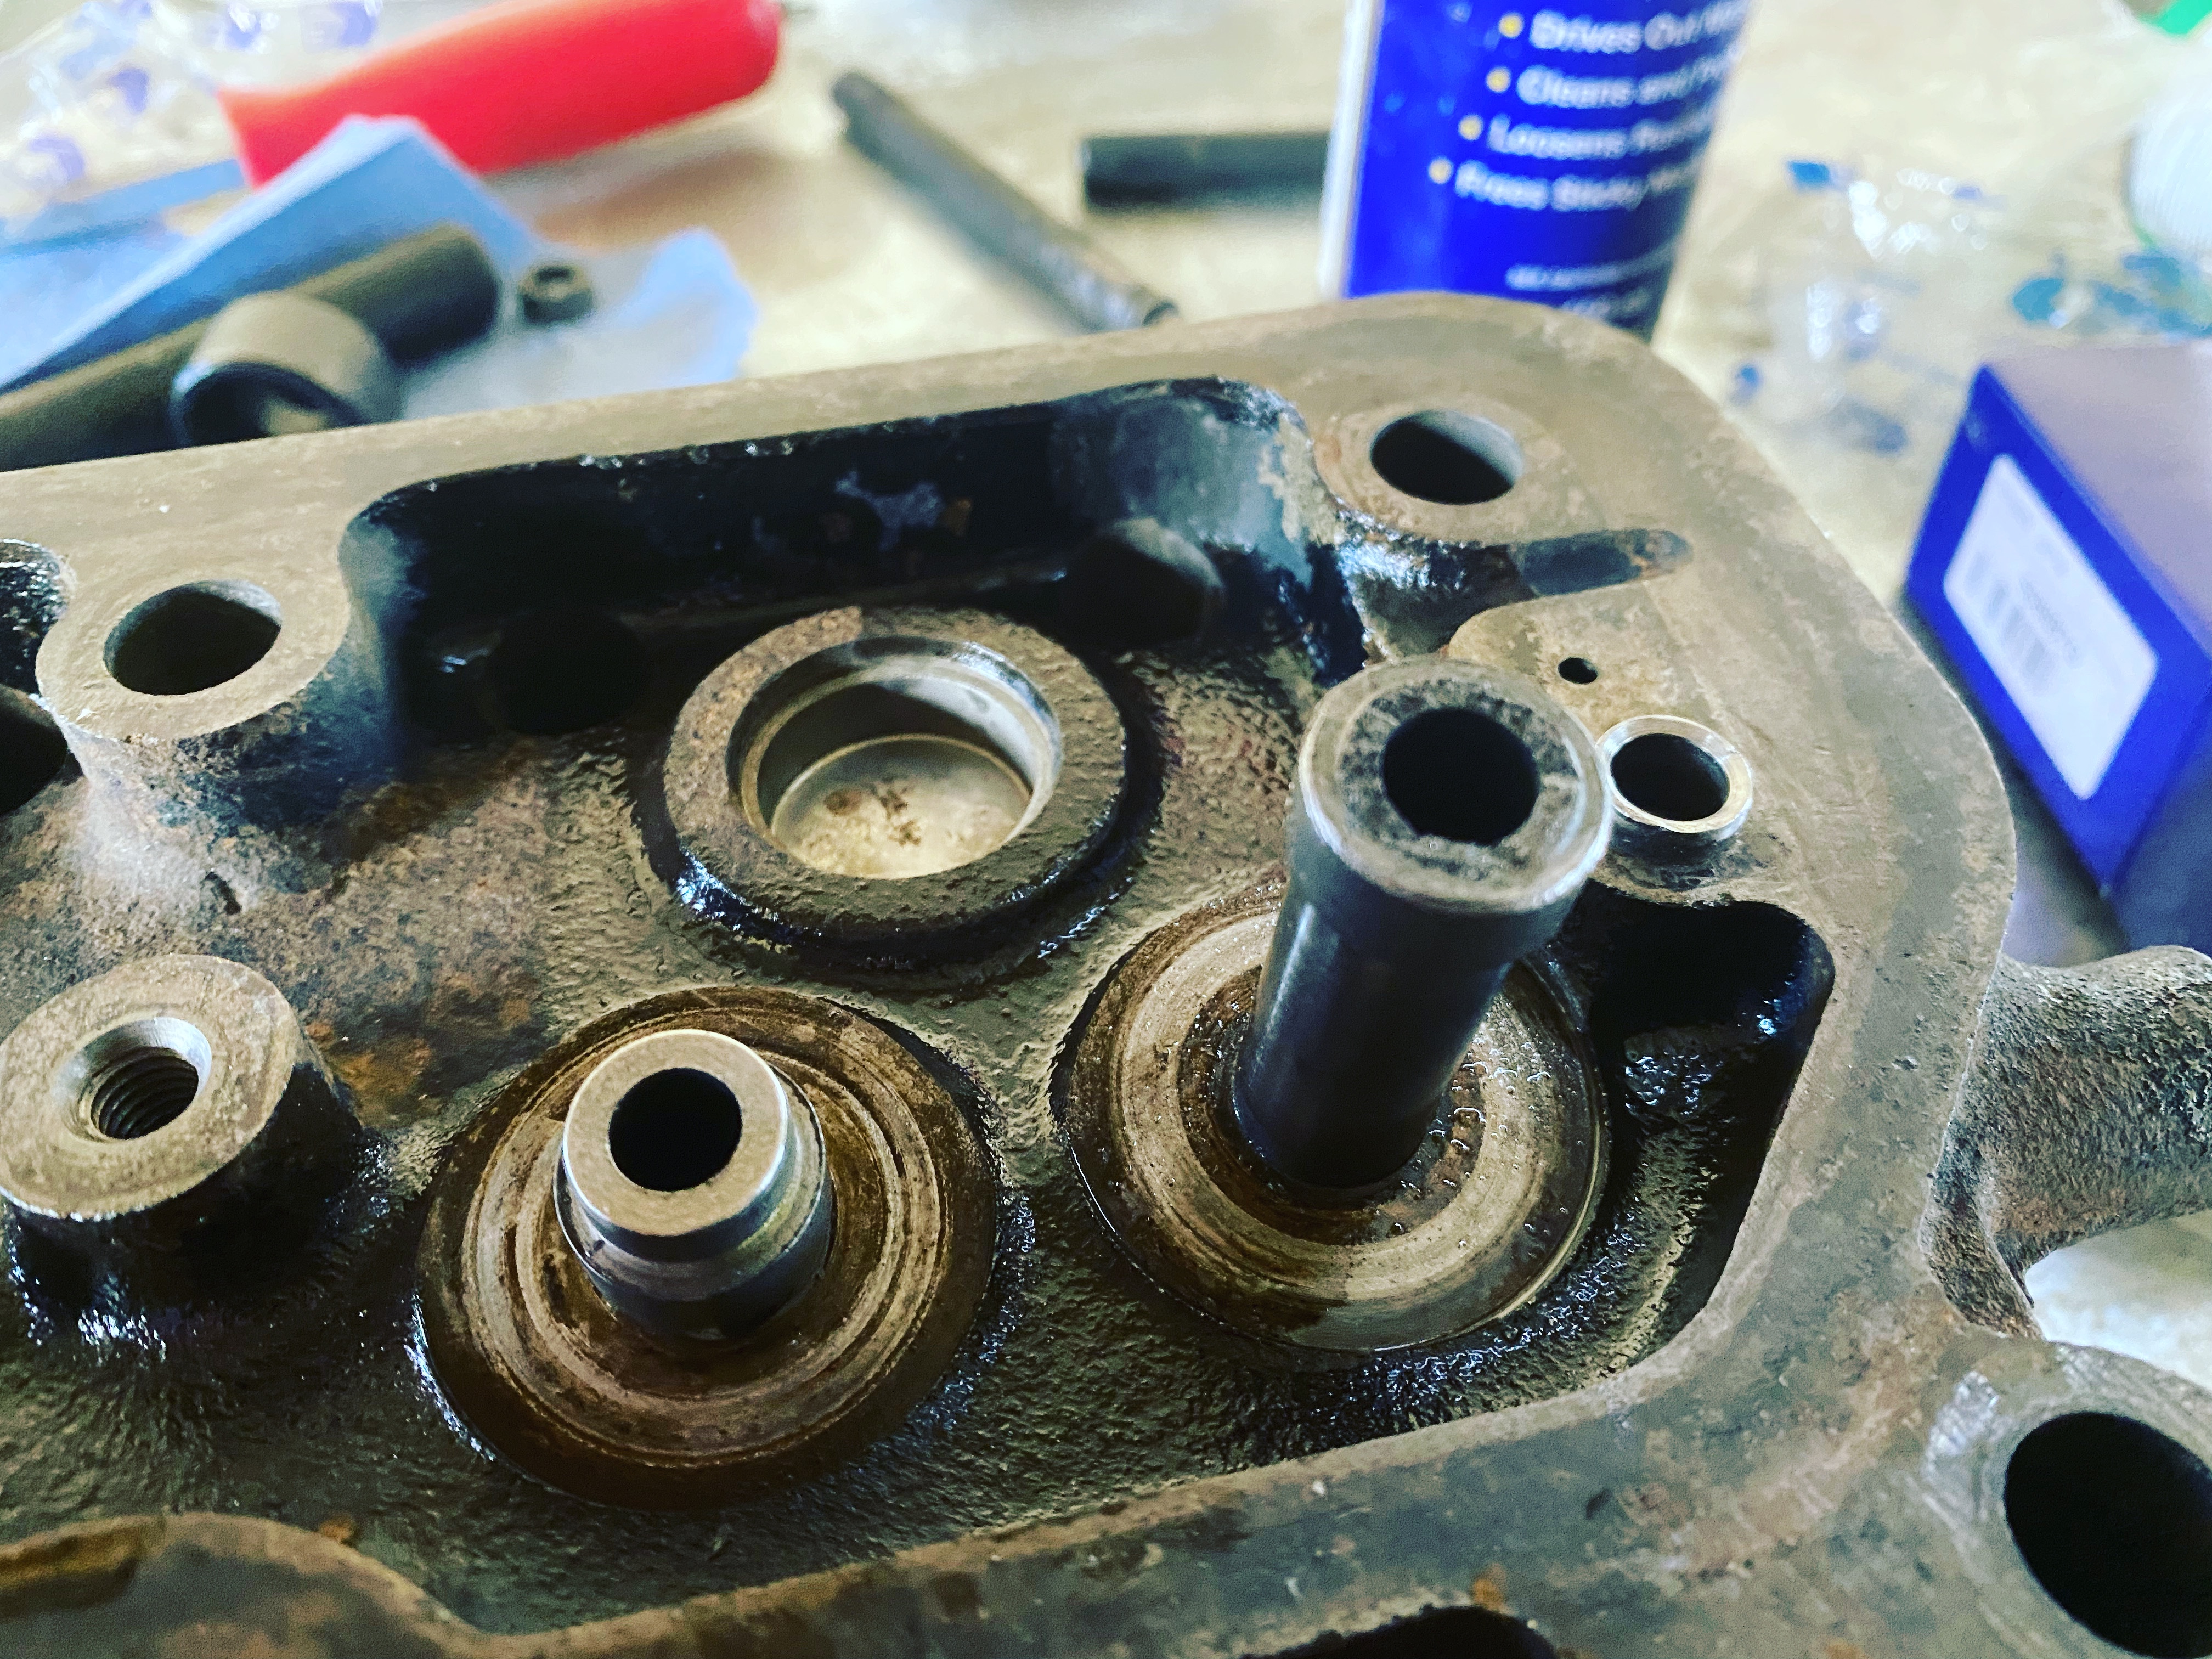
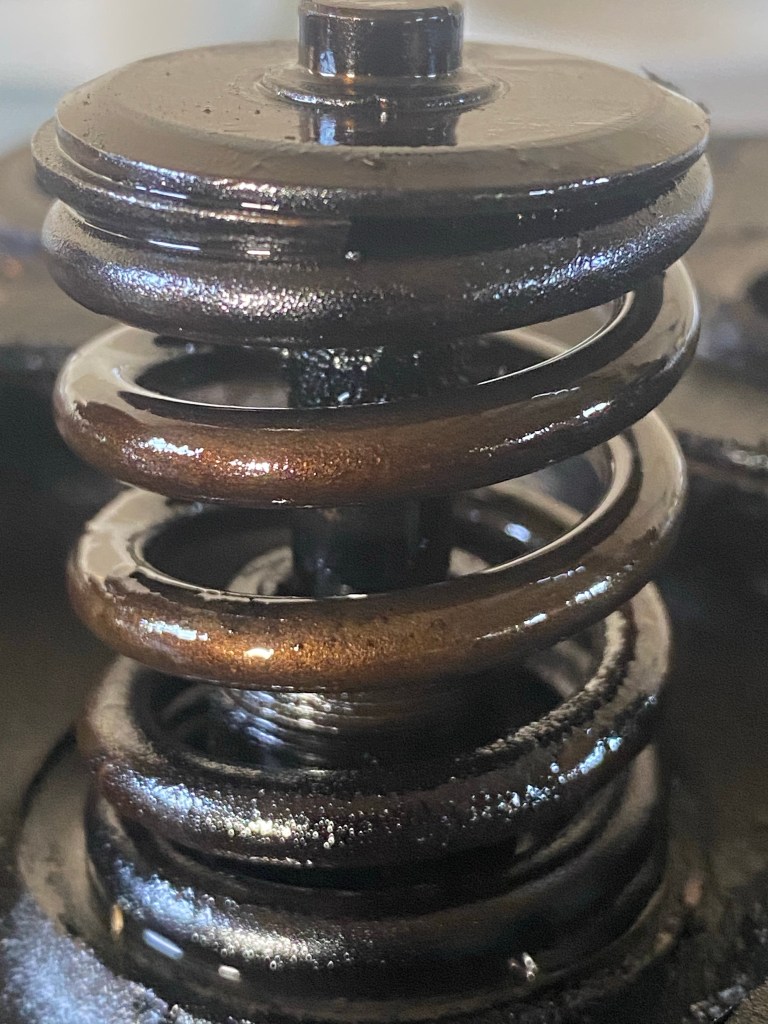
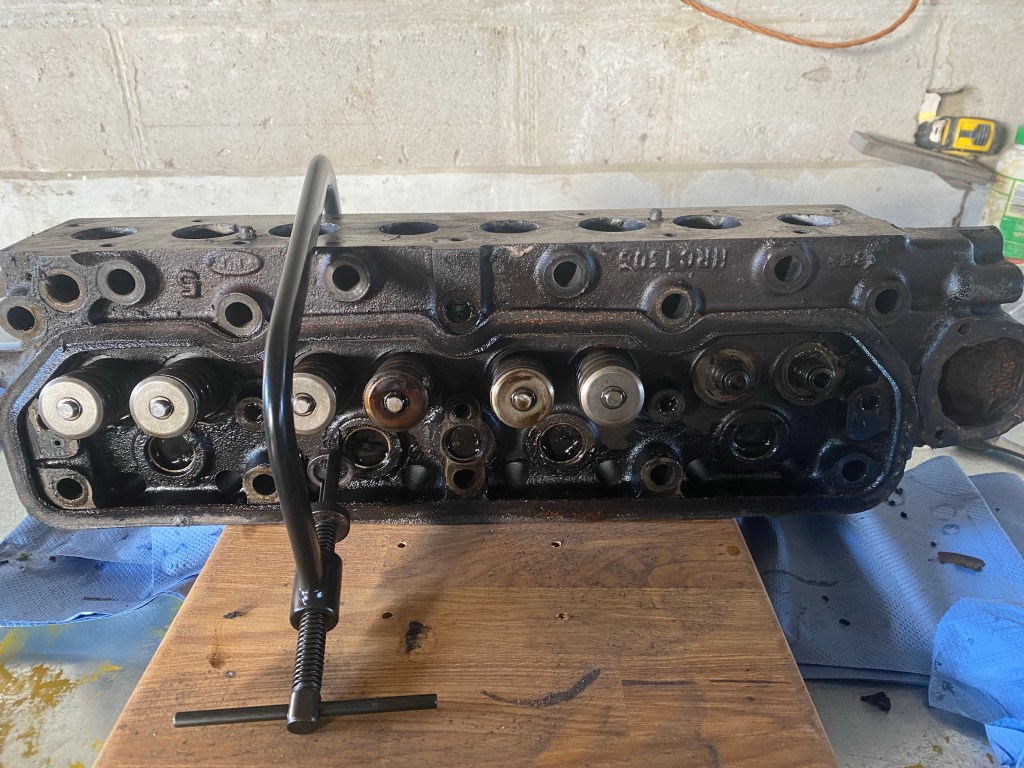
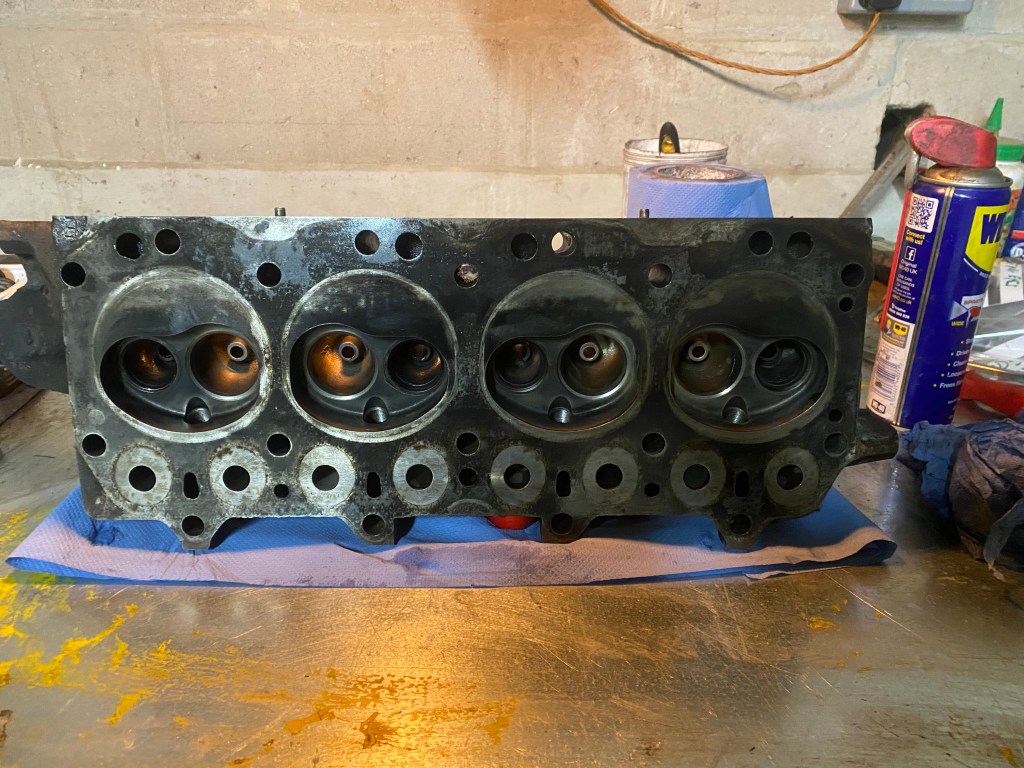
The head had waited patiently for its turn to be stripped and cleaned. Today was the day. A little bit of a look around suggested that all might not be well.
Stem seal?
Four easy bolts took the rocker assembly off. Fortunately this needs only a good clean, but it’s removal allowed me to glimpse the issues that lay ahead. Next job was to remove the collets and release the valves. All straight forward until No.5 (Cylinder 3 exhaust) which seemed a bit loose.
I spy a black sheep.
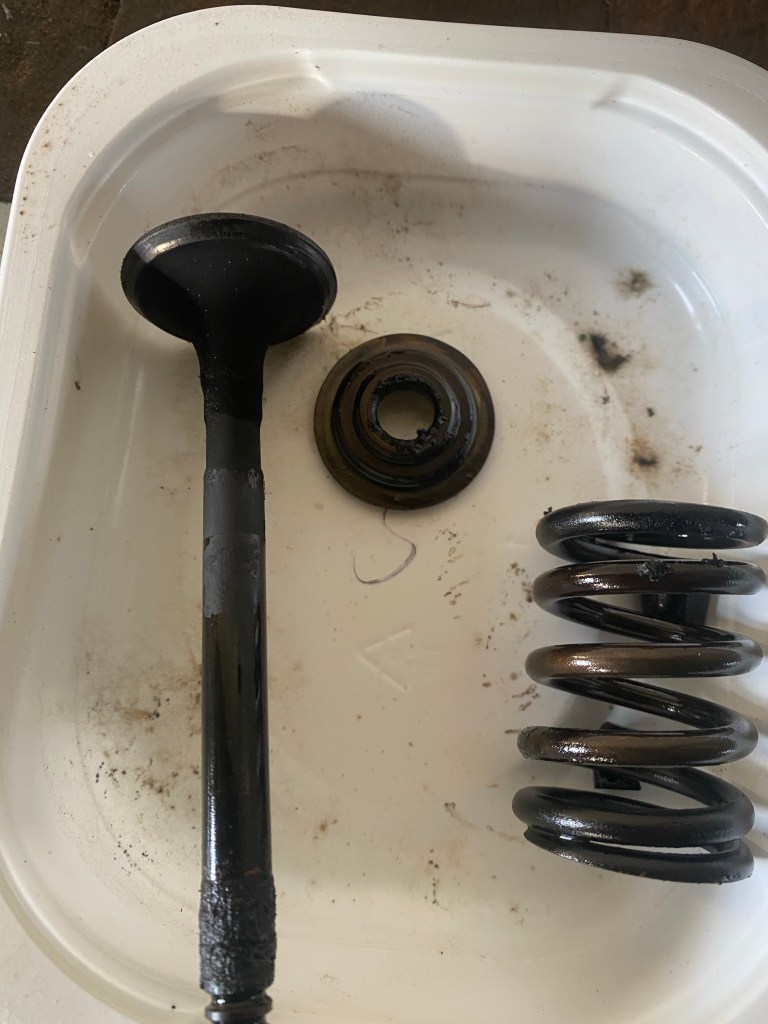
All springs and valves out, the state of the stem seals could be assessed. All hardened and ineffective, but No. 5 was missing quite a bit. The stem of this valve told the story.
A dog’s breakfast tray.
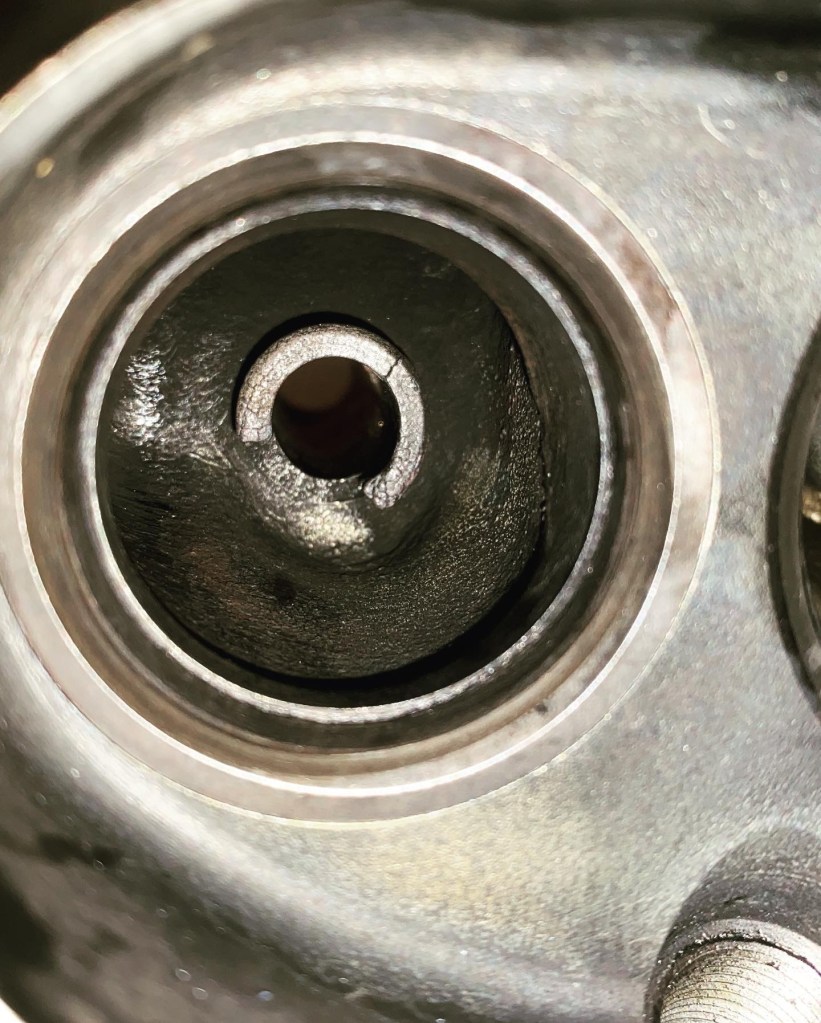
Clearly I had been burning a bit of oil. I was not, however, expecting the valve to be so loose in the guide, although some of the slop had been taken up with burnt oil. Closer inspection revealed that the copper liner was absent and the guide had fractured.
Toast after carbon scraped away.
Well this means a new set of guides is needed. I believe the saying is ‘in for a pound, in for a lot of pounds’. At this juncture, whilst debating a machine shop or a combination of my oven and freezer, I decided to carry on with cleaning the head. They is some very minor pitting between cylinders 2 & 3, but it is flat in this area. If a skim is needed then that answers the guide question.
At least clean enough to work on now.
Next up is painting the block and deciding how best to replace the front crank seal, but maybe finishing painting the chassis now the loom has arrived. Oh wait, maybe the springs and axles or ………..
I have been trying to buy ‘new’ bits and pieces as I go along partly so I don’t forget what I need but also I it is quite therapeutic to find a solution to a given problem at the time rather than it playing on ones mind for a long time.
As I have said elsewhere I choose Genuine Parts where possible, OEM as a backup and named manufactures after that. If possible I avoid catch-all brand name pattern parts. I would rather Joe Blogs knocks up one on a lathe than not know if it was in fact made by a dishwasher manufacturer that had spare capacity…
Today brought three deliveries; each ticking a different box.
The new. The replacement wiring loom arrived today. It was built to order by a people that only make looms.
A bit more flexible than old one
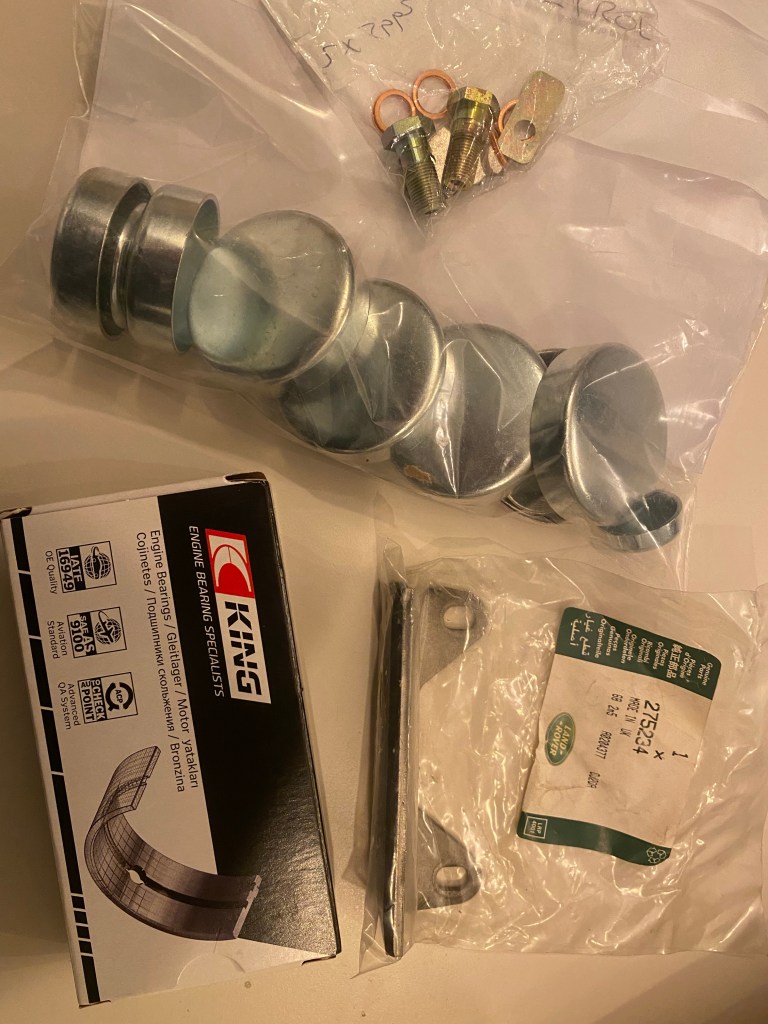
Next was a bag of bits for the engine containing Genuine Parts, named suppliers and some general bits.
A mixed bag.
The final one brought a tear to my eye. There is something really special about NOS Genuine Parts.
Those were the days.
Now I just need to get to the point I can fit them!