The last few days I have been trying to get on top of all the ancillary parts of the engine. There are surprisingly (or perhaps not) many many bits.
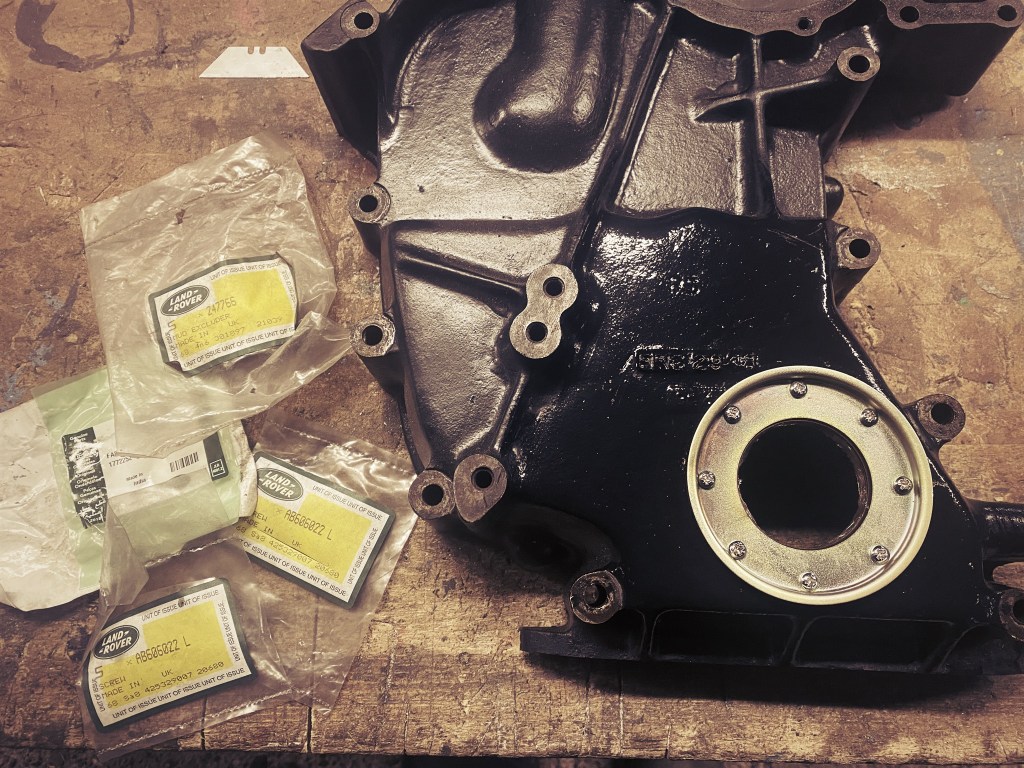
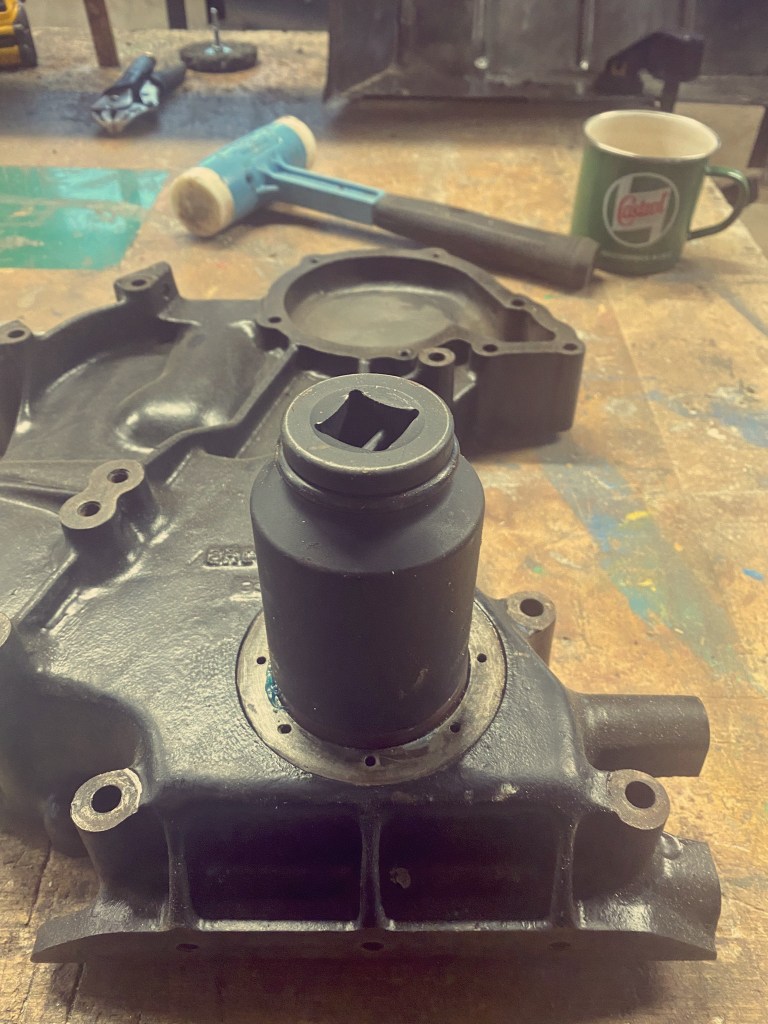
The timing cover was done but for the crank shaft seal and new mud shield. I had opted for the genuine seal, self tappers and mud shield.
By the book.
I used hylomar blue on the seal where it touched the case, and I used hylomar red on the screws to stop any oil leaking through them. I used a 43mm socket to drift the seal in.
A perfect fit.
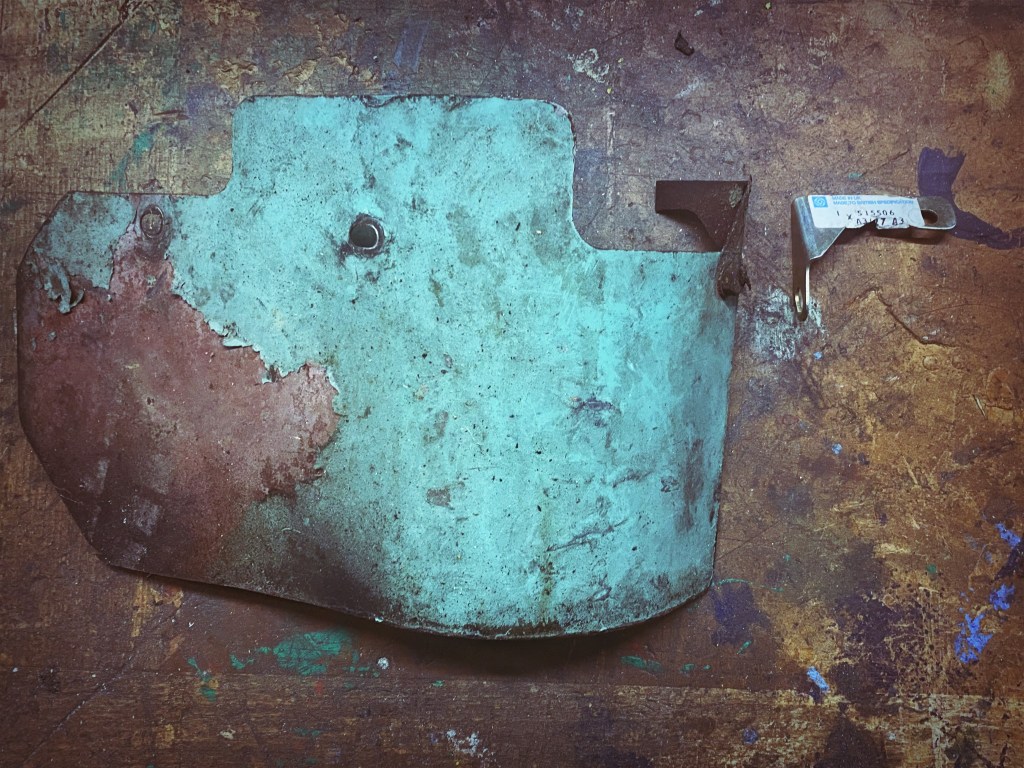
Next up was the heat shield. The bracket had snapped and so I had bought a new one but the rest of the shield was serviceable.
The new bracket is a bit shiny!
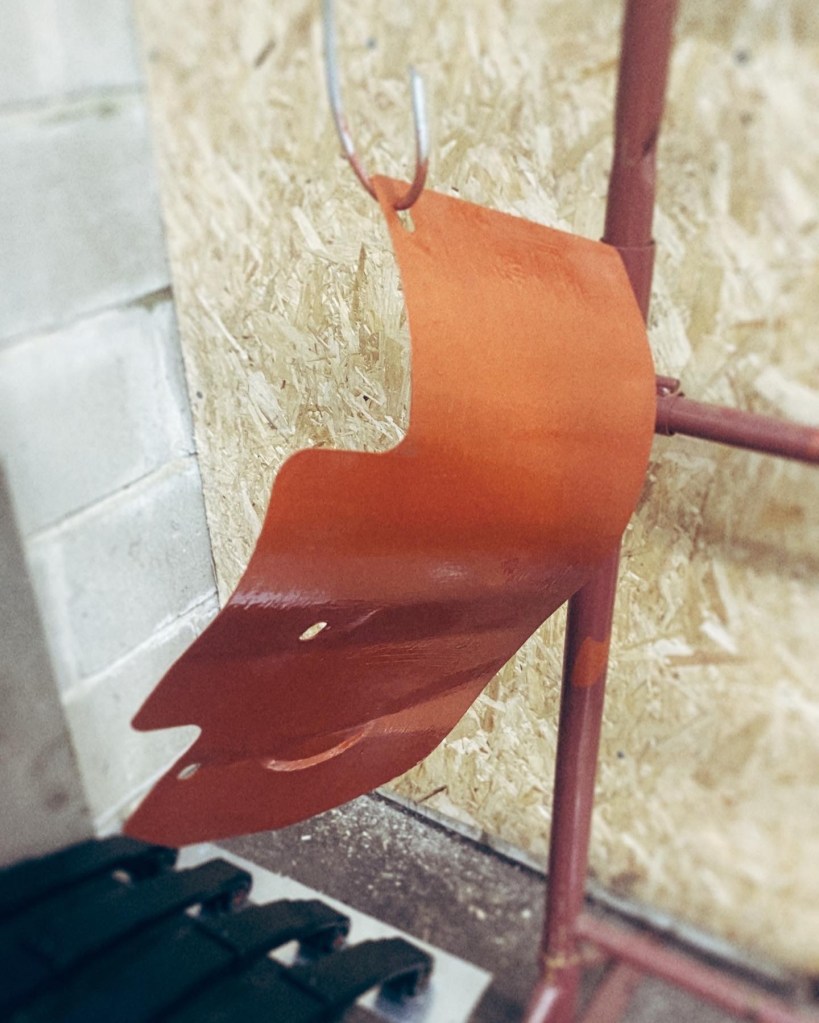
The heat shield is painted in MOD recon blue and so I’ll keep that. Interestingly only it, the alternator bracket and the crank pulley were. After a good session with a grinder mounted wire brush and prep disc it was ready for painting. First a coat of primer.
A bit better
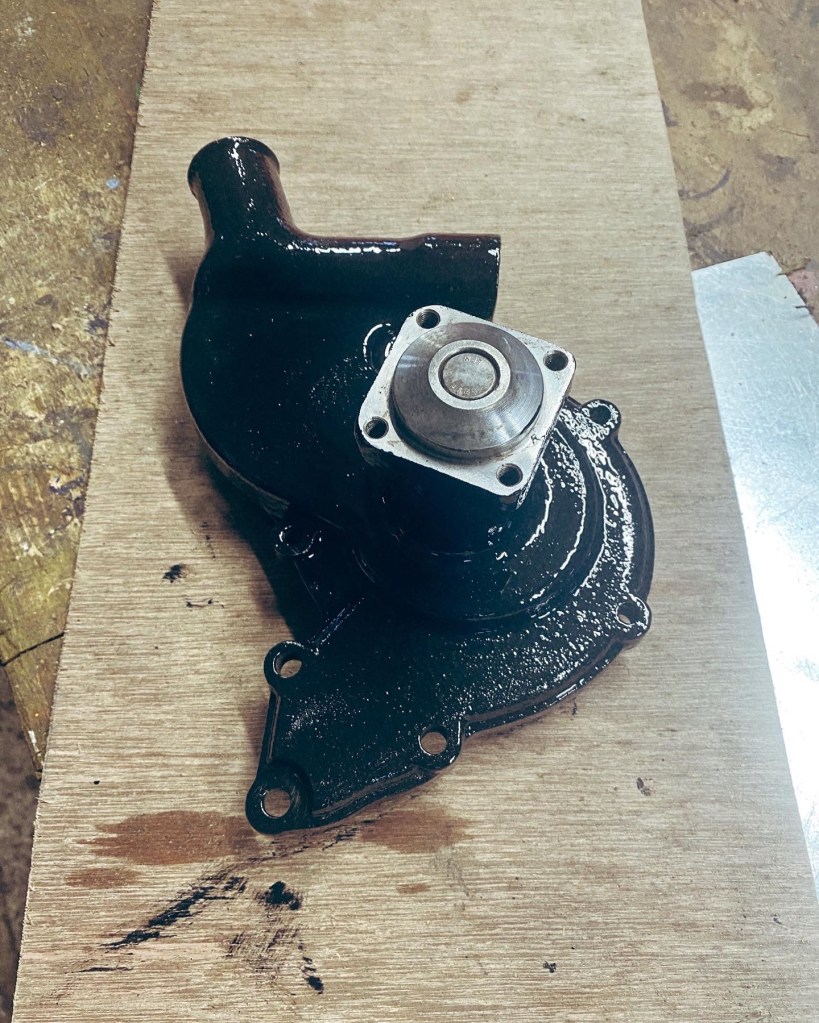
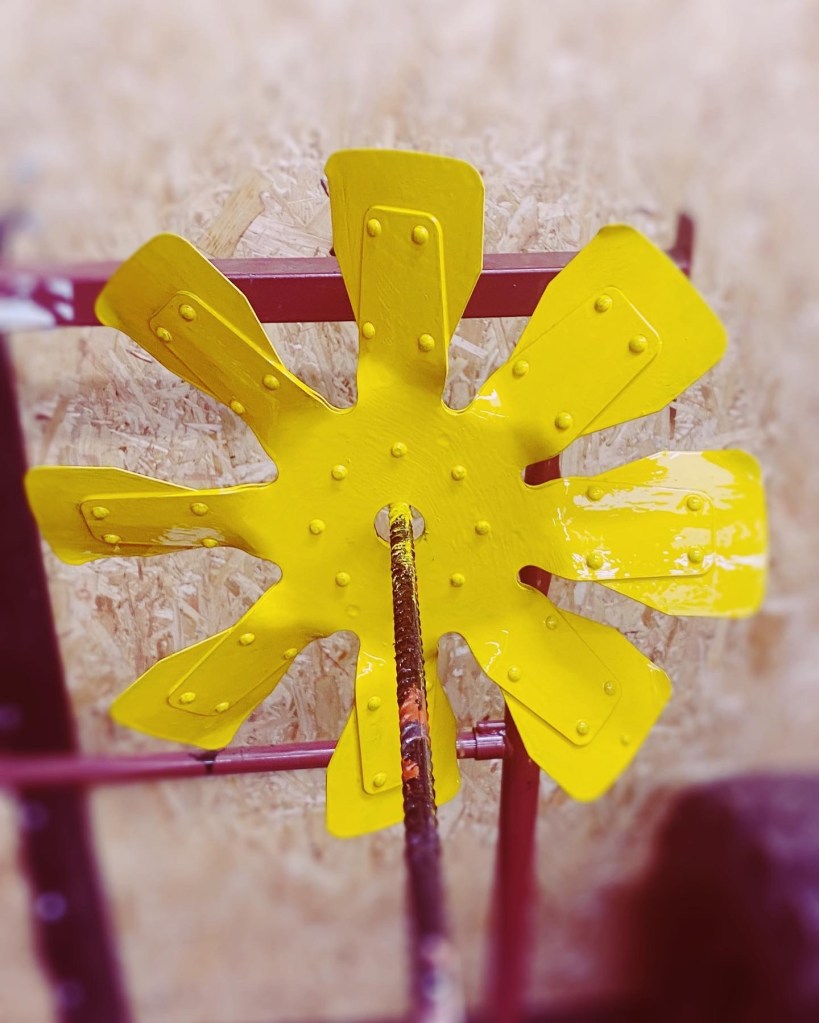
Whilst painting I also did the water pump and started on the fan. The fan was a pain to do, and I don’t think I am happy with it so may blast it back to bare metal and start again.
Black.Yellow.
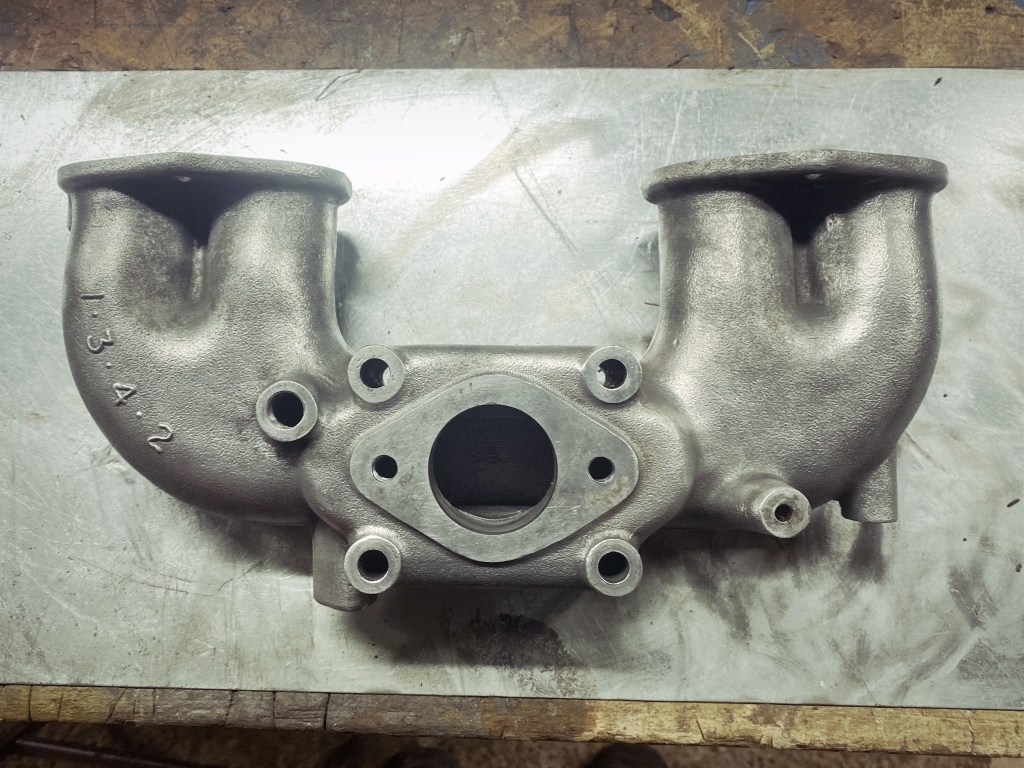
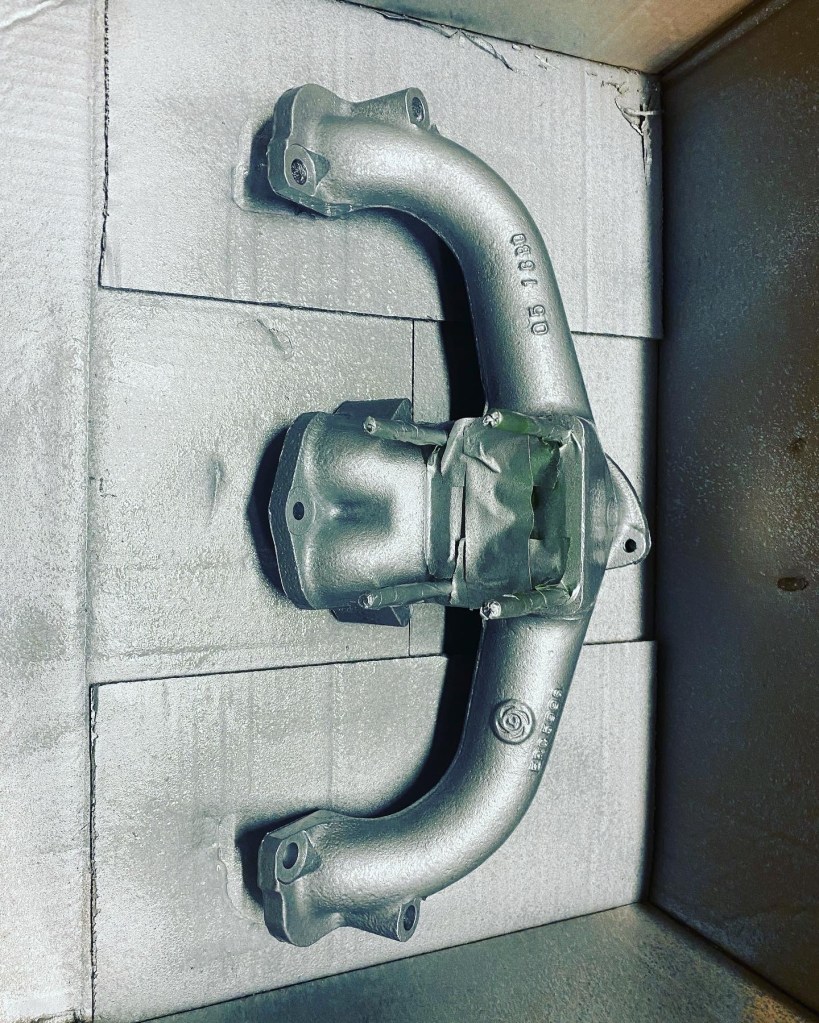
The last job I took on was the intake manifold which was feeling a little dowdy compared to it’s usually ugly neighbour the exhaust manifold. After a soak in degreaser and a wire brushing it looked a lot better.
A thing of beauty.
Next are the engine mounts, cam case plates, and all the other bits I find!
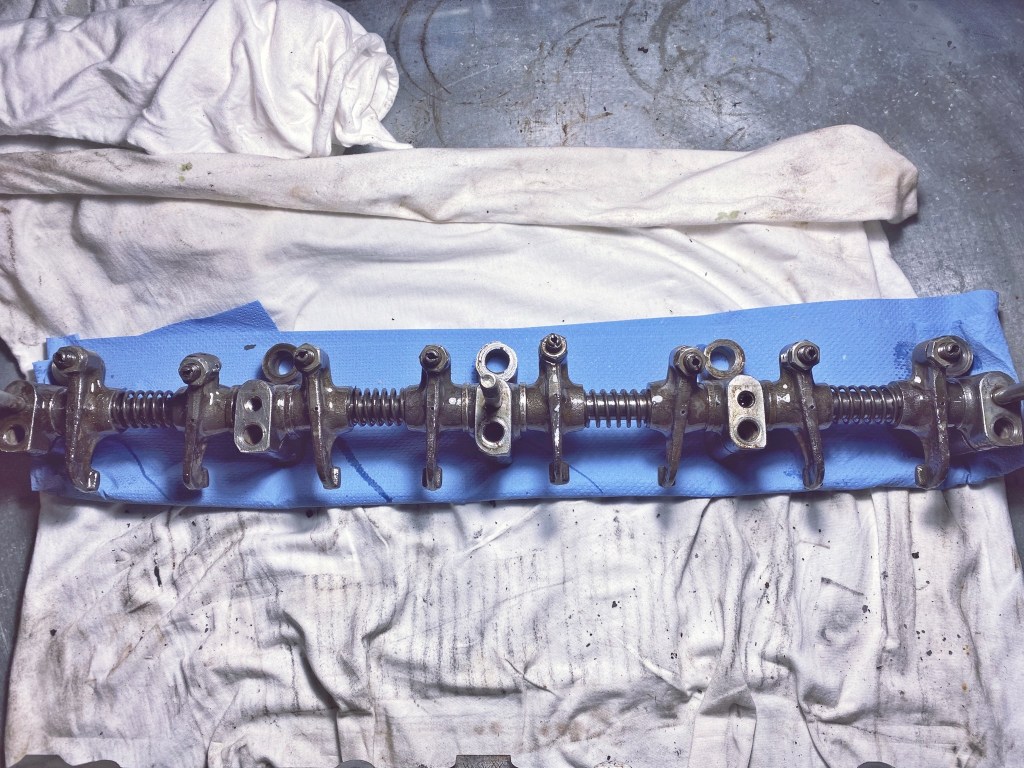
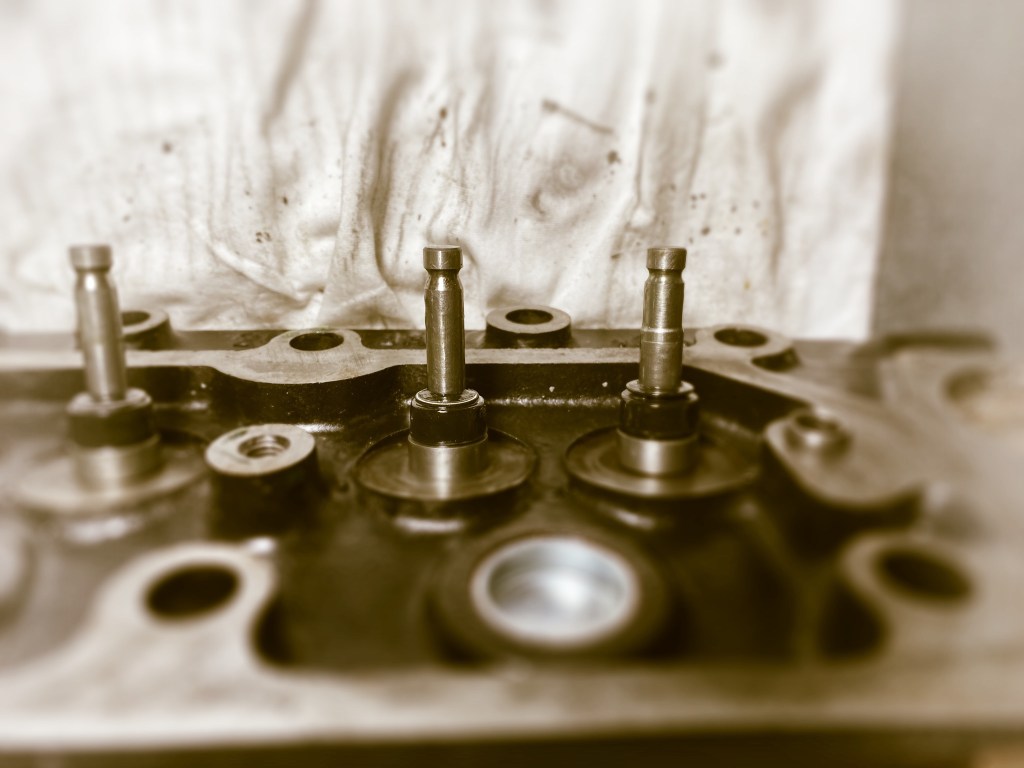
As I am still waiting for the new piston rings I thought I would crack on with the head.
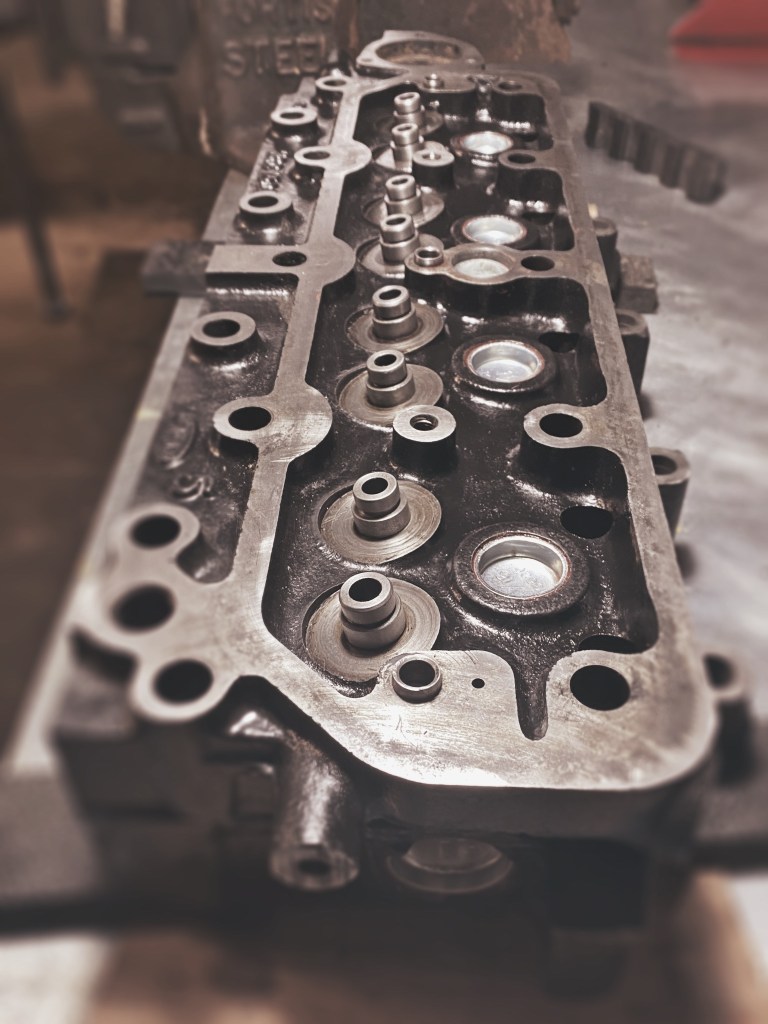
Simple job of putting in the valves, seals and springs before bolting on the rocker rail. First of all I stripped and cleaned the rail and made sure all the oil ways were clean. I then reassembled with assembly lube.
Ready to rock.
I lined up all the valves and slipped on the new valve stem seals. I compressed the first spring and placed the collets on the valve stems. Upon releasing the compressor I found a snag. I had bought single groove valves and collets, but the spring caps were for the later (and correct for 05 KD 28) three groove valves and collets.
Old fashioned.
I am now have a quandary. Do I double down on the mistake and get new spring caps or go for the correct valves? I am thinking the later although it does depend on the valve clearances in the guides.
Another post covering a couple of days of a few bits and pieces most of which involved paint going on or coming off. I, however, am too old to be the Karate Kid, although 05 KD 28 is the same age as the film.
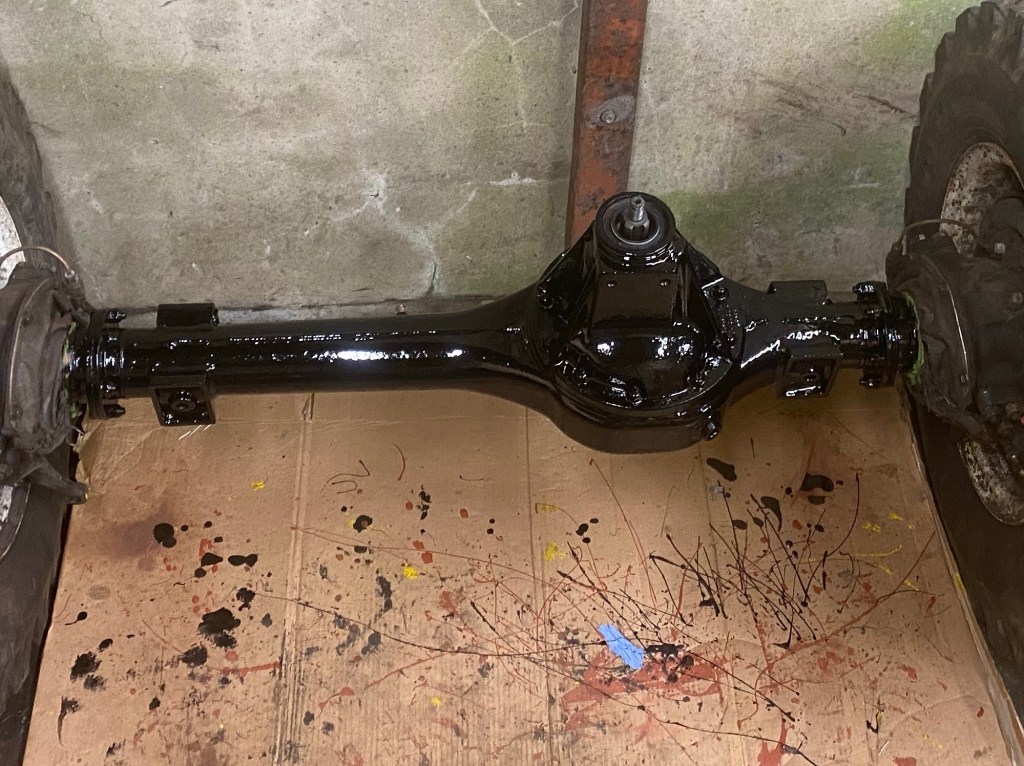
Final coat on the front axle ….
Black ….
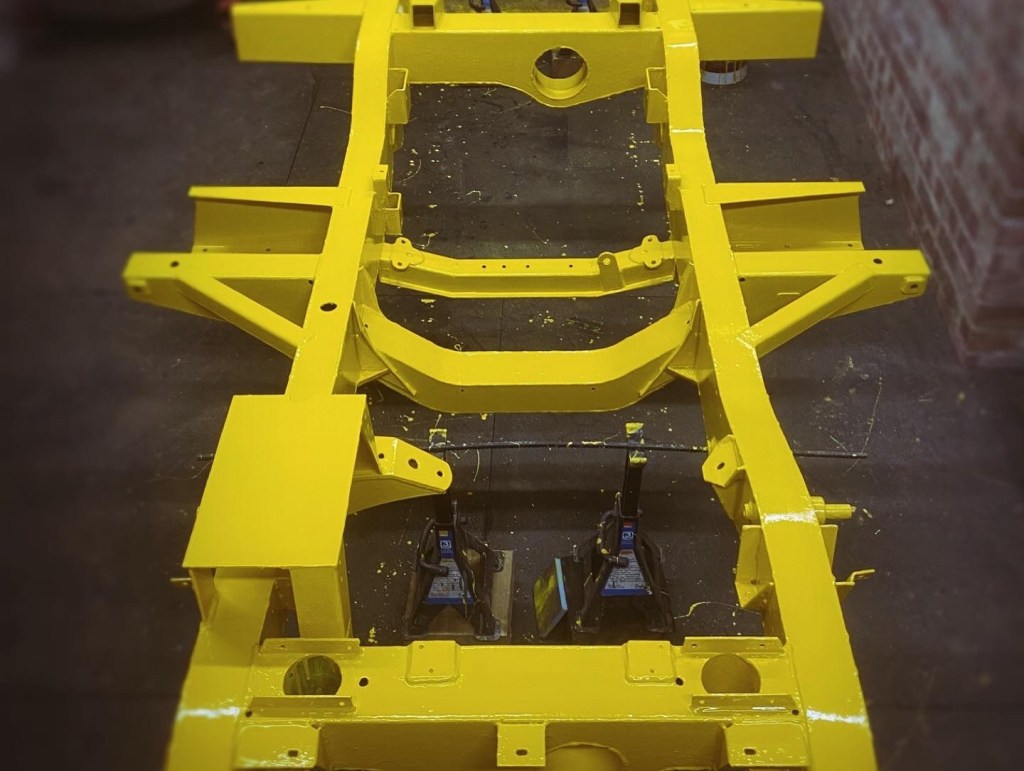
… and the chassis.
… and yellow.
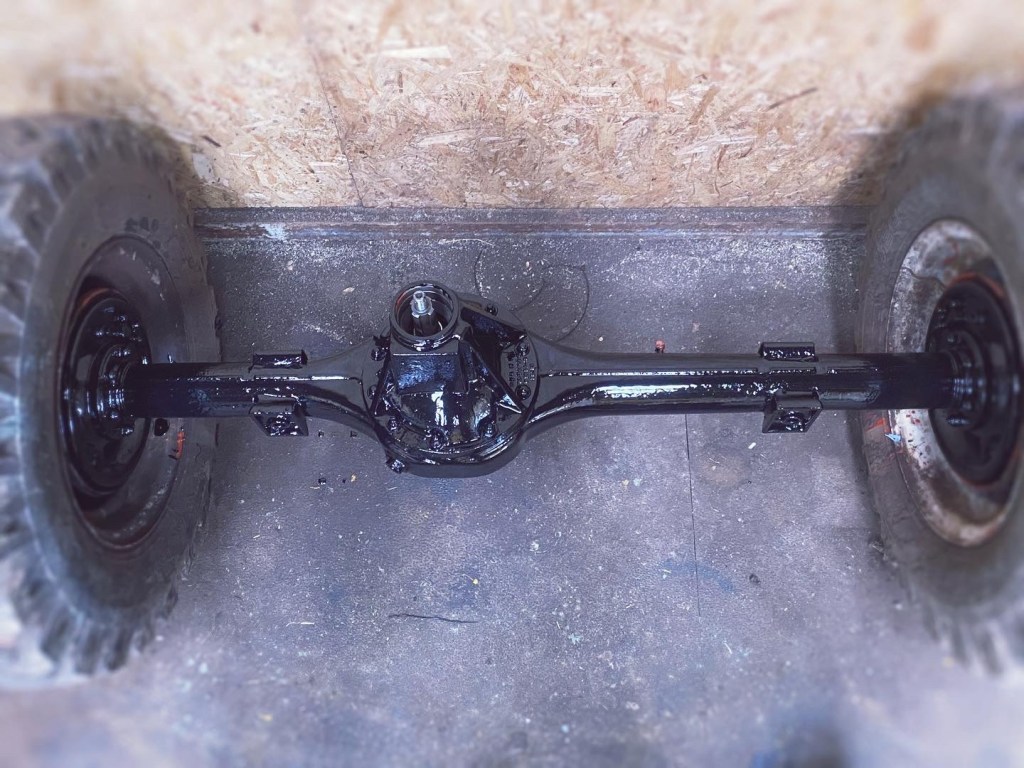
I also did the second and final coat on the leaf springs and whilst I had the black chassis paint out did the first coat on the rear axle.
Black again.
I now need to pull finger on the spring mounting plates, front slipper plates and rear slipper plates / brake pipe mounts. Then I can get a rolling chassis!
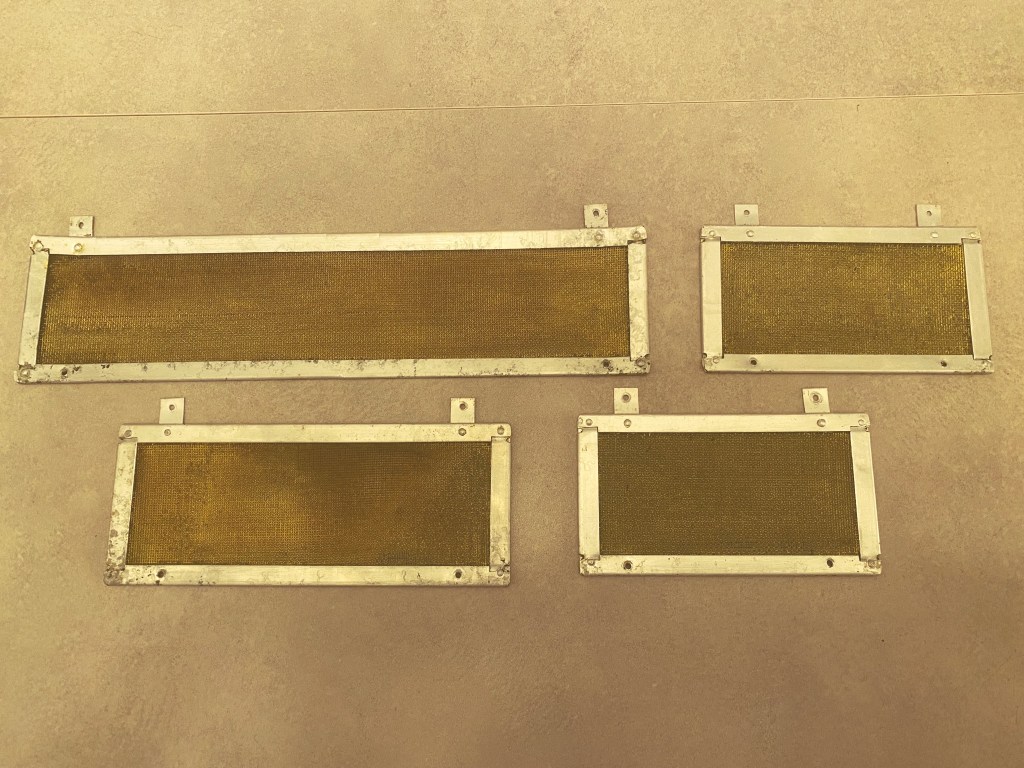
Whilst tidying some bits of 05 KD 28 so that I might find them again I ended up thinking that cleaning the multiple coats of paint off the vent fly screens would be a good idea.
After liberally coating them in paint stripper, and then giving them a long soak in hot water, I ended up giving them an acupuncture treatment. Armed with a pin I went through unblocking the holes.
Air conditioning serviced.
I now need to decide what to do with them as the mesh is slightly rusty. I am thinking a light spray of yellow just over mesh.
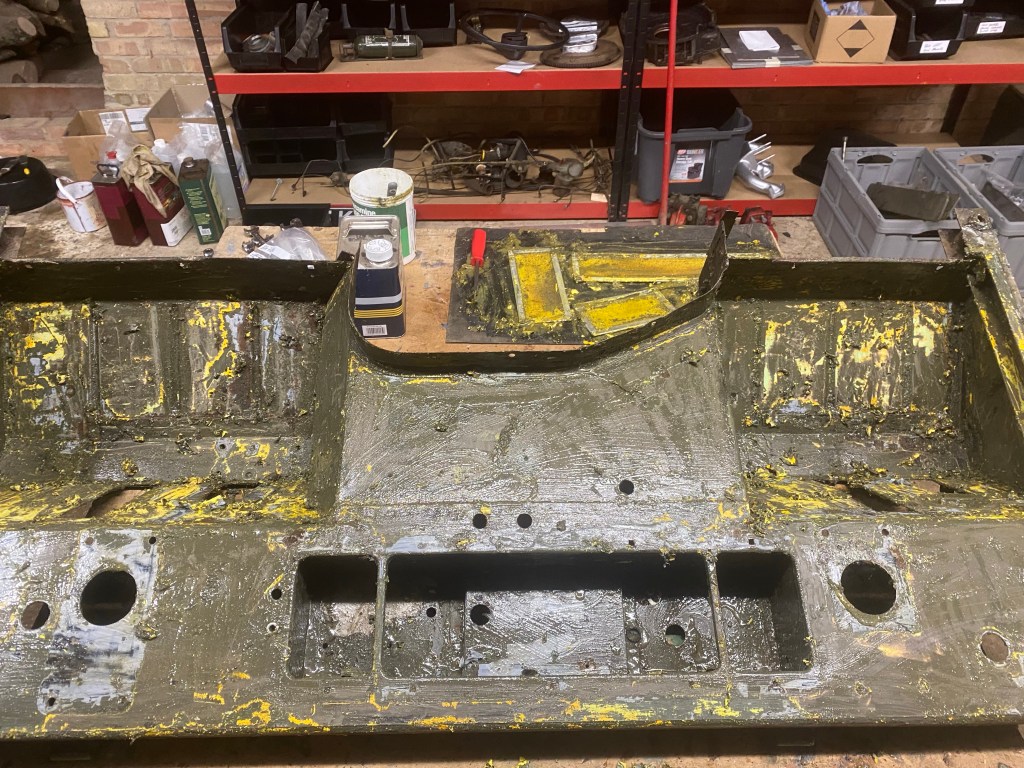
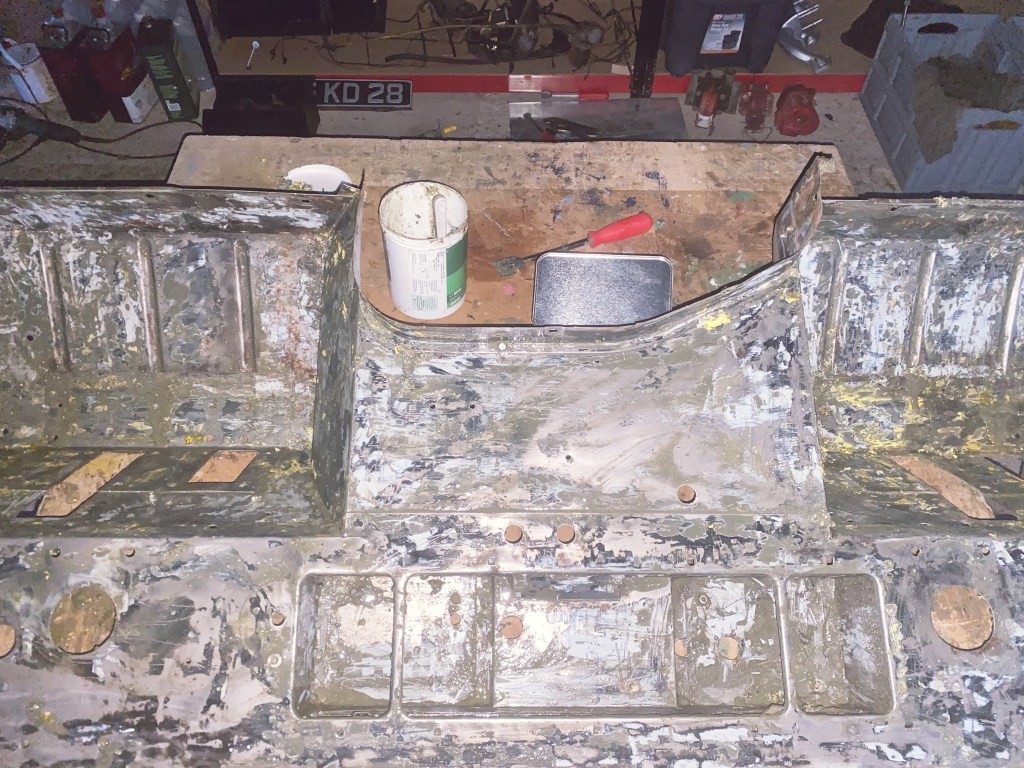
With the stripper out I also thought I would attack the bulkhead so I could gauge the extent of the rust. The rust is exclusively associated with panel seams and seems related to the somewhat haphazard approach to seam sealer the BL chaps had. It hasn’t been helped by some ‘agricultural’ previous repairs.
I started with stripper which got the first layer of NATO green off and started softening the light green primer, yellow, nato green, black undercoat, and light grey primer.
Starting.
I then resorted to wire brushing, before getting to work with stripper again. The wire brush on a grinder is a good test of metal’s right to remain on the bulkhead. I need to do more, but nothing terminal found yet.
Still going.
More wax on wax off tomorrow. Maybe a black belt will be earned by the end of all this.
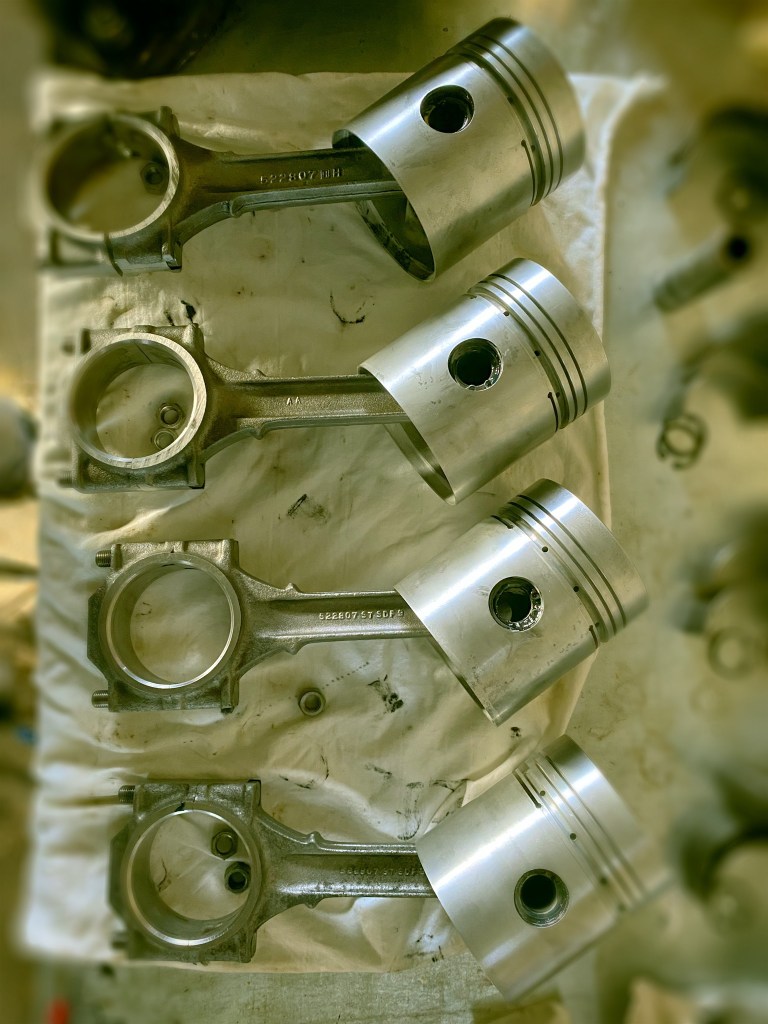
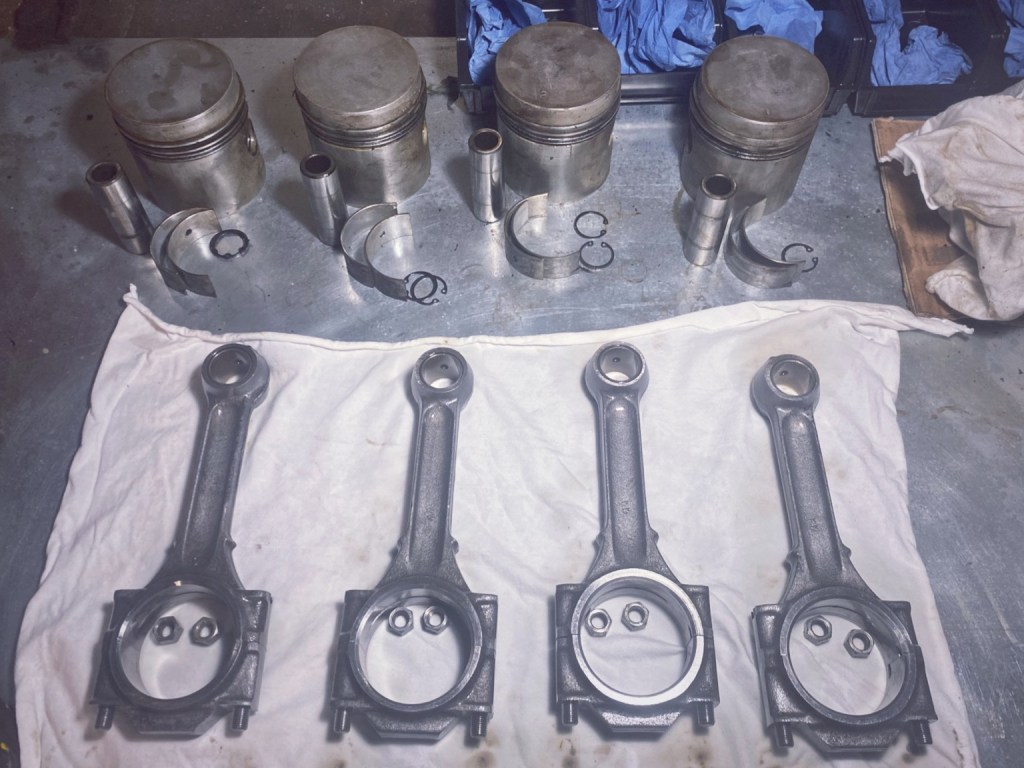
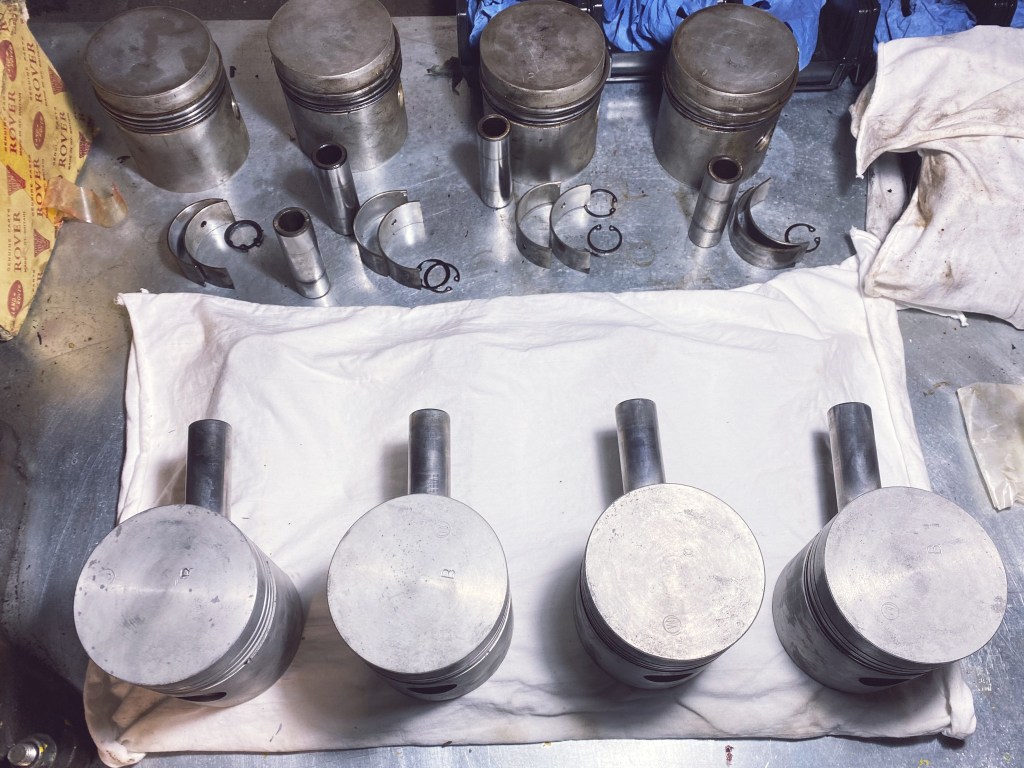
I thought today would let me get the pistons in but the world had other plans.
Step one was to polish the pistons. This was only to remove the oxide rather than make them pretty. Once cleaned I stamped the crowns with the cylinder number only because the previous ones were. It was then a quick job to knock the gudgeon pins in.
Just the rings.
I turned my attention to the piston rings. The NOS crowns had been provided with rings in a Britpart ball joint box and so I have no idea who made them. Nevertheless I opened them and started to fit. First of all i noticed that the oil control ring didn’t have the spring coil. We’re they meant to? Who knows! I therefore have ordered some OEM rings. Genuine rings were 62 quid a set – I am not marrying the pistons so a baulked at that.
Pistons on hold I went back to the rear axle. I had largely cleaned it but it needed a bit more wire brushing.
Cleaned.
With the axle brushed I washed it down with pre prep and set about it with red oxide primer.
Primed.
Now I’ll have to paint the diff pan white so I am wondering if I do the whole thing in chassis black and then paint it white or just paint it white. The first option may involve a lot of white!
The last few days of the year have had me doing a few other jobs in the shed rather than working on the 05 KD 28. I have also been wondering more and more about her original voltage ….
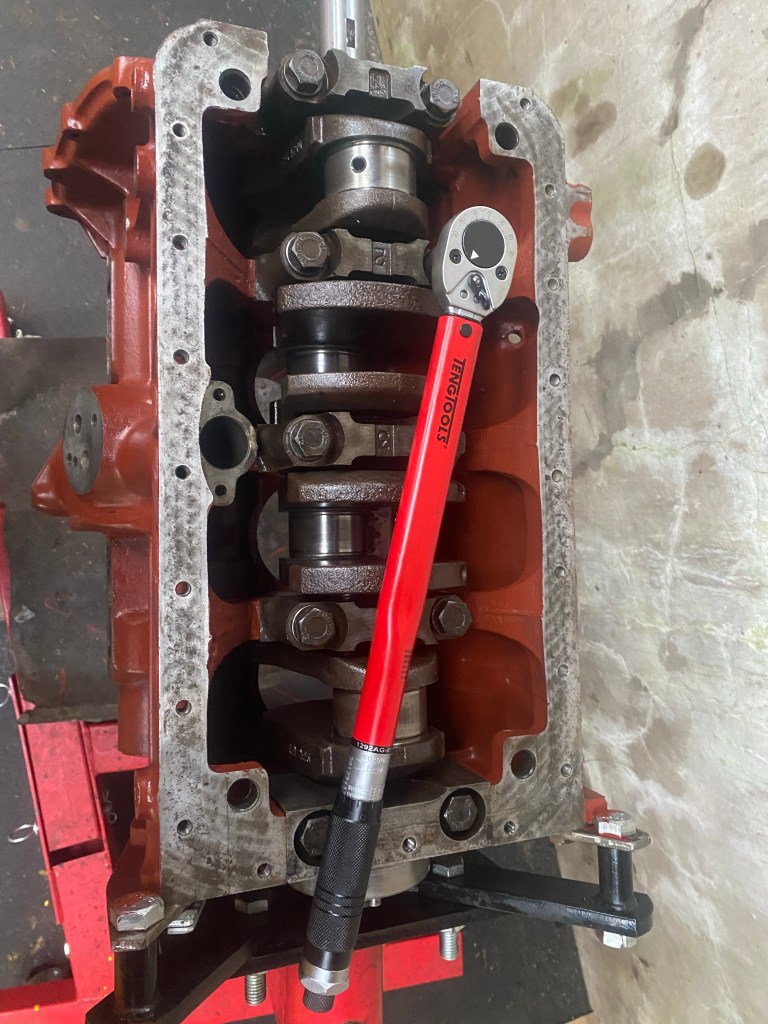
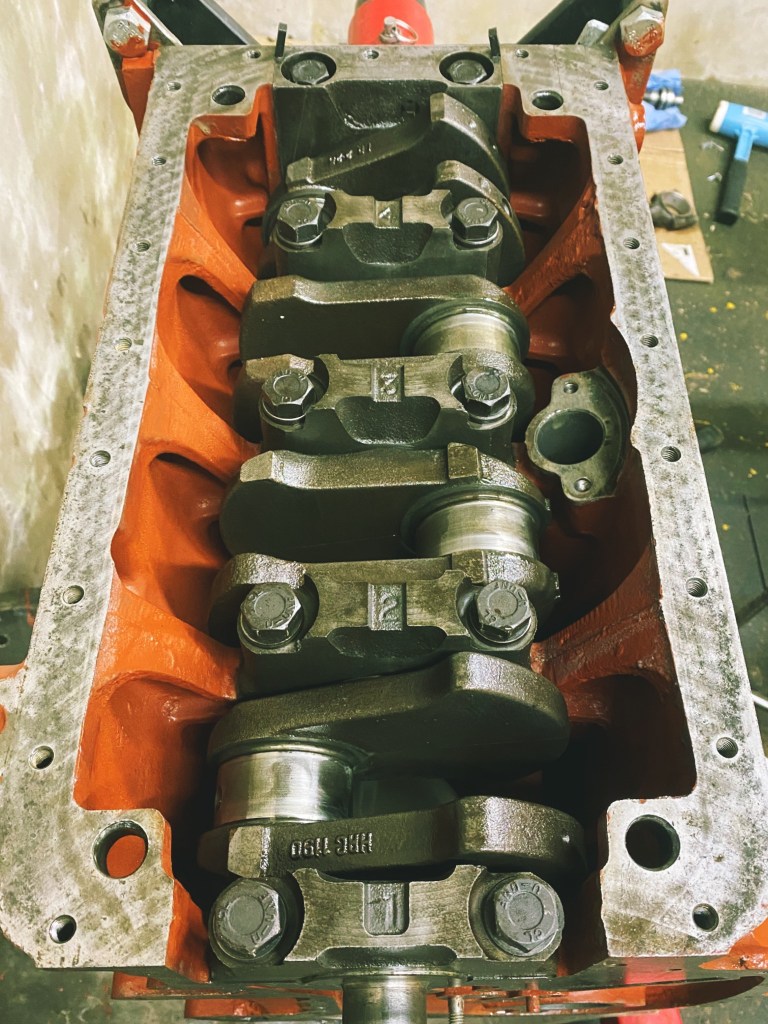
I torqued up the bearing cap bolts and trimmed the T-Seals on the rear bearing cap.
Torque talk.
Then I turned my attention to the pistons once more. All the crowns were helpfully marked with a ‘G’ that I concluded might indicate the direction that the gudgeon pin might be drifted out. It worked.
All ready for the new crowns.
The drift was a socket on the end of an 1/2 inch extension bar and it worked pretty well with the pistons on my legs.
Next up was prepping the new old stock crowns for installation. I drifted the gudgeon pins out as before and then I have started giving them a bit of a buff to take off the oxidisation. This is the only down side of 40+ year old parts!
It is good to be actually putting things back together. However some more taking apart has also been required.
I had been thinking about if to replaced the riveted mud shield on the front crank seal with screws of not, but in the process of removing the extremely hard and brittle seal I decided that I would make life easier for the future. I am now waiting on the screws.
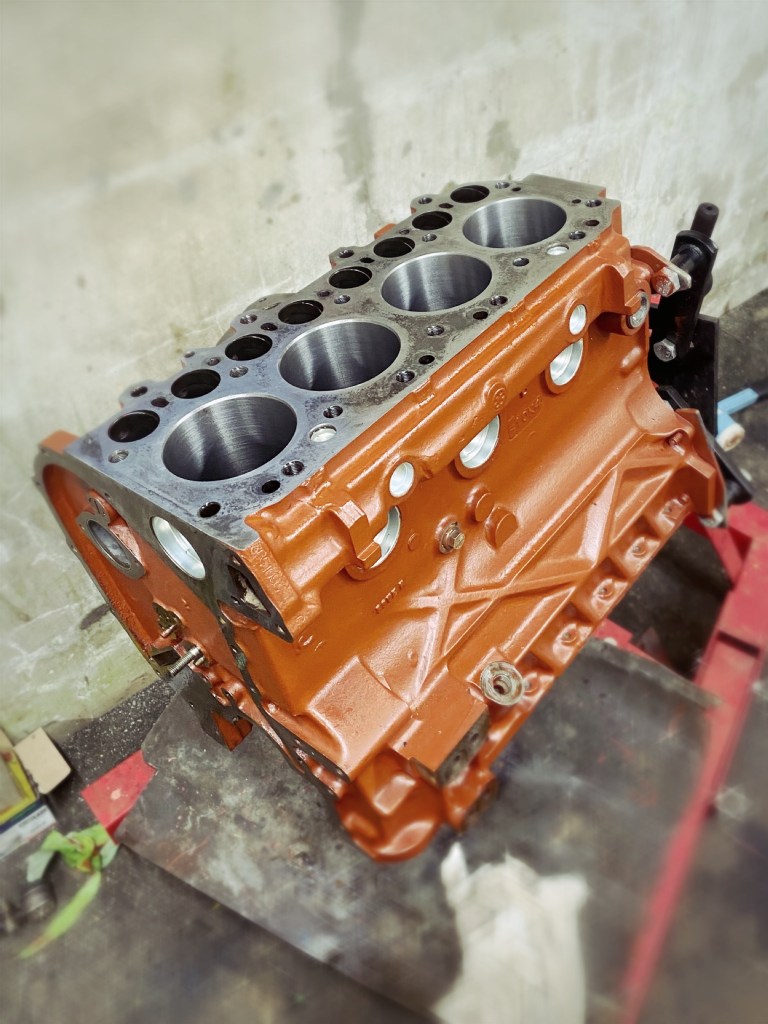
With that on hold I put the core plugs into the block – including the two at the rear which are slightly awkward due to the engine stand.
Shiny plugs.
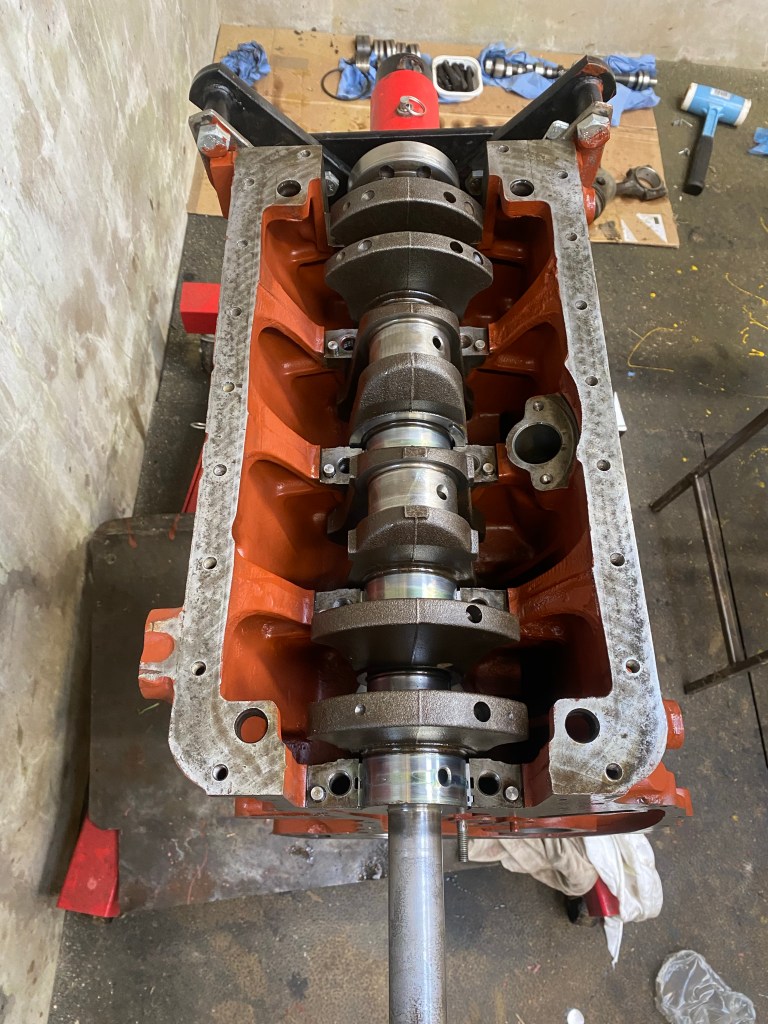
Next step was to get the crank back in. First up the lower shells (new) with plenty of assembly lube, followed by the crank itself.
First piece back.
With the crank in, it was quickly onto the other half of the bearings which meant having to fit the t-seals into the fifth (rear) block. I had soaked the seals in oil and it was fiddly getting them lined up in the block – seeming too wide and difficult to stretch in. I managed to get them in and then time to fit the bearing block into the block.
I had invested in the correct tool and I am glad I did as it was still tricky to get it going in straight.
Now they stretch.
I have tightened all the bolts but not torqued them yet. I’ll leave it to settle a little and let the seal contract back if it wants before trimming it.
1, 2, 3, 4 …
Now I need to rebuild the pistons with the new crowns which might need a bit of a polish. I’ll also assemble the head to keep that moving.
This is actually work over two days but Boxing Day socialising meant that yesterday’s work didn’t merit a post.
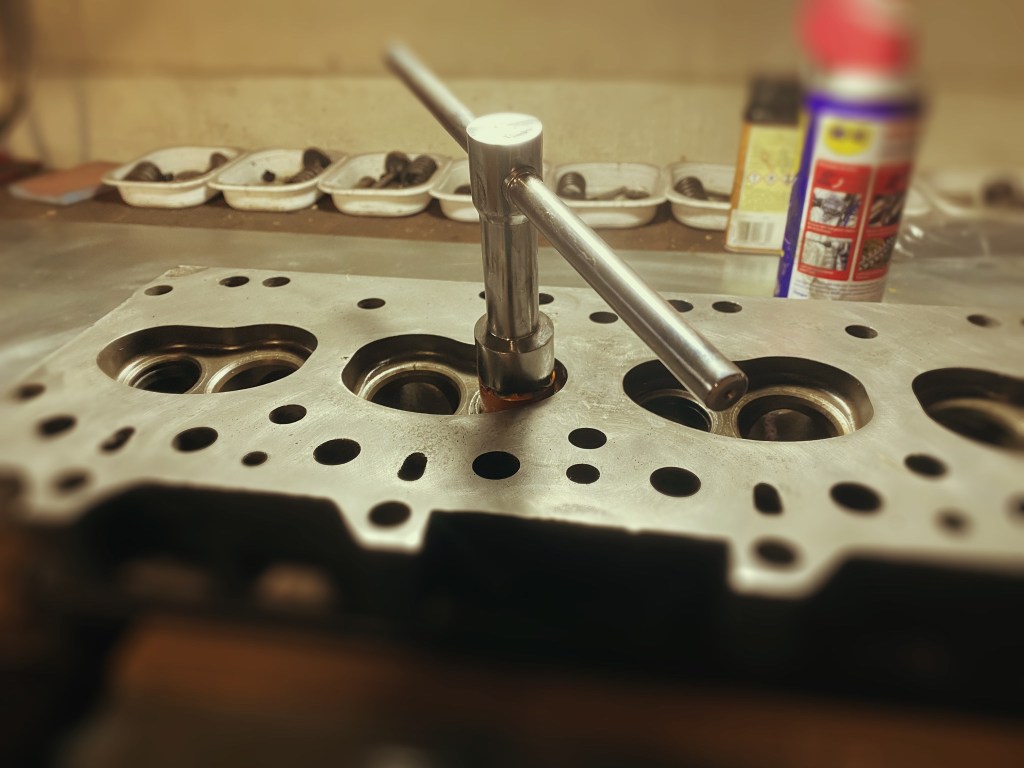
The head is nearly ready for reassembly but first it needed the valve seats recut to ensure they the chamfer is concentric with the new valve guides. The head has hardened seats already so this was a light cut until the entire surface was bright.
Not quite trepanning.
With the seats cut I set about selecting which new valve went with with guide best. This was a bit of trial and error to see which ones were closest. Interestingly one of the exhaust valves was a bit larger than the others (fractions of tho) but they all had their favourite guides. It is also interesting to think of all the tolerances that add up to give the clearance between guide and head.
Reamed and plugged.
I used an adjustable hand ream on the guides and opened the holes out until you could sense clearance and the passed a spin test, and a drop test – the valve should spin but not for long and should slowly fall into the guide. I had tried measuring but the error on measurement of hole was too much so I resorted to ‘feel’.
After reaming and cleaning the head (again) I knocked in the new core plugs each with a smear of Hylomar Red. They went in easily, but with reassuring resistance. I had run some scotch brite around the apertures first and used sockets as drifts although it was easier to set them off with a nylon dead blow hammer.
Six plugs in.
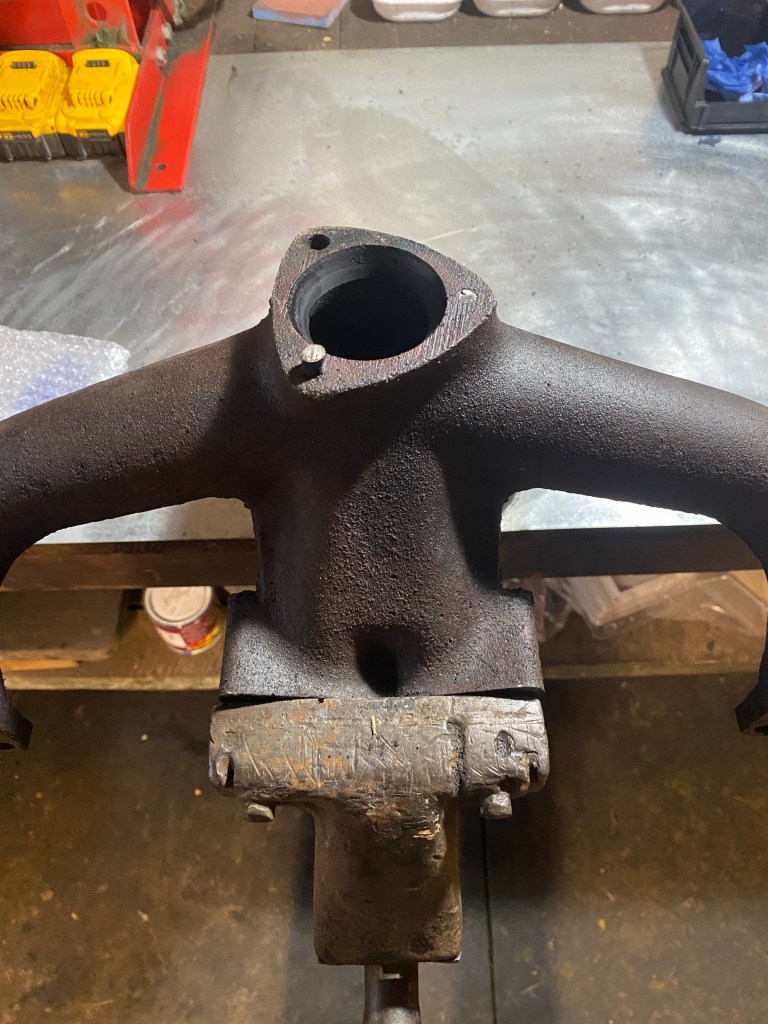
After staring at the head for most of the day, I wrapped it up in an oiled cloth and moved onto the exhaust manifold. Well it will bolt to the head.
One of the three studs between the manifold and down pipe had been replaced by a bolt before, one stud had snapped when taking the down pipe off, and I had to cut the third.
Studless.
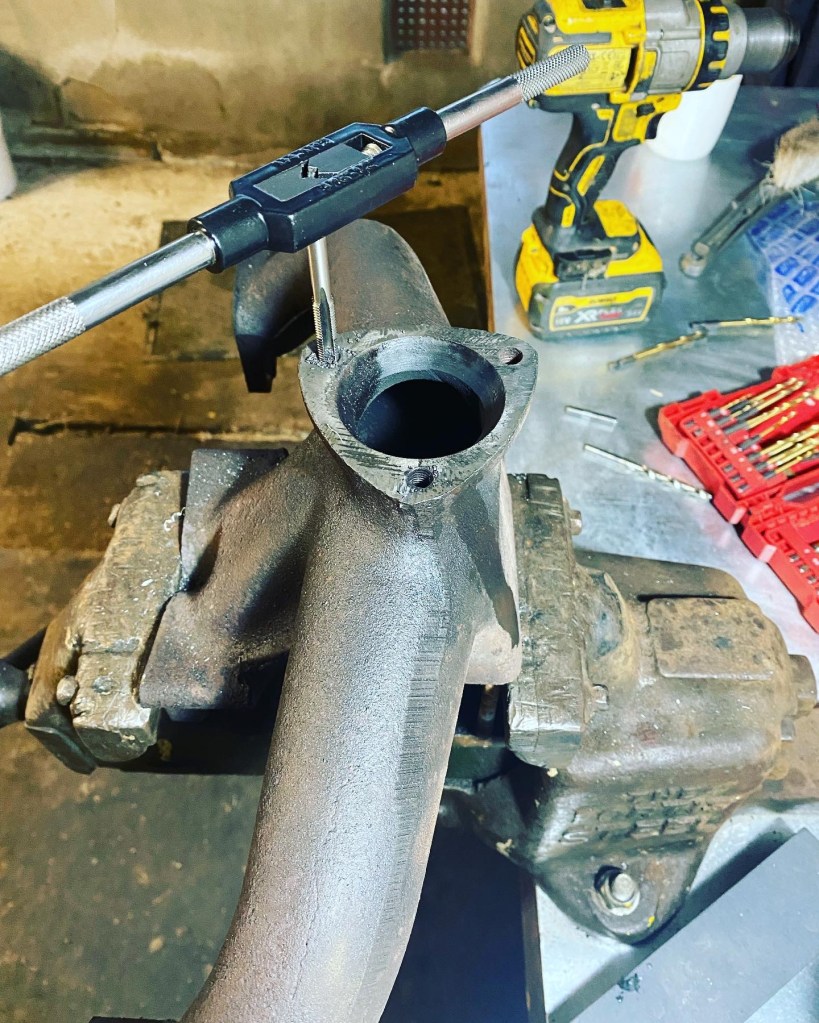
Step one was to cut the protruding stud flat and generally flatten the flange. I then progressively drilled out the remnants before tapping to 5/16 UNF to take the proper studs.
Tap tap.
The third, previously drilled one, still has a little thread in it so I am going to pin a stud in it and fix with JB Weld Extreme Heat. The pin is to resist twist.
After prepping the three stud holes I cleaned up the flange faces by having to chisel off some gasket and then file them flat.
Shiny!
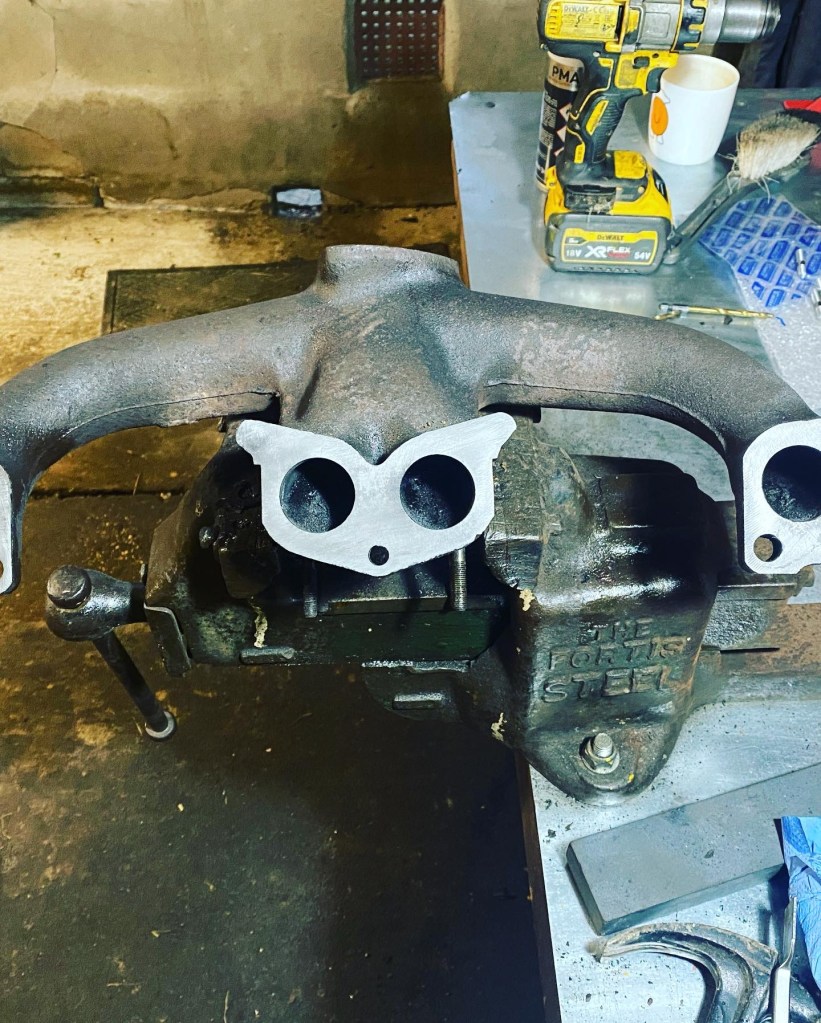
I than gave the manifold a though wire brushing, decoke and decrease before spraying it with VHT aluminium coloured paint. It will soon go back to original cast appearance but this keeps it cleaner for the build.
Probably the best it has ever looked!
Tomorrow I’ll lap the valves to the seats and sim to reassemble springs, and tappets. I might even get the block moving forward too!
So it is Christmas Eve and nothing was stirring ….
I haven’t been able to do much this week but managed to get back to some bits on 05 KD 28 today. What time I have had over last few days has been spent boarding the inside of the workshop and installing a door, as well as improving my generator set up. All good stuff that will make working slightly more comfortable and importantly cut the dust that can fall on fresh paint.
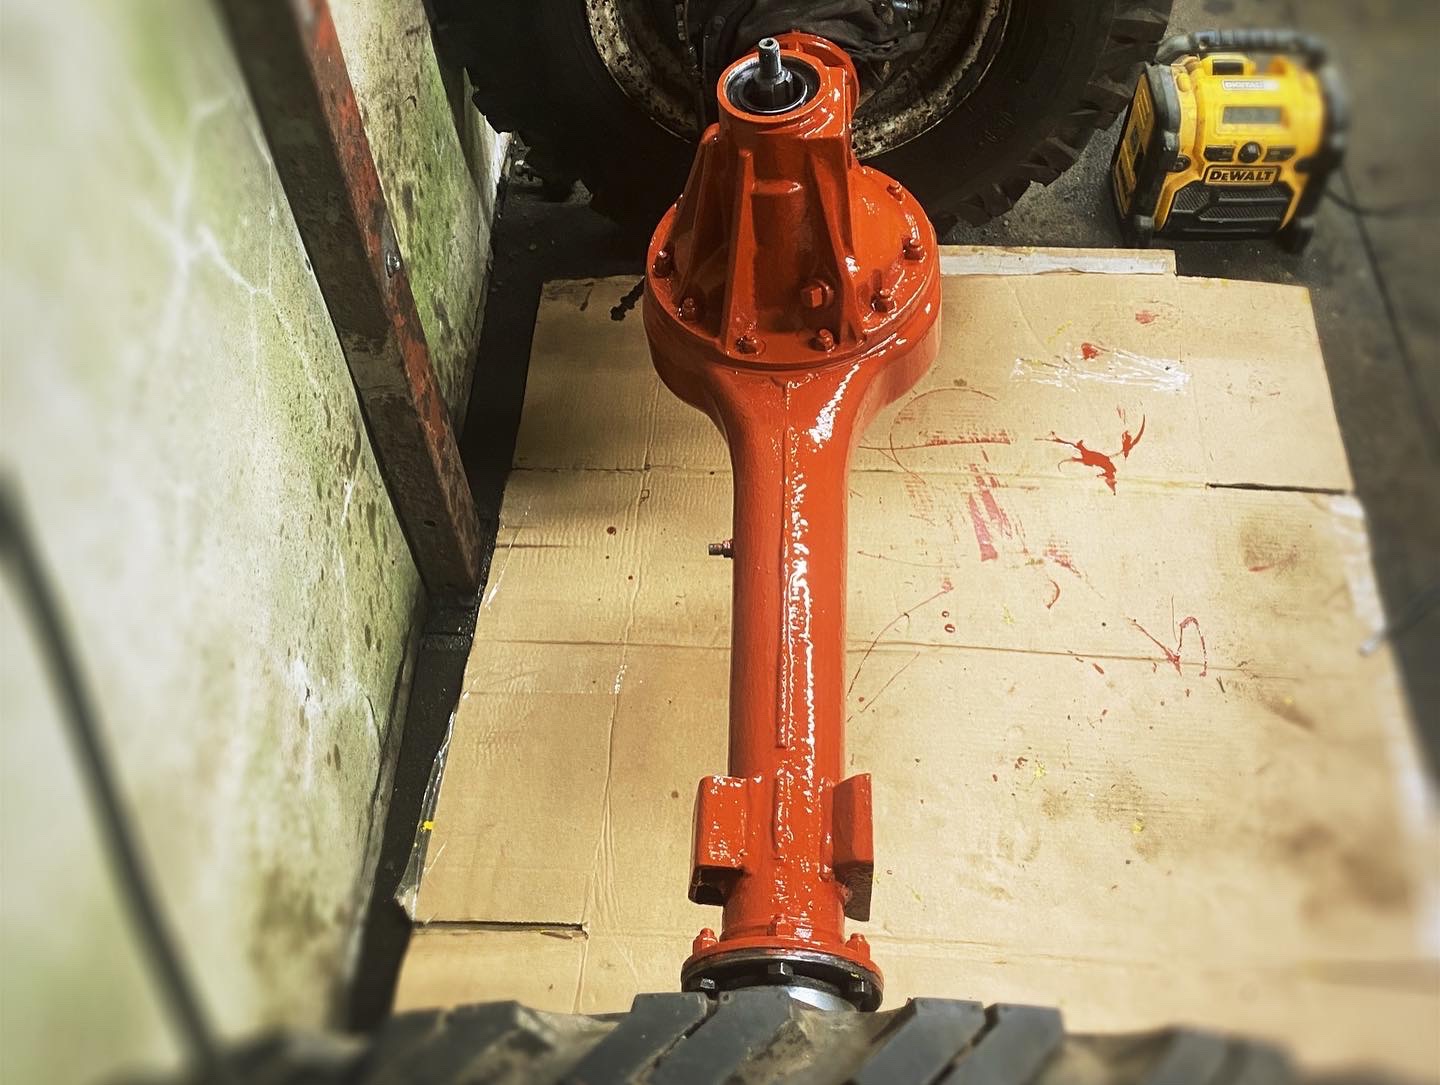
Today I managed to paint the front axle (to chalice necks) and do a final coat on the sump.
Black is the new black.
I have to say the axle does look good in fresh black! It is good to have certain bits entering the final stages
I also cleaned the machined faces on the head and got it ready to re cut the valve seats and ream the valve guides. I may not get that done tomorrow!
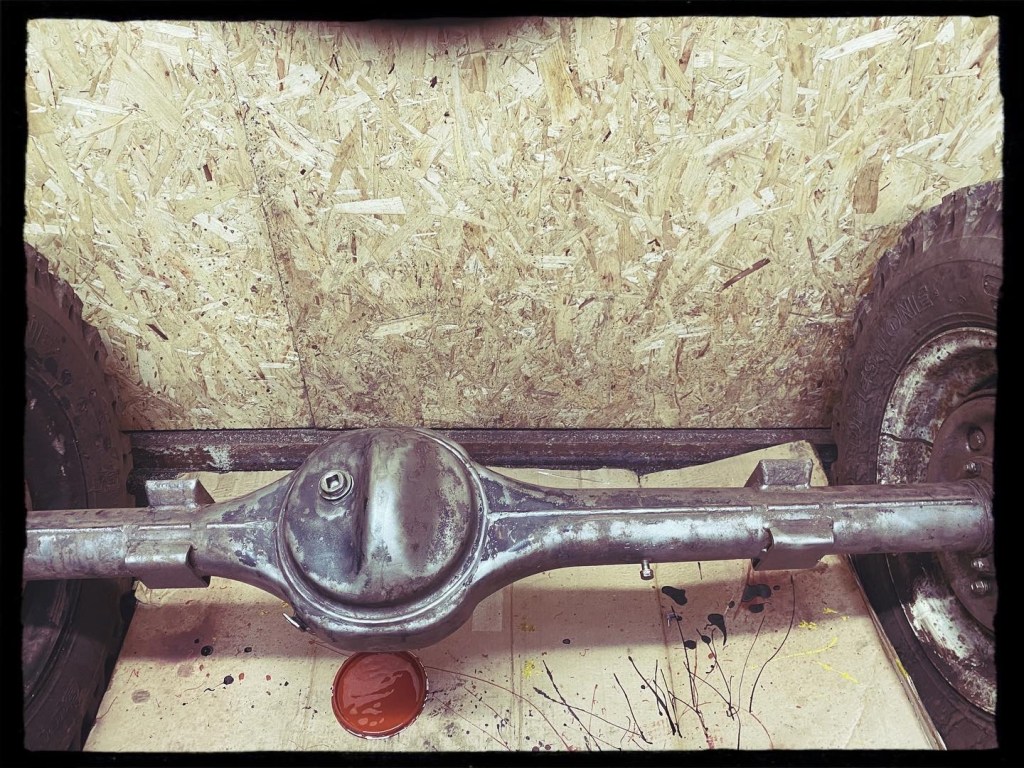
I haven’t had a chance to do much recently and today only had limited time too. I did manage to make progress on the front axle.
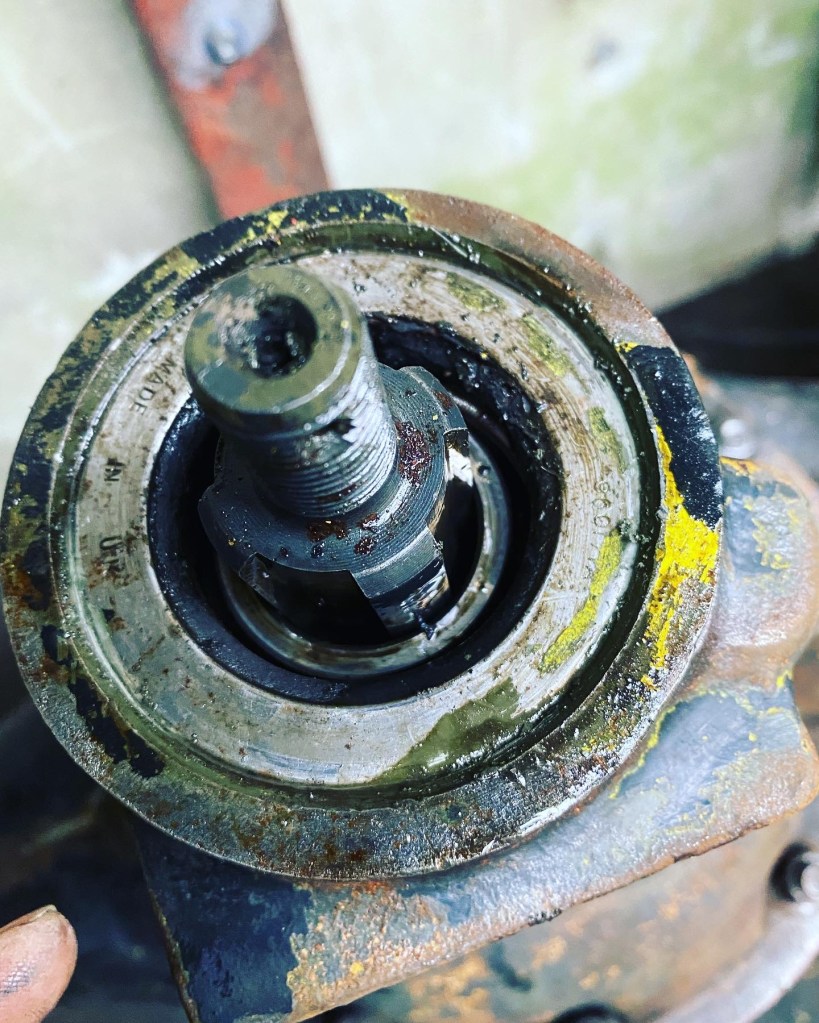
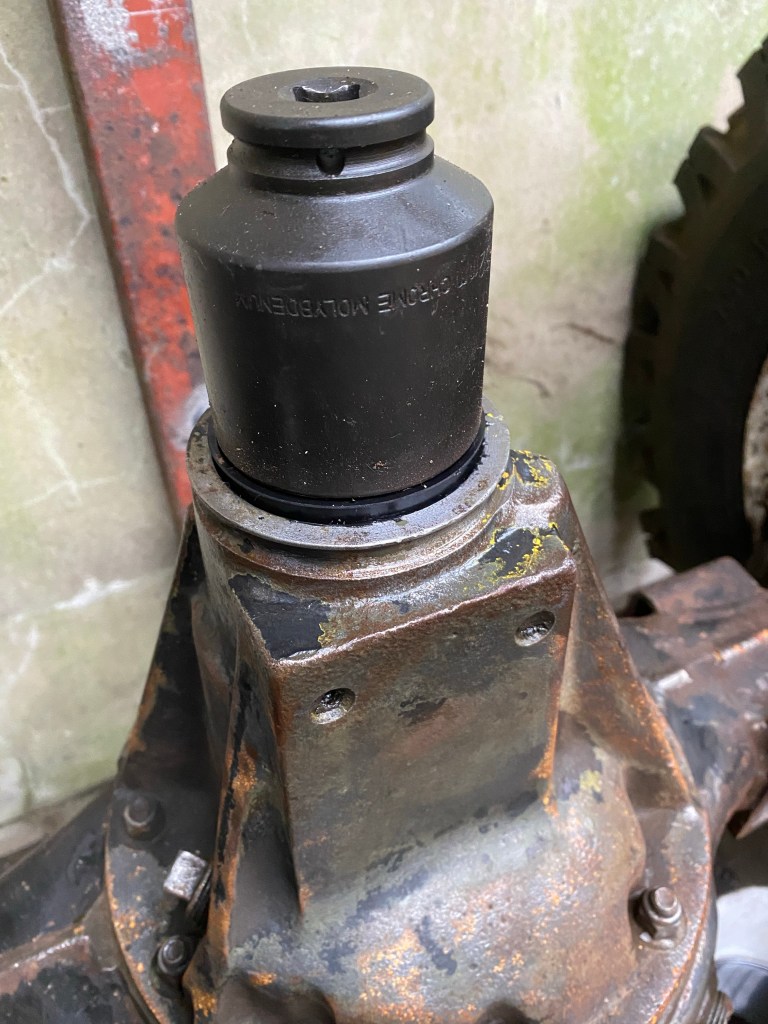
I started with the pinion seal. I hadn’t looked at this closely before, but when I did I realised it wasn’t the rubber effort I was expecting.
Metal cased seal.
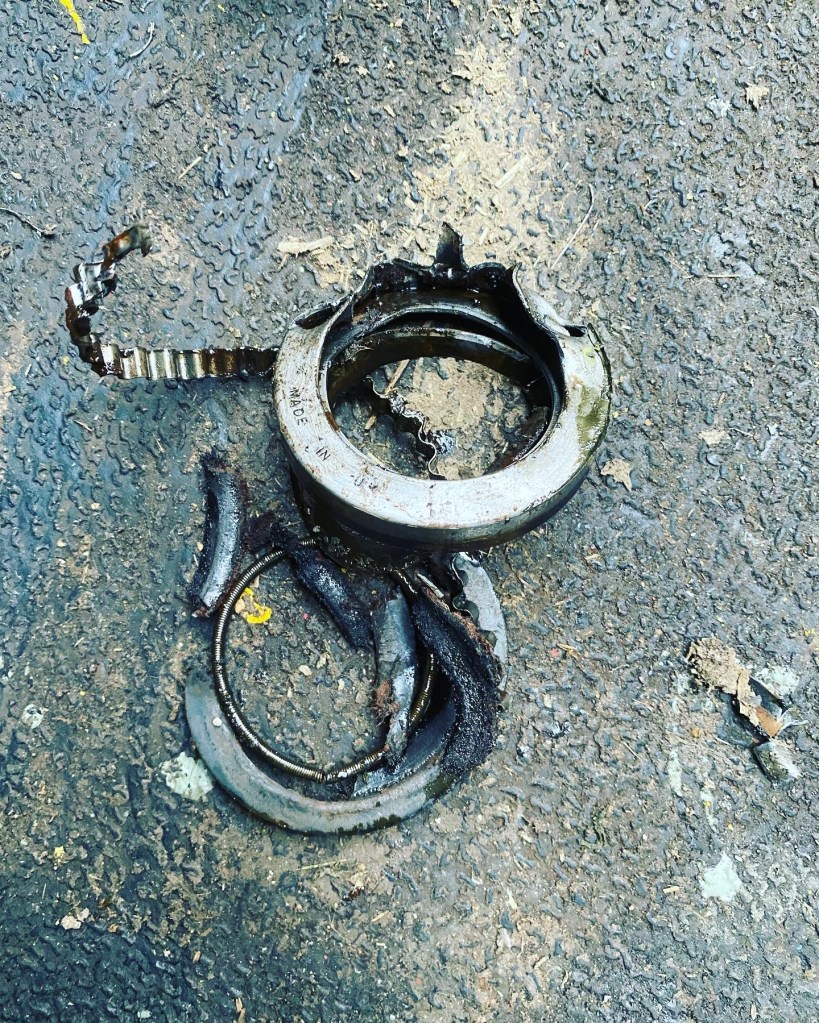
Knowing that this seal was closer to a sieve than anything else I set about removing it. It was not easy.
Fairly symmetric destruction.
I assume that this was the original seal, and to a design of years gone by. It was a shame to destroy it but if I am to cut 05 KD 28’s oil habit….
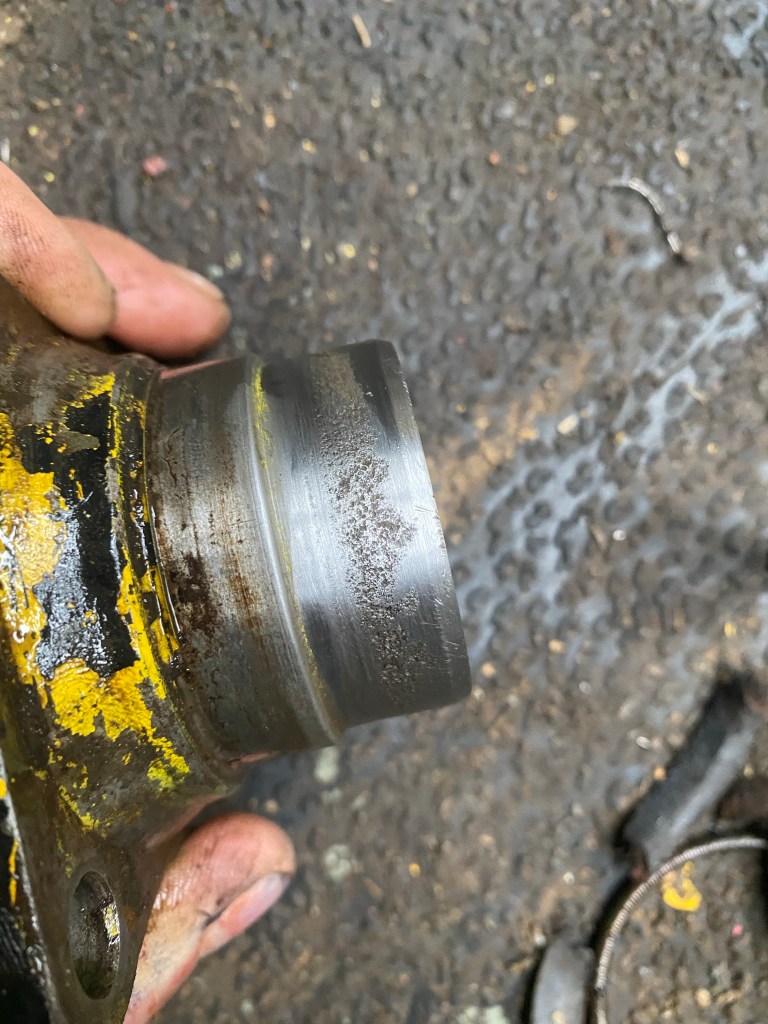
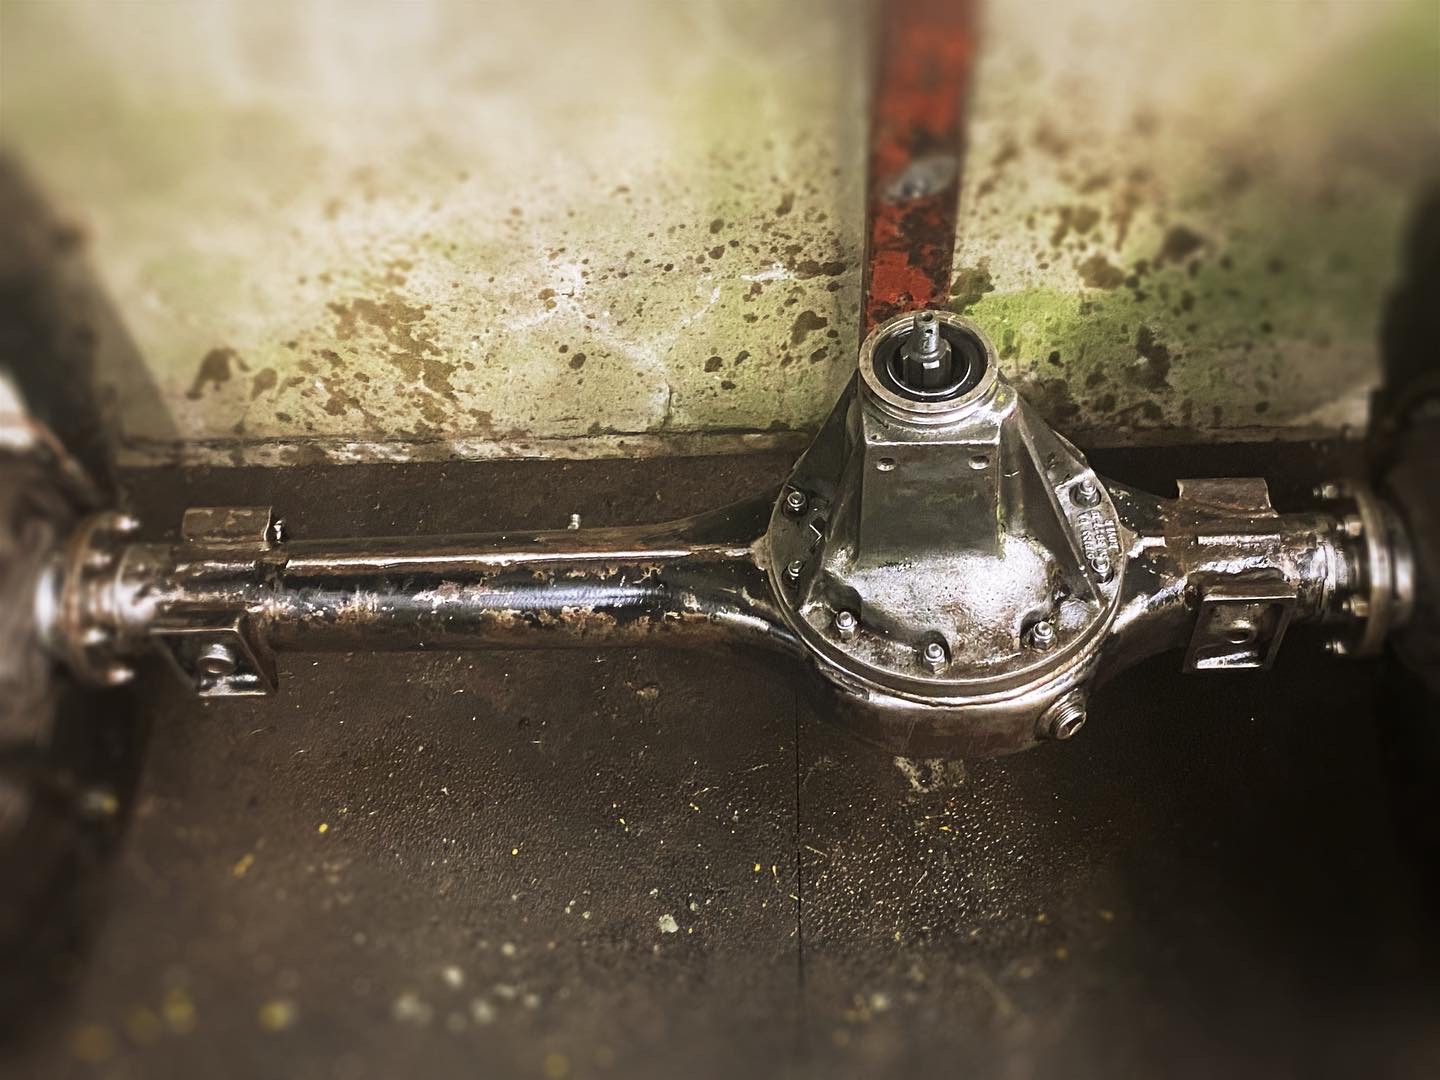
One are that might need some more work is the driving member which is a little pitted in the sealing surface.
Will it seal?
The new seal is an all rubber number – genuine parts – and I set in in place with a little RTV sealant between it and the casing. I found that a hub nut socket was a perfect drift!
Almost made for it.
With the seal in place I continued to wire brush the axle casing, degrease it and prepare it for painting. It came up quite well after all of that – just a shame that the differential had clearly hit something very hard in the past. Once cleaned it was time to prime it – red oxide for this job. It’ll be black chassis paint next.
Looking pretty!
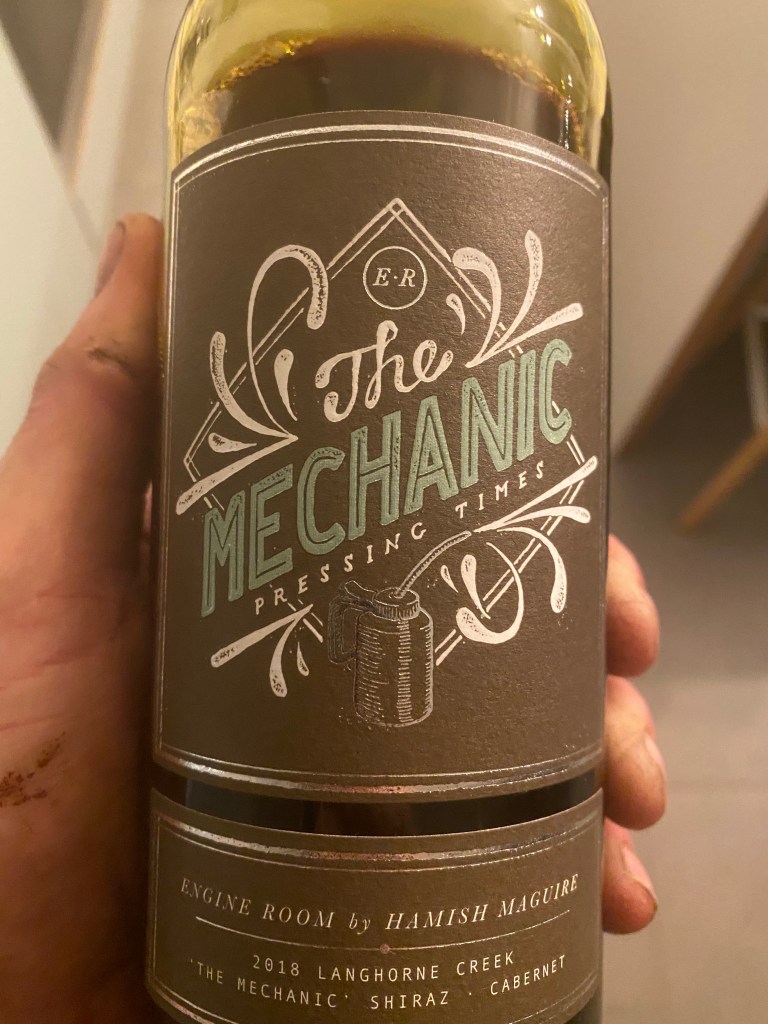
After a evening with a grinder and paint brush I moved on to an aptly named wine.
Well, it does have my name on it.
Tomorrow I hope to get the axle painted and start on the head cutting / reaming.
Wait! I promised blue and so blue there will be.
A thing of beauty.
I must say that the oil filter housing on a series 3 is a real design gem (niche I admit). It is also an environmentally sound idea to only have to replace an element rather than a whole can.
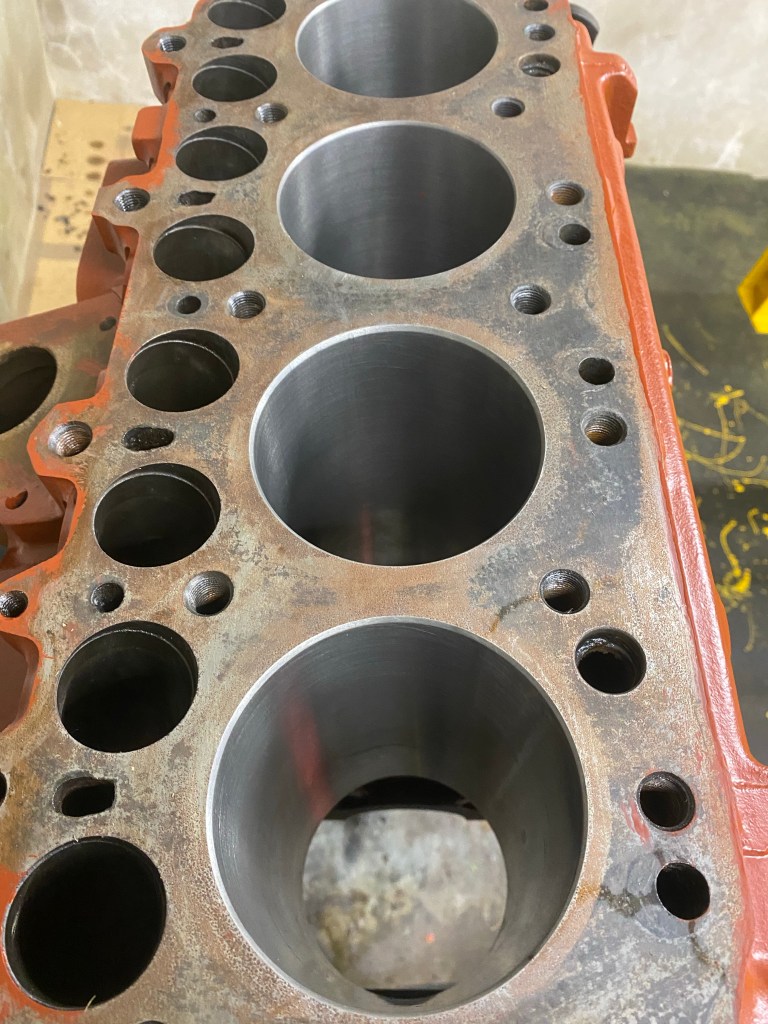
I finished honing the cylinders today. I had started with a three legged hone as this is good for taking back the wear ridge but today was using a flex hone to cross hatch them.
Need to clean again!
I had forgotten to wipe oil over the head after cleaning the bores yesterday and it was a very warm damp night! So I’ll have to clean that again.
After finishing the bores I gave the block a second coat as well as another on the sump and timing case. I also started painting the head so that it is ready for seat cutting and reaming of the valve guides. I also cleaned down the spring and gave them a coat of red oxide primer ready for chassis black top coats.
Autumnal leaves.
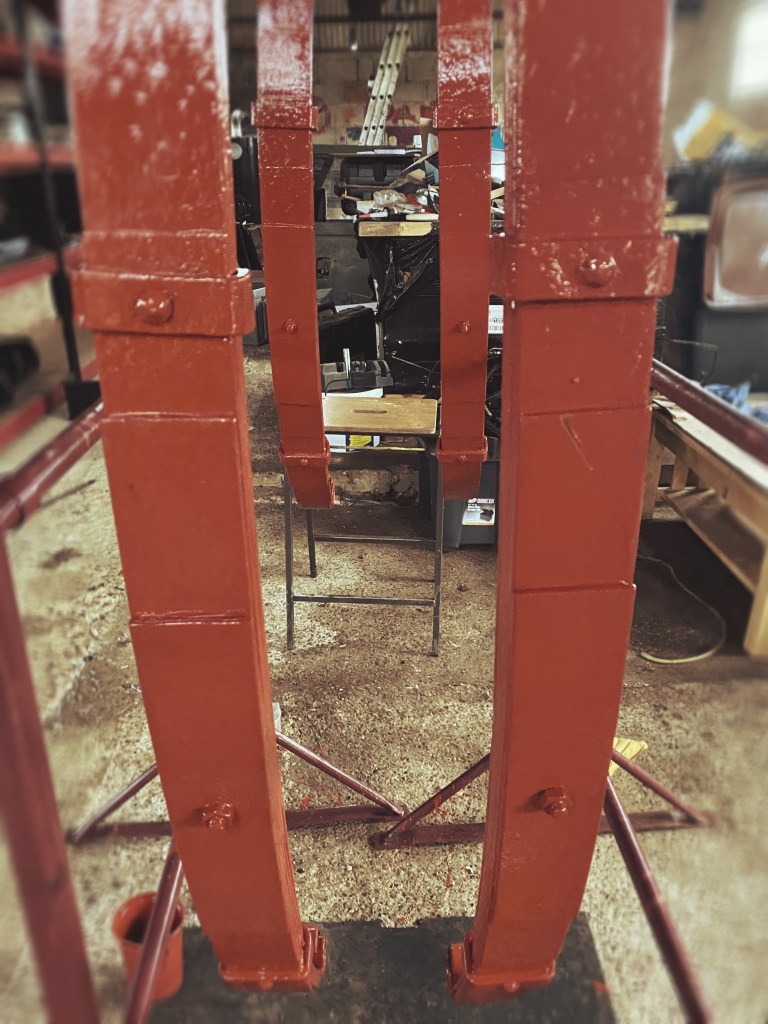
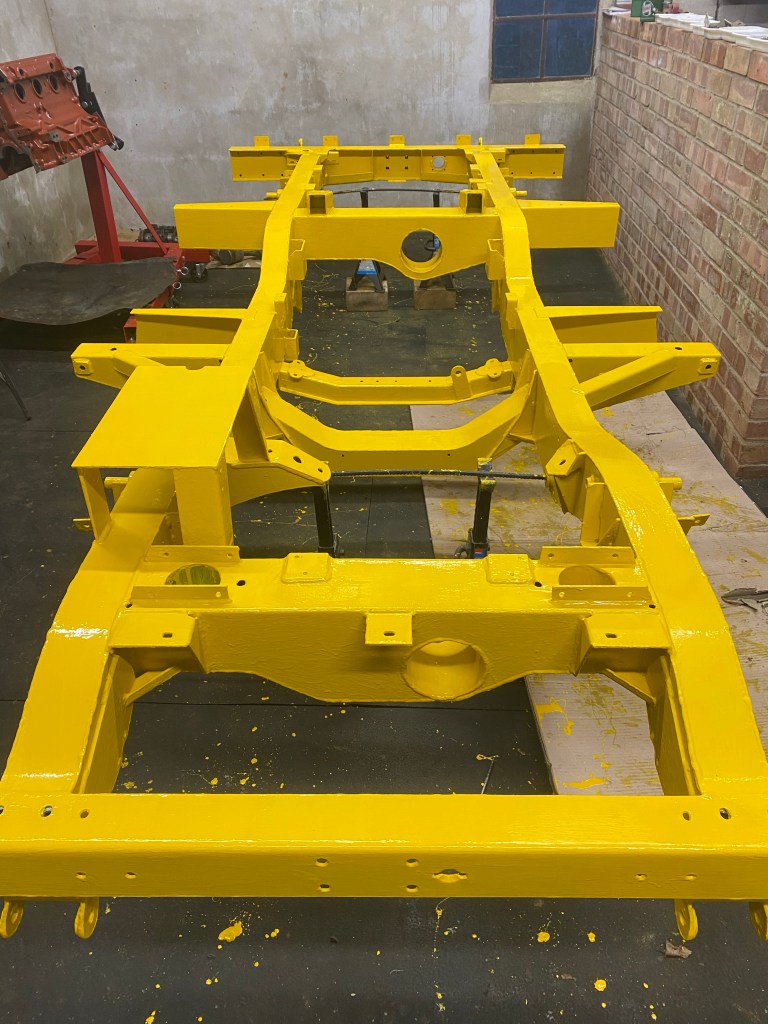
Plasterer’s trestles with some rebar make a good hanging rack for the springs. I also touched up some spots on the chassis which, thankfully, is nearly done.
Very very yellow.
I think I’ll concentrate on rebuilding the engine for a bit. I need a break from painting, but I may do a bit of the axles alongside. I am looking forward to getting a rolling chassis.